|
|
 | Tuesday, July 28, 2026 |
October 19.2023 The following was originally in a page called CustomerCombatBuild which started as a commissioned Combat build and then added a 69S - a version of that page still exists and explains why this change. See: this. The writeup below is unchanged except that all 69S content has been removed and it has carried on with the updates for the new buyer. Of course, when caught the many typos I make are fixed. A separate 69S page is coming.
In June 2021 I was contacted by a guy who wanted me to build him an 1972 Norton Commando Combat. Watch this space. Even
though I've already documented building Combats a couple of times I expect this to be a little different so I will document
it as well.
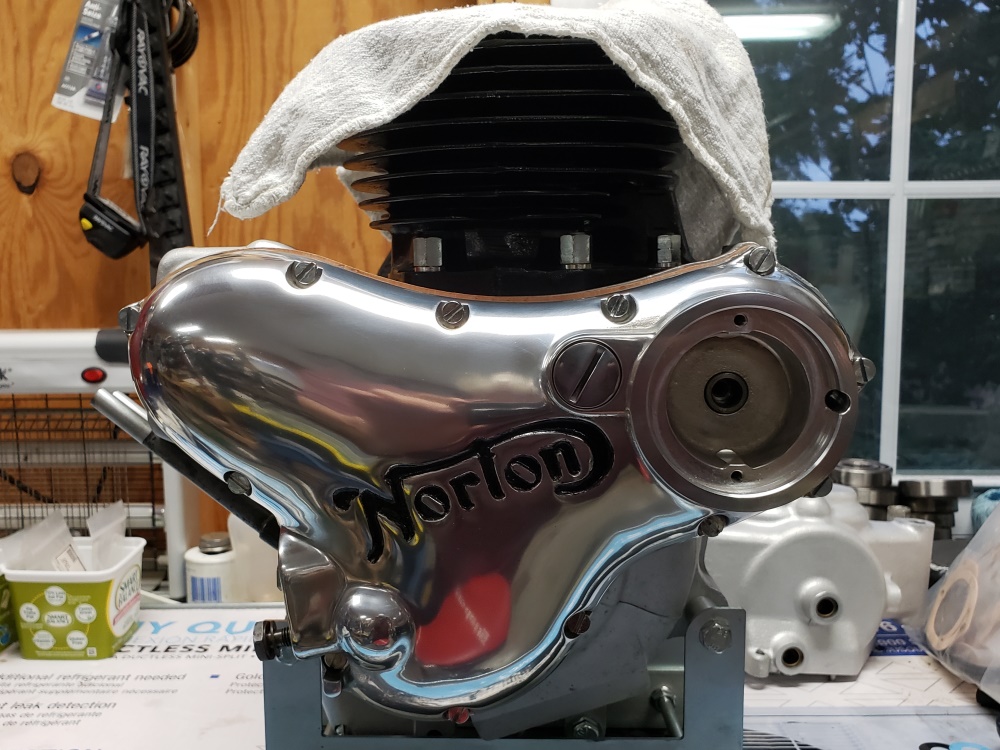
July 5, 2021 The project will start with a matching numbers titled bike that I bought a while ago. It was a half-done
chopper and supposedly the power unit was ready to go. The power unit looks OK, but is a little ugly so it will come all
apart to make the cases look good and to be sure there won't be anything wrong. It may have a ridiculous cam and if
it
does, it will be switched to a standard Combat cam. One reason I don't trust it is that the PO said that the isolastics
would't fit so he cut the rubbers down - silly, now they are trash.
The frame and swingarm were powder coated as a part of a deal during the last customer combat rebuild documented here.
I haven't inspected yet, but I think the wheels were rebuilt already.
The only holdup to getting started in earnest is that there's a Triumph Trident on the table that needs the clutch
finished. Once that's done, it can come off the table and this can go on.
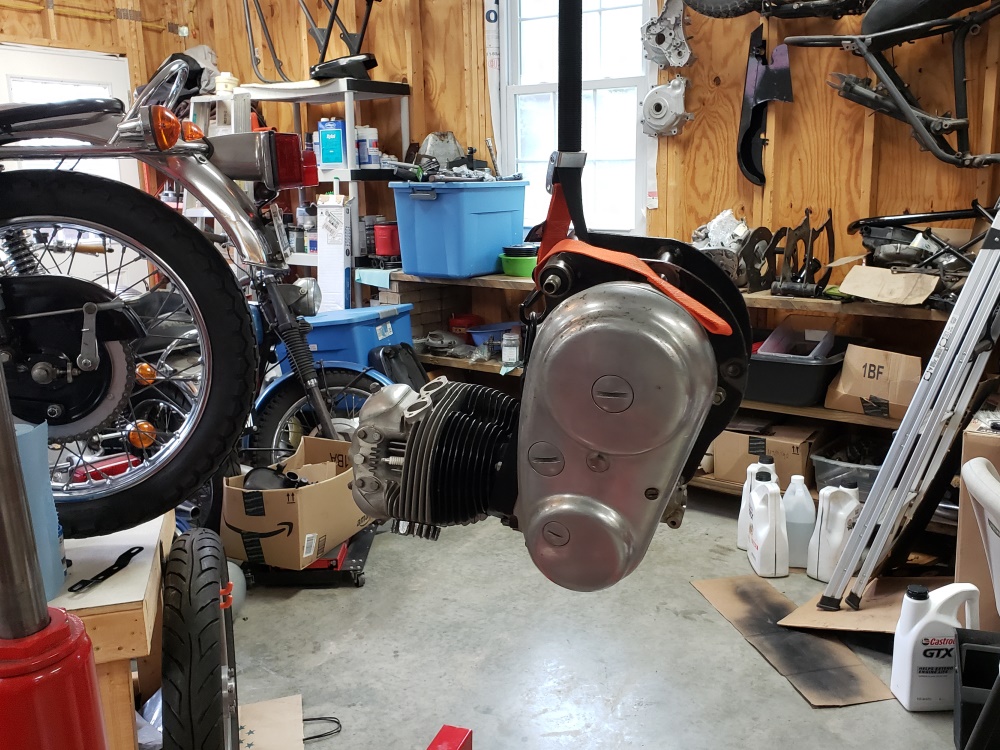
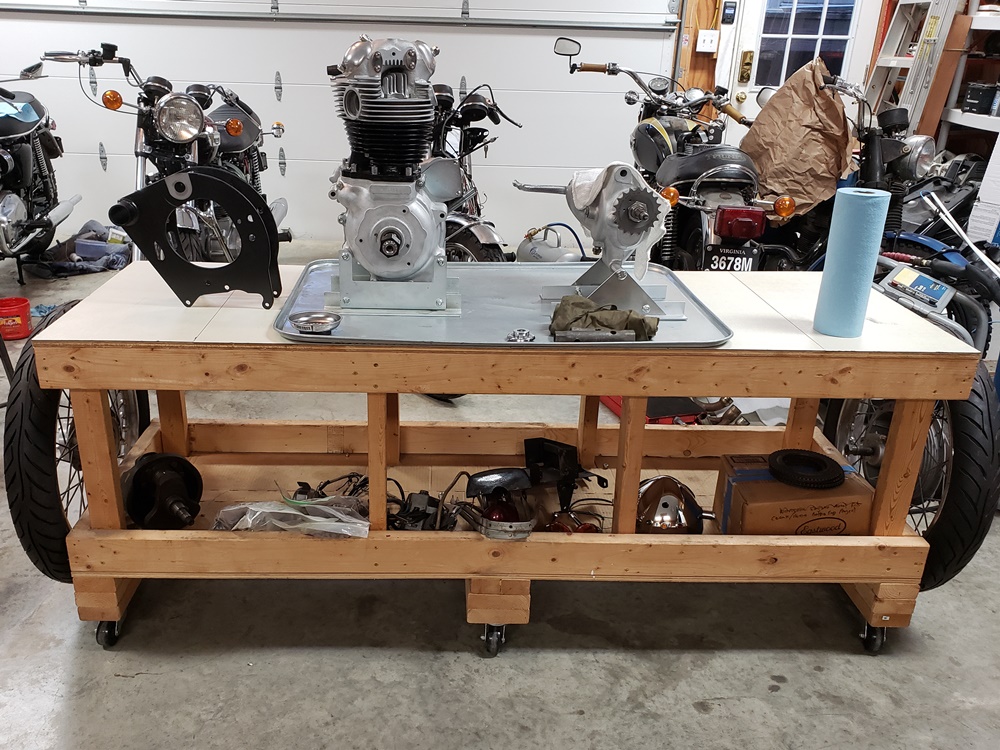
July 18, 2021 The Trident is getting close and I have some help coming tomorrow so it's time to get the power unit on
the bench. When you're old and no longer can carry a Norton power unit, it's time for the engine hoist.
Had to move a few things around in the shop, but got it done.
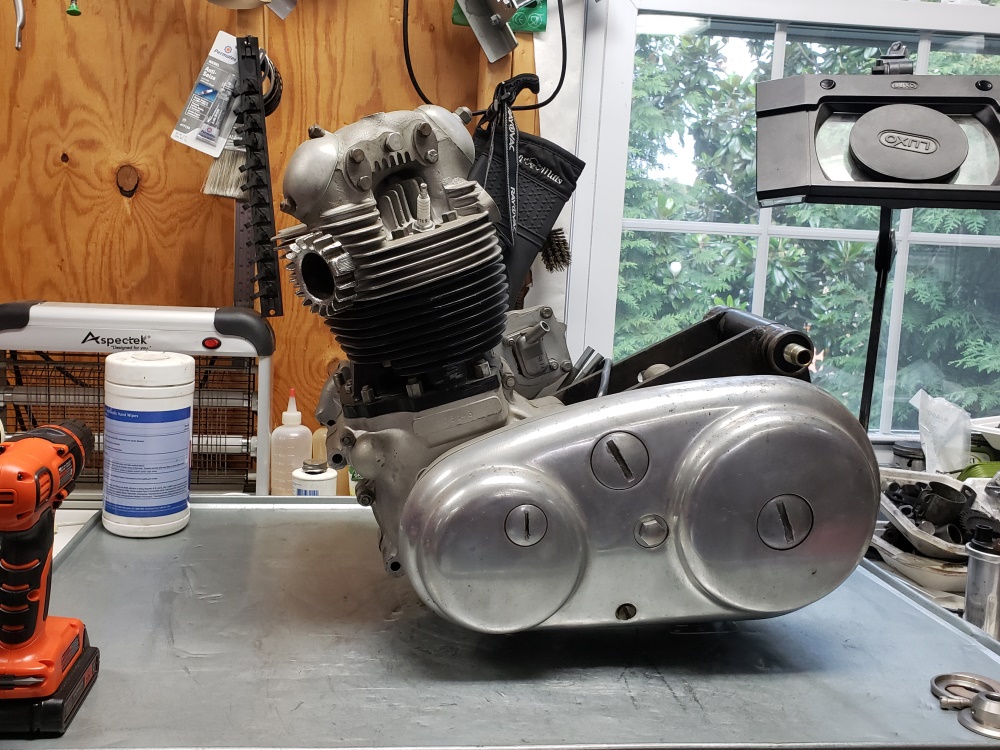
July 19, 2021 People sometimes ask me why I start by taking the engine and gearbox all apart. This is a
perfect example of why - it was supposed to be a professionally rebuilt engine:
- When we took the head off and turned it over, a copper washer fell out
- The engine would have leaked badly - the jointing compound was not evenly applied and there were areas with none.
- The timing chain was WAY over tight
- The primary chain was WAY over tight.
- The rotor nut was not tight.
- The clutch had mismatched metal friction plates and a pressure plate for fiber friction plates.
- The short bolt that holds the cases together in the finger was finger tight.
- The cam had two beveled thrust washers and the journals have been sleeved.
- The oil pump feels terrible
- The bearings are similar to "Super Blend" bearings but definitely not right. You can see the bearing half
that was on the crank in the
picture - should be just a journal.
- The cases were not cleaned well before assembling
- The cradle was missing a lot of paint and had quite a bit of rust
- The cylinders were poorly painted
Now for the good:
- The cylinders are bored .020" over and the pistons and rings are new.
- The head appears to have been well done with new valves, guides and spring.
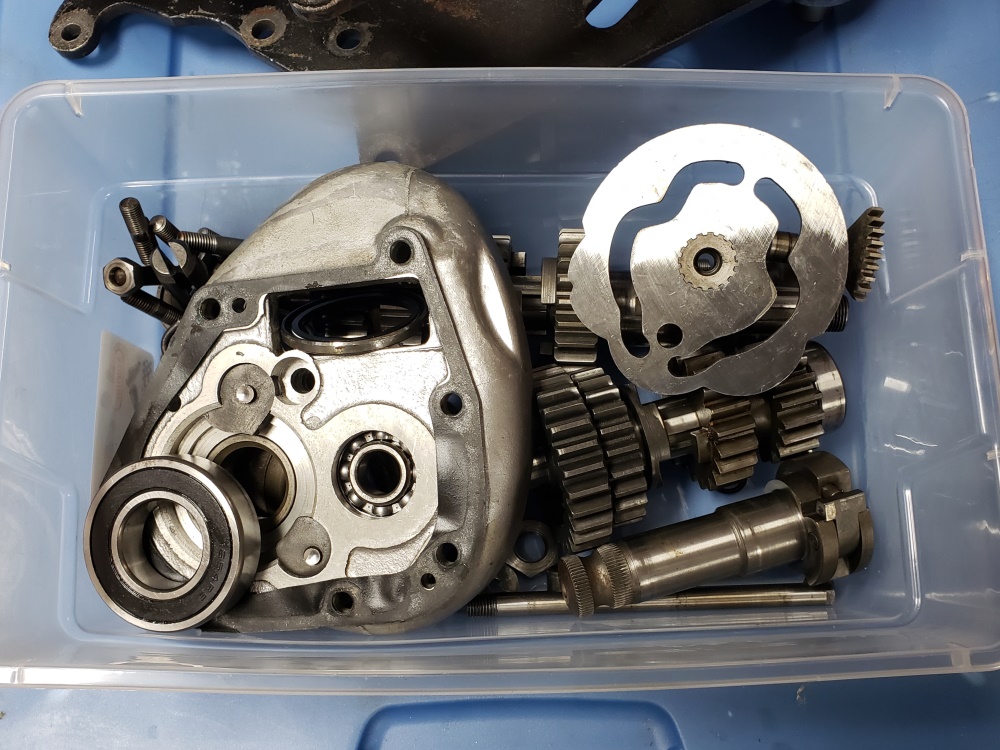
July 20, 2021 Took the gearbox apart for inspection and so I can make the cases look new. As with the engine,
there were disappointments for a "ready" gearbox:
- The 2BA Nylock nut for the clutch actuator roller was
finger tight and the lock is worn out
- The clutch operating body lockring was just snug - not nearly tight enough
- The drive sprocket lock ring was missing.
- The layshaft still had a ball bearing
- The sleeve gear was installed backwards - seal on the inside!
Now for the good:
- Although dirty the case and inner cover are in good shape - it will be easy to make them look new
- Six of the seven inner cover studs are new as are all seven nuts
- The gears all look good
- The drive sprocket is new
Here's the gearbox in a box...
July 22, 2021 The engine and gearbox cases are stripped and thoroughly cleaned ready for the next step to make them
look new.
July 23, 2021 Had help today to rearrange the shop - have two Commandos coming for eStart upgrades.
Completed the next phase of making the cases for this bike look new. They are completely clean now with not staining
and look quite odd (raw aluminum). Should finish making them look new tomorrow and hopefully the final cleaning will
be done tomorrow as well. Getting every last speck of media out of the various holes is the hardest part of the
entire process.
July 24, 2021 The cases are ready.
They are spotless and every thread has been checked. Had one major surprise. While washing out the passages
I could not get water through the oil return passage in the crankcase so I left it until all was washed and started using air
in every hole and passage. Everything went well except that passage would not pass air either. Since this
was a "ready to run" engine when I got it, I figured I had somehow clogged it. Then I tried a thin bottle
brush -
imagine my surprise when a piece of blue shop towel poked out of the hole like a worm in an apple. I started
pulling and realized that the entire passage was packed full of that towel material. Once I got it all out, the
passage cleaned up fine. I can't imagine how someone did that, forgot, and assembled the engine!
I was suspicious before, now I'm taking absolutely nothing for granted. I had planned to put the bottom end
together today but I don't like the camshaft that came with the bike and I'm out of Combat cams so I have to order
one.
Also, the connecting rods feel great so I wasn't planning to remove them for inspection but will now - too many bad
things. Including, I inspected the crank and it was been separated but put back together incorrectly. So, I
have to order a bolt kit for that (should never reuse those bolts and nuts).
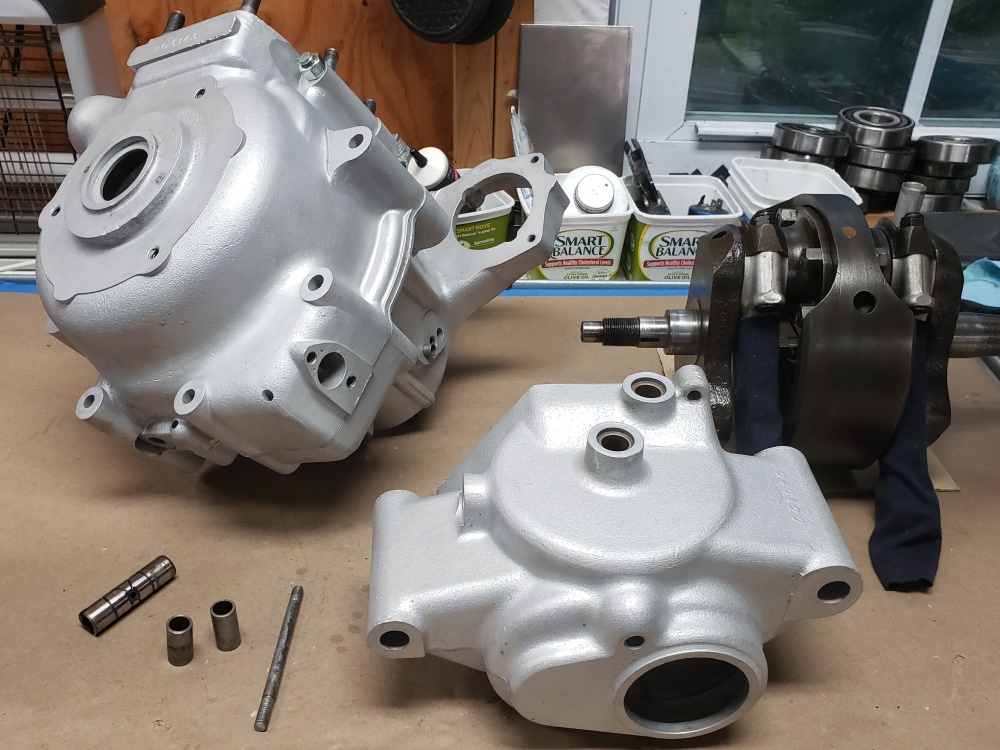
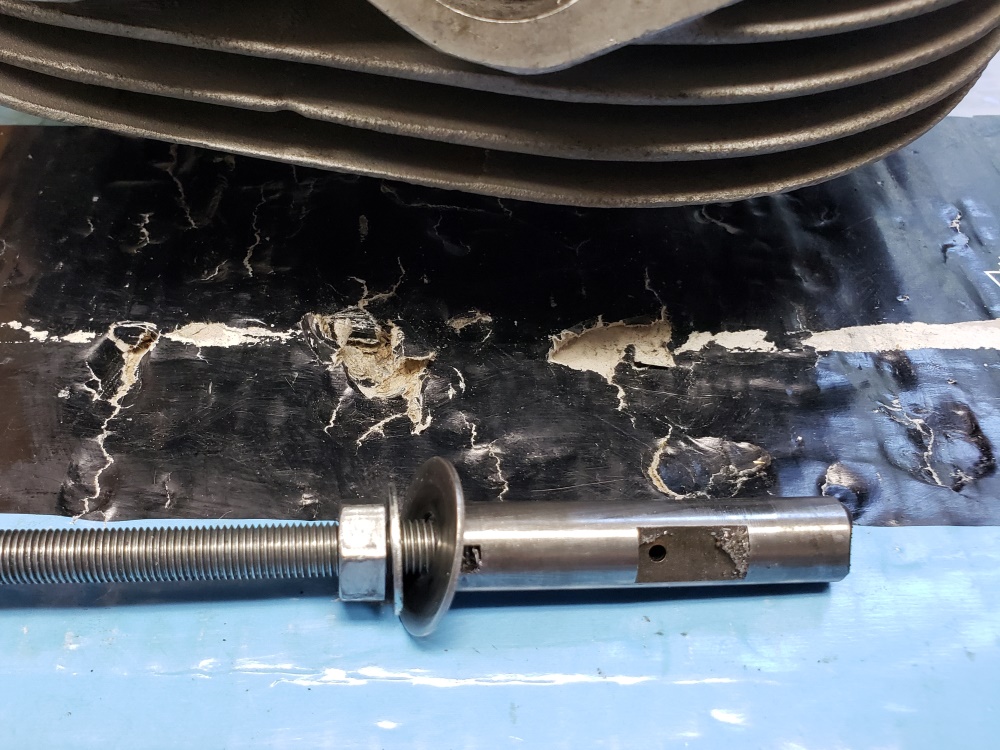
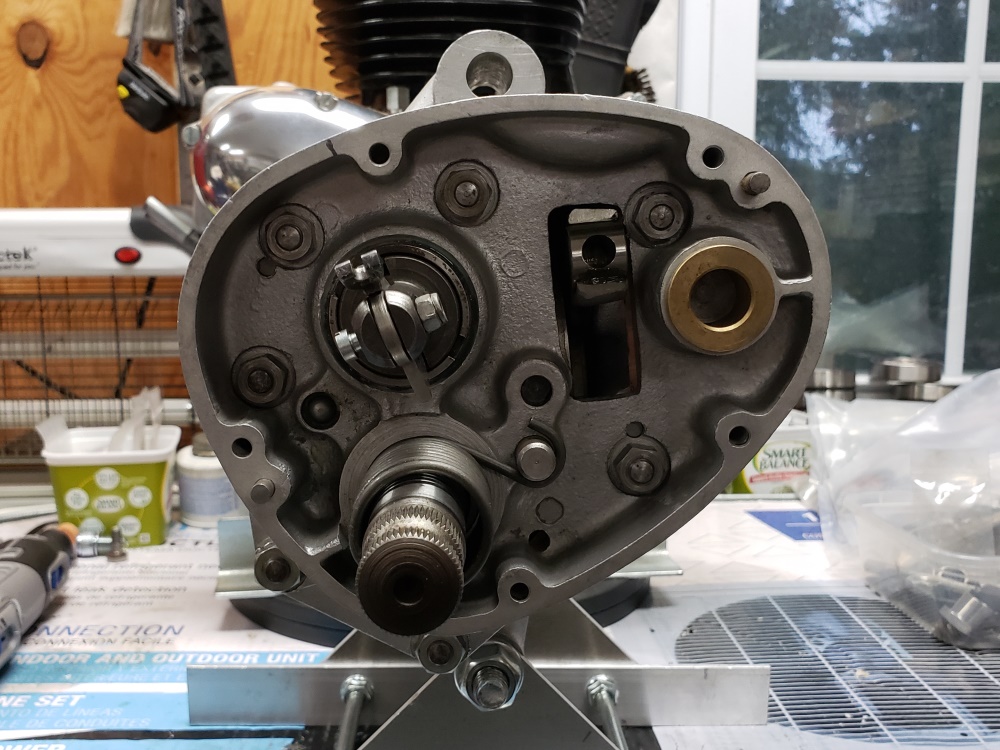
Another interesting thing is the thin stud in the picture. It goes in the front of the engine just below the
cylinders. These cases were harder than normal to split. Now I know why. That stud is very bent.
The last person to put the engine together had to force it over around 3/8" to get it to line up with the hole in the
other casing! It's real lucky that the case was not cracked! Have to order on of those as well.
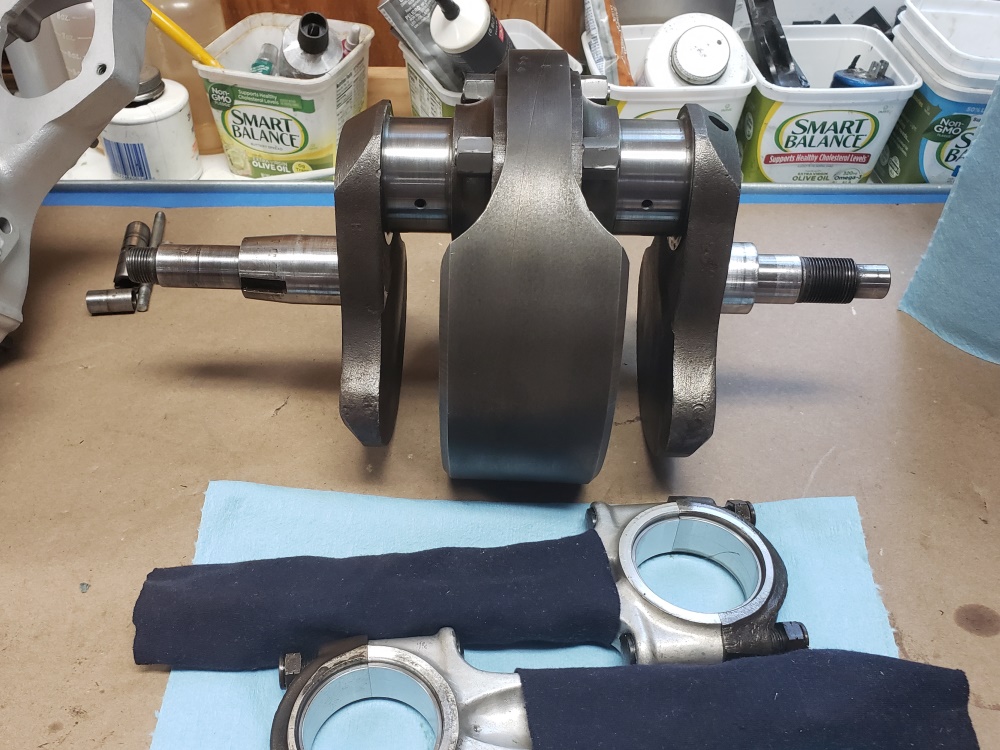
July 25, 2021 Removed the rods. Both sides had been slathered with Loctite. The timing side was not
tight and the drive side was very tight. I was hoping to find good crank journals and new shells. I found
both, BUT! The rods/crank were not clean when assembled. The score on the timing side catches on a
fingernail! Fortunately, the journals feel and measure good.
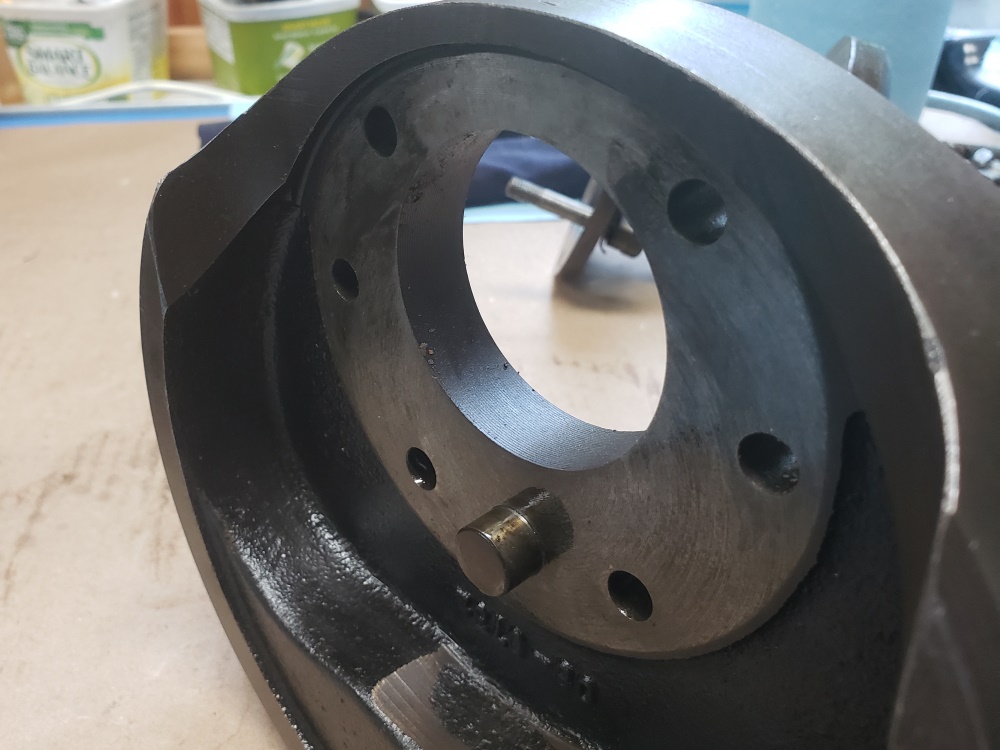
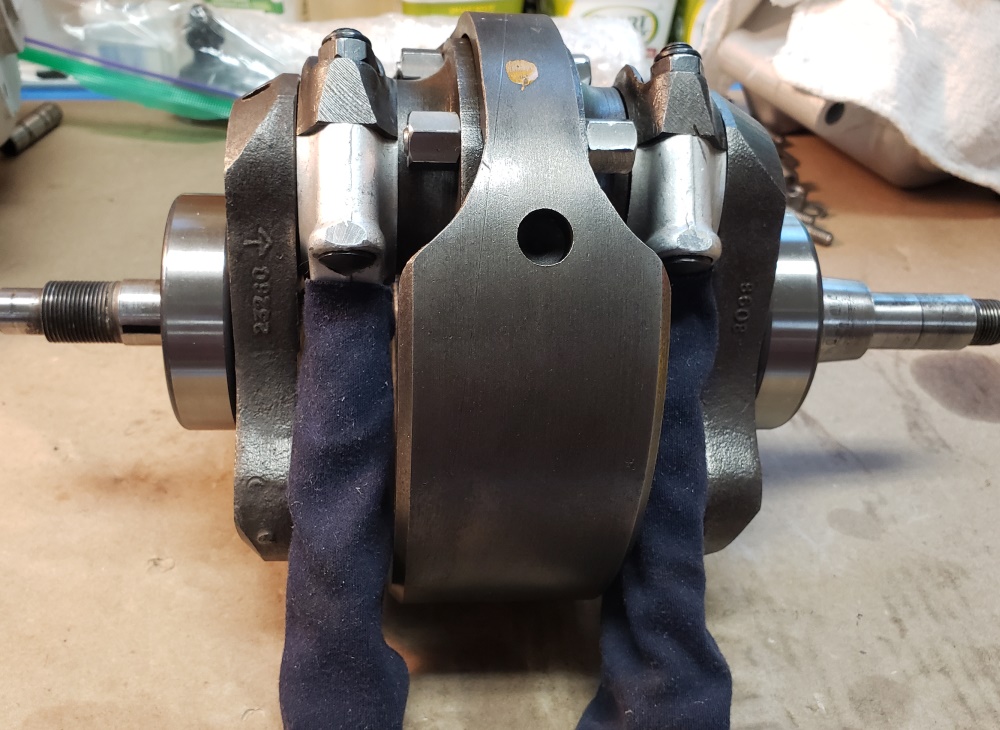
Look at the second picture. There are supposed to be two long and four short studs. The long studs go at the
top along with the long nuts. The four short studs are an easy slip fit in the crank halves and flywheel and the two
long studs are a tight fit. The pin a the bottom and the two long studs do the truing of the crank as well as
holding it together. The other four only hold it together. The long studs were put at the bottom - could't
be more wrong except that the long nuts were too. Notice that the tabs are bent again a circular portion of the
long nuts - doing nothing. On top of all that, an extreme amount of Loctite was used and it was between the nut
and crank!
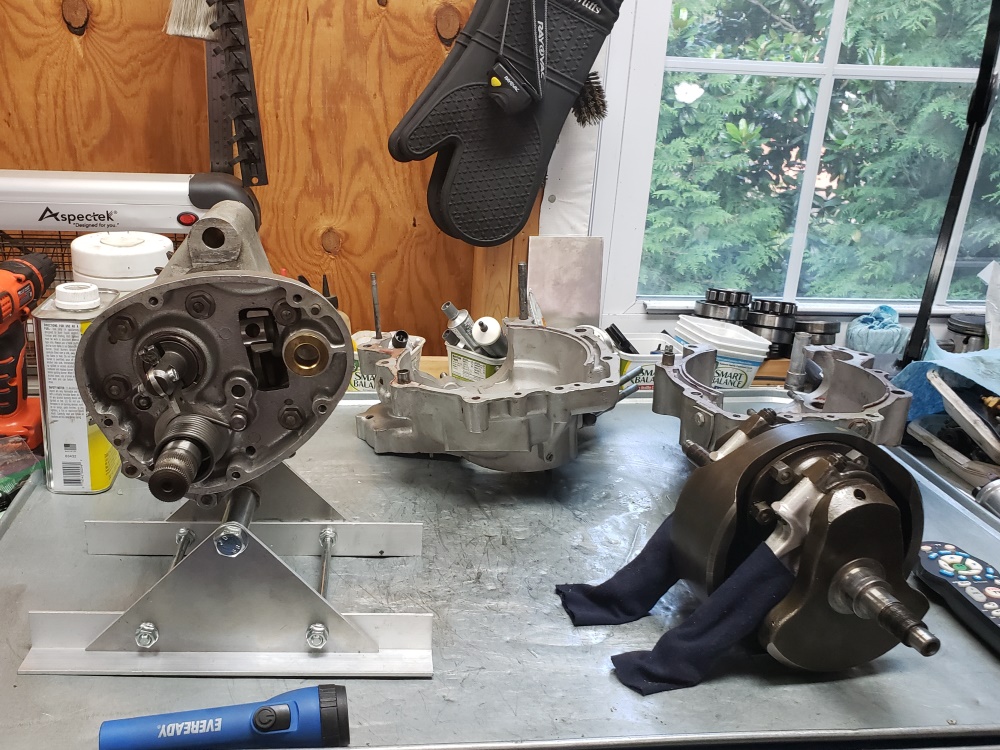
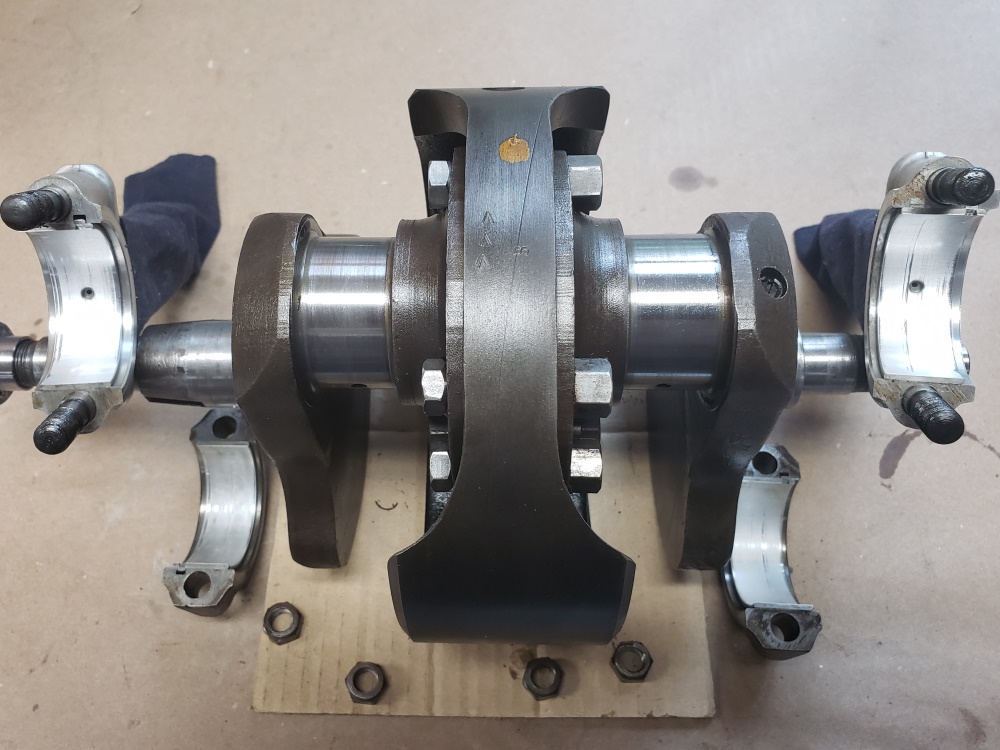
I lightly polished the journals with 1000 grit paper and WD40 to be sure there were no embedded flecks of metal.
The it was all thoroughly washed in hot water and soap, blown dry, and washed again with WD40. Then it was tie for
the first bit of assembly on this bike! The crank is back together in the last picture ready for the rods.
Unfortunately, I'm out of bearing shells so this will have to wait until they arrive. For now, the crank is
protected under a cover until more order arrives.

July 26, 2021 When I checked the oil pump I could't believe how rough it was. Today I took it apart to
see why. It looks OK, but had grit and metal filings inside - so much that it would actually catch. After
thoroughly cleaning it, it's still a little rough. I have another that feels good but had a casting flaw that makes
it wet sump way more than normal. I'm seeing what I can make of the two - so far it looks good but more testing
before I'll trust it. I think I have a couple more in boxes. I would prefer to not mix and match parts and
I
am keeping them separate but trying them one at a time.
July 27, 2021 I could not make the pump work to my satisfaction so I went through my boxes and found two more.
One was obviously bad but the other felt good. So, I serviced it and it works great. I guess I'm on the
lookout for oil pumps now. I have three more Norton's to build!
According to tracking, my Andover Norton order won't be here until Monday so I'll spend some time on one of the
other
bikes I'm trying to finish until then.
July 28, 2021 Some of the parts arrived today. I inspected the camshaft bushings. Both were fine but it still had
the 72-style on the timing side. To eliminate the loose thrust washer whose tab can break off and cause a terrible
engine failure, I replaced it with 06.3020 which is the later type with the thrust shoulder on the cam side. This
time it went in without problem and required no dressing once installed. I have a drift that is just right for it
and pressed it in this time. I also inspected and cleaned up the connecting rods. Both had some tiny nicks
and both were somewhat dirty - that's all correct. Once a couple more parts arrive, the bottom end can go
together.
July 29, 2021 The parts that were supposed to arrive Monday came today so made some real progress today.
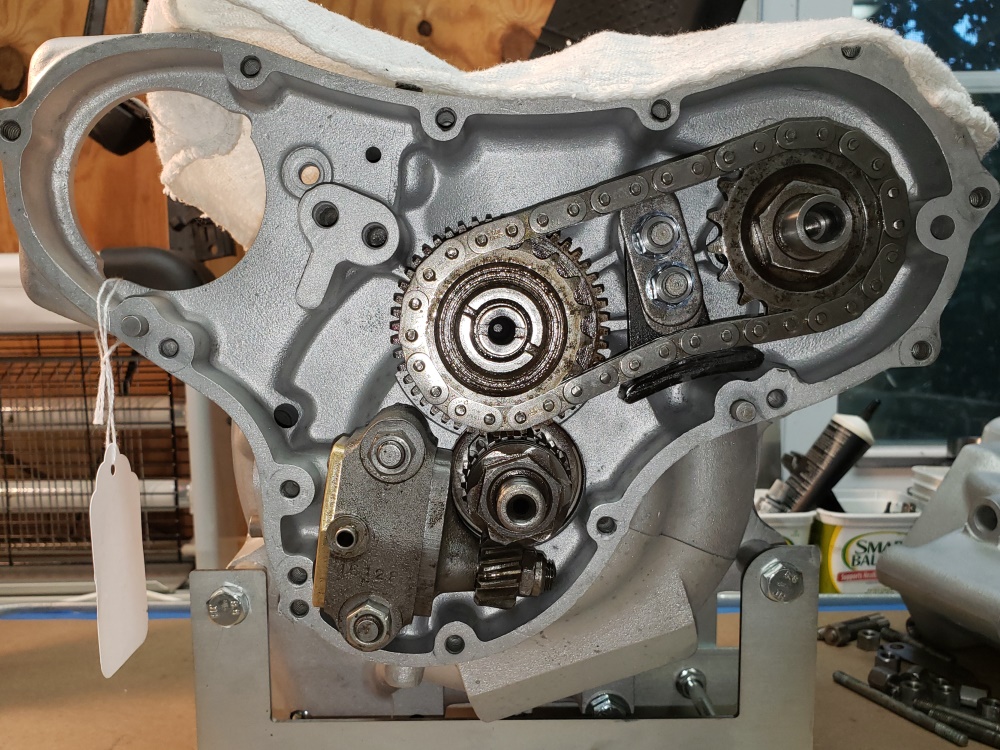
July 30, 2021 Just spent a little time on it today. The timing chest is back together but I forgot to order the
blanking plate so I could't finish. The sprockets look dirty in the picture, but they are not. That are
stained. I considered blasting them but those stains don't hurt anything. They did get a good going over
with
WD40 and a brass brush. The bike came with a new, rubber faced timing change slipper so that's good and I believe
that the chain is new too.
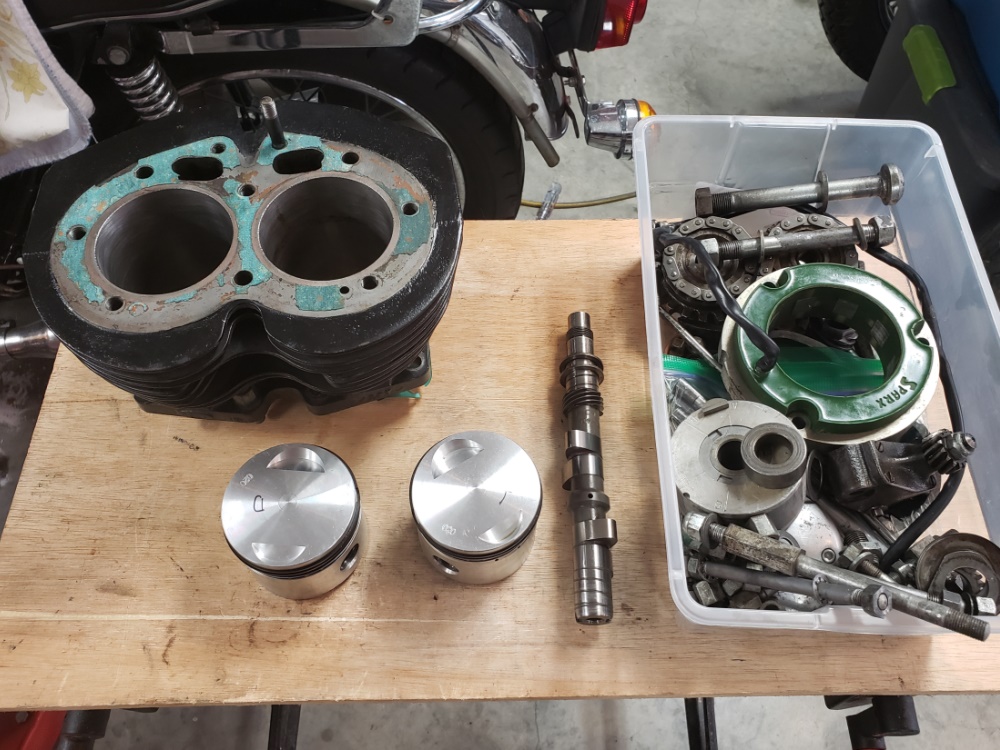
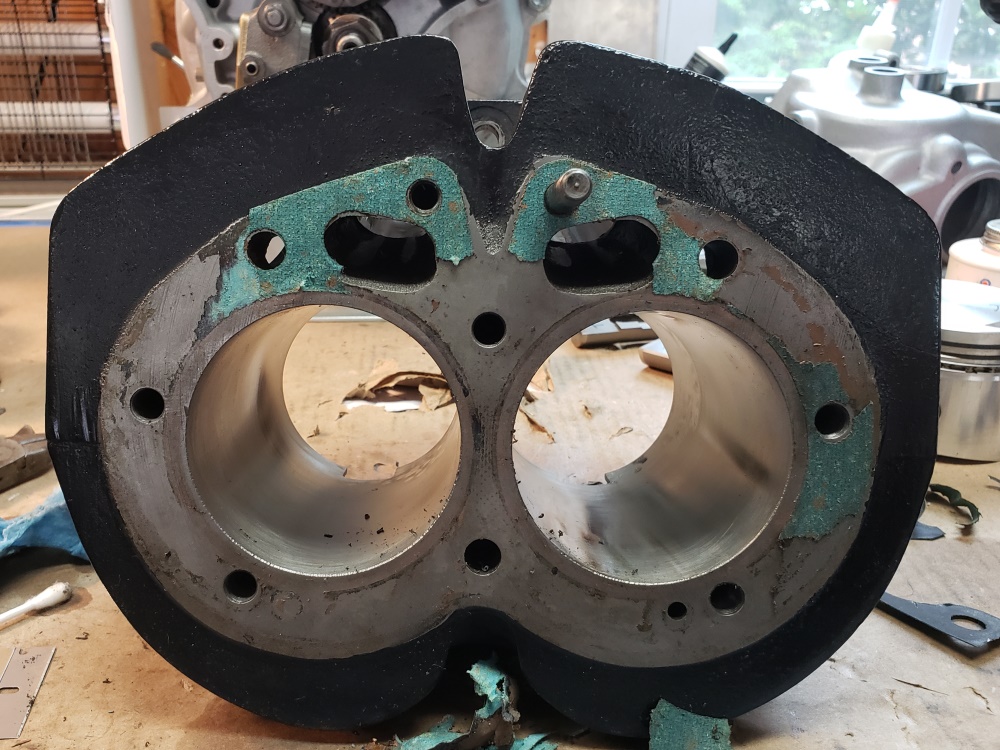
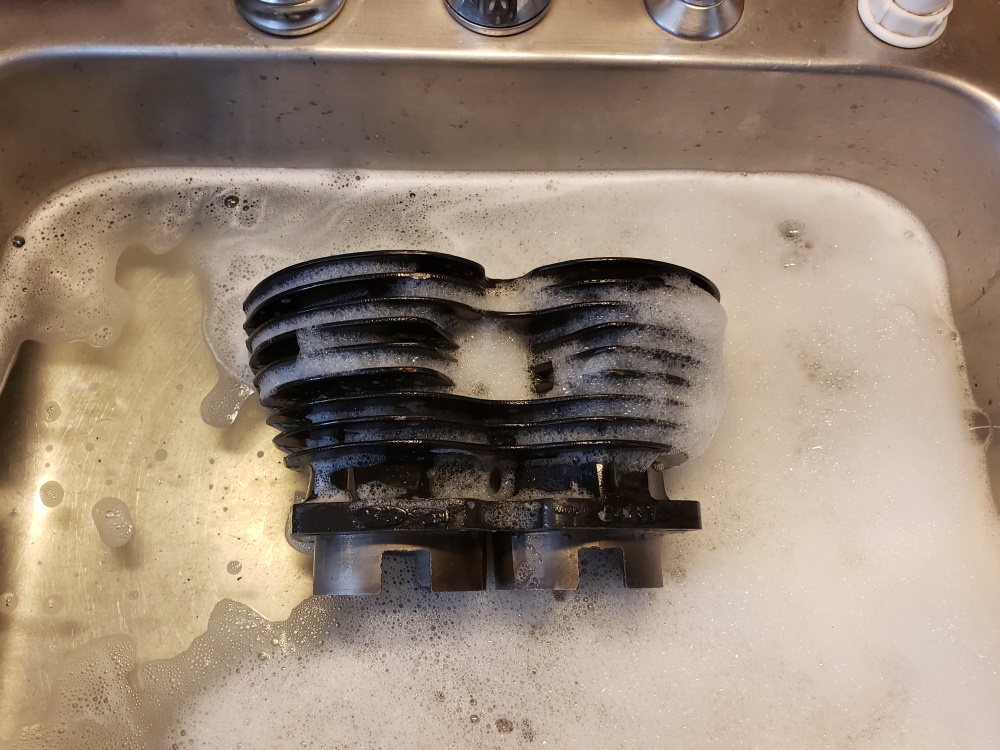
July 31, 2017 Only had a little time today. Inspected the cylinders. They are nicely bored and painted
but they have quite a few paint chips, had a glued-on gasket, and were very dirty. After a great deal of gasket
scraping, I took them in the house and did what you must not do if you have a significant other!
About then, a visitor showed up so I enlisted him to help me install the cylinders. They are in place but I
haven't gone through may stock of nuts so far so they aren't locked down.
August 3, 2021 Forgot to take pictures. I didn;t find a nice set of nuts so I used a new set. The
cylinders are installed.
August 4, 2021 The cylinders were well painted but not well protected afterwards so they has some chips. I used
special cylinder paint to touch them up - they look great now.
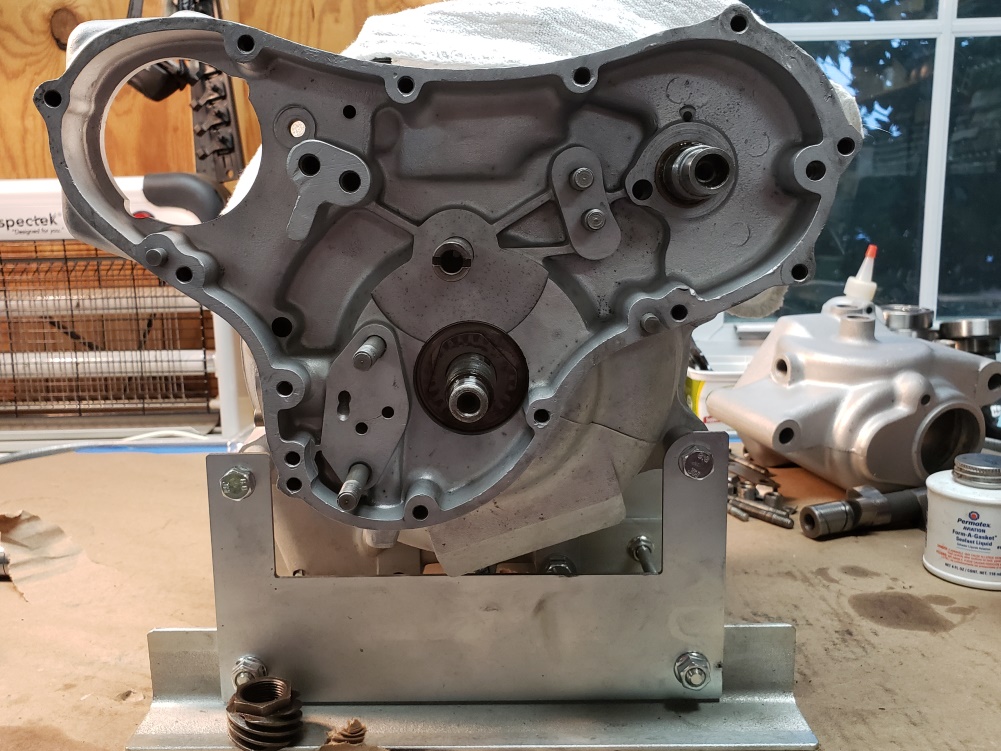
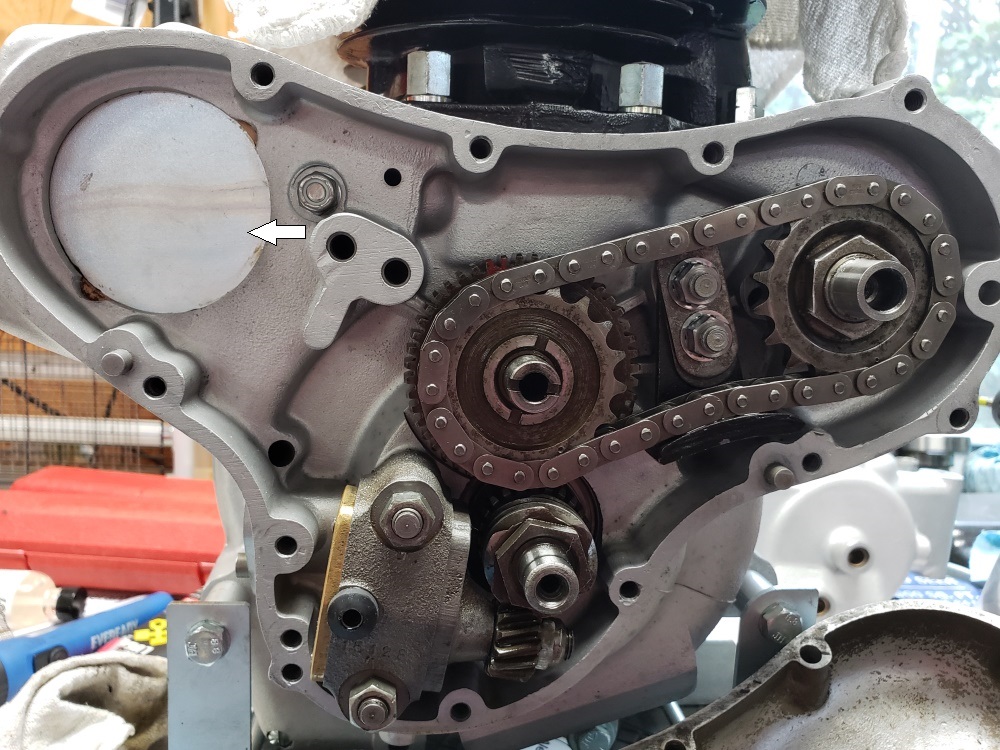
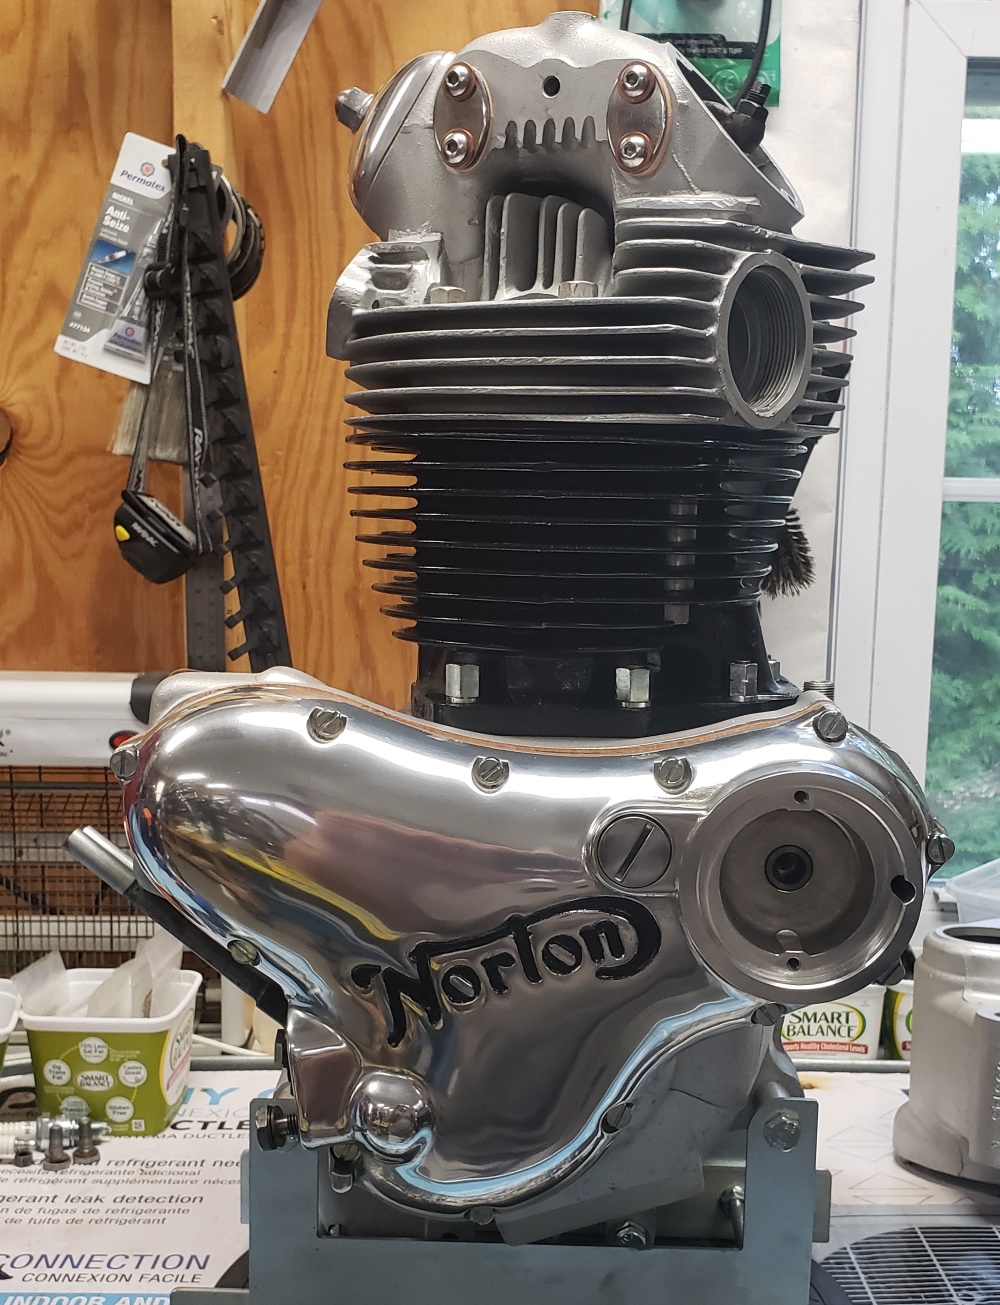
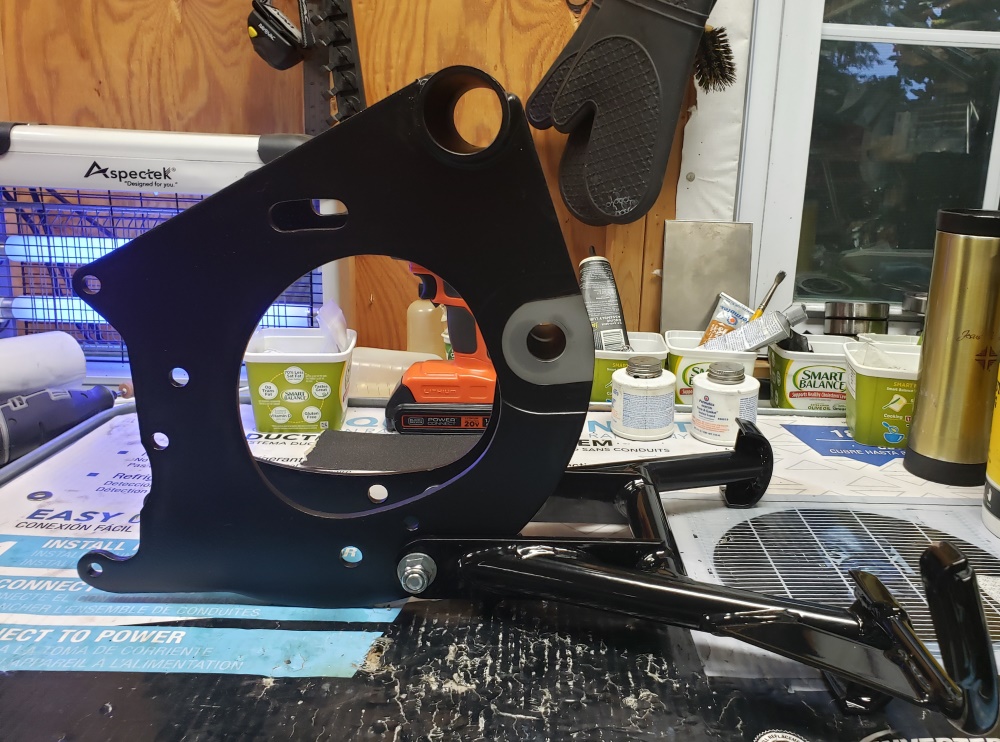
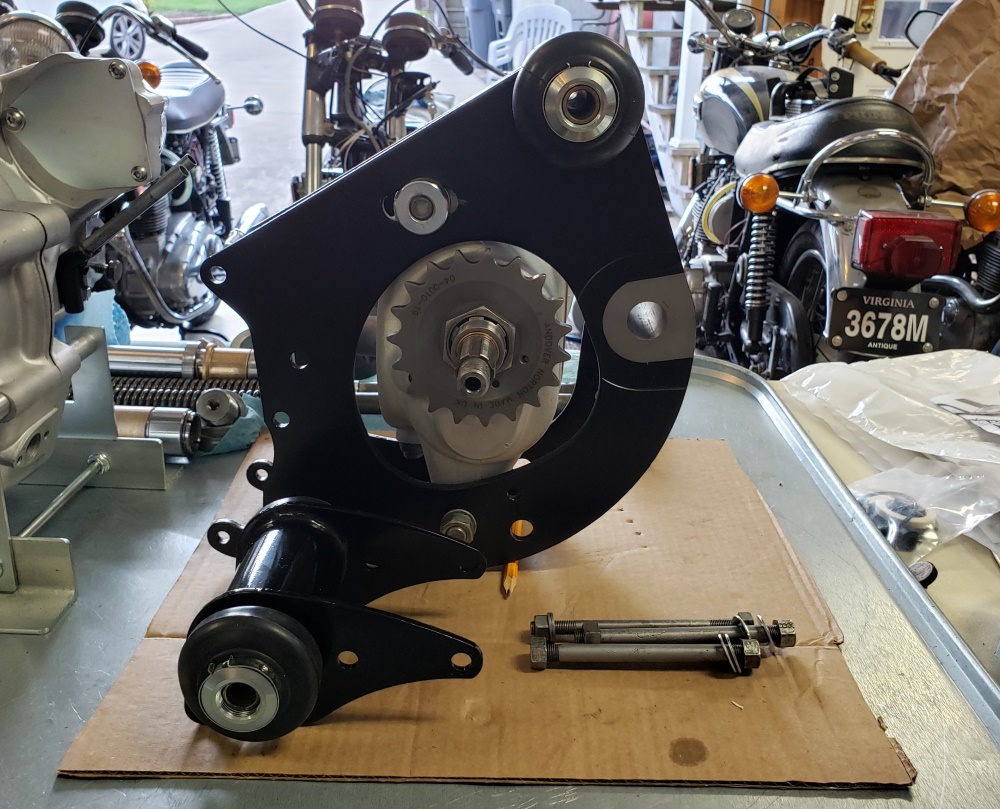
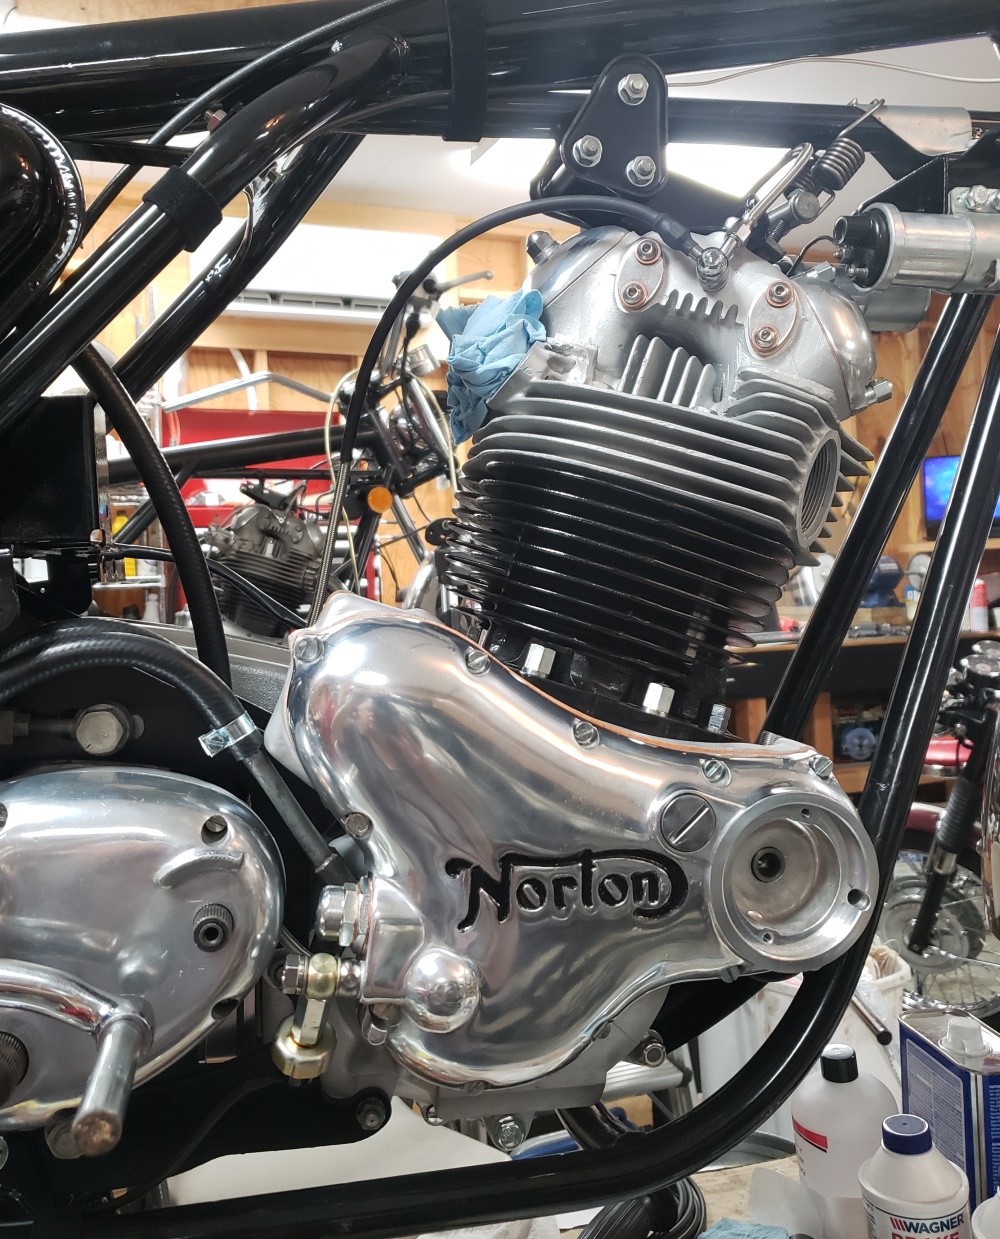
August 7, 2021 The plate in the first picture with the arrow pointing to it had to be replaced and I've been
waiting for it to arrive. I'm installing the cNw breather in the standard 1972 engine location and this engine
had
a home grown breather attached to a modified version of that plate. Anyway, the new plate is installed so I was
ready to cleanup and installed the timing cover.
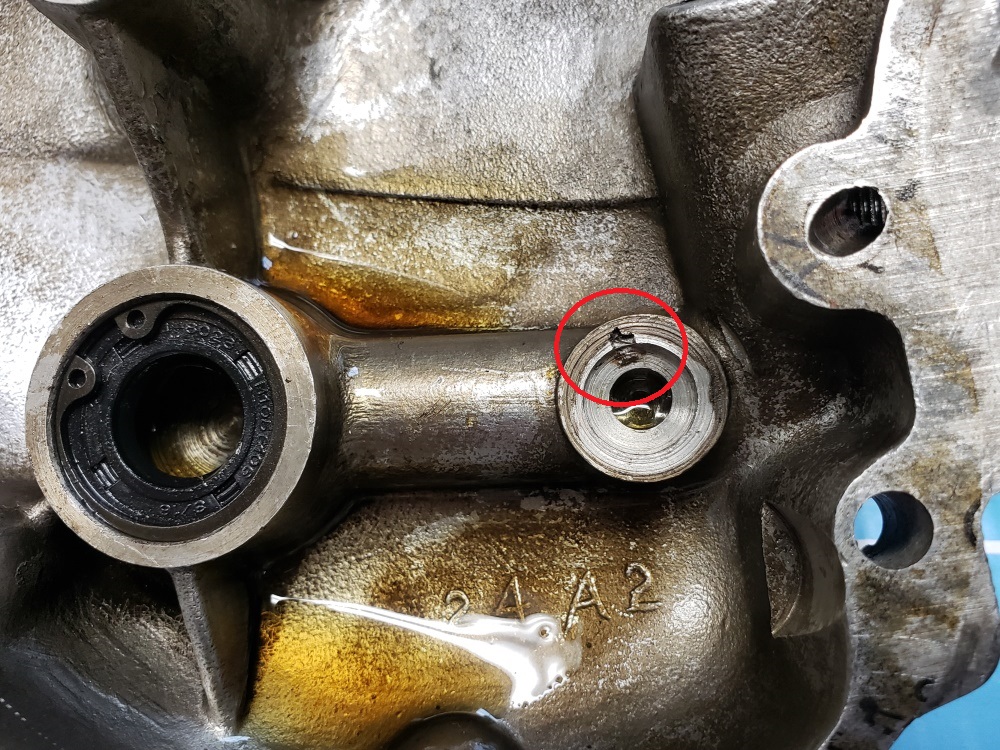
Fortunately I inspected it. In the second picture you will see a circle around a damaged area. That are is
where the high pressure from the oil pump enters the cover, flows to the seal next to it and then into the end of the
crankshaft. With that damage the oil pressure would be way below normal. In other words, that cover is junk.
Since I don;t have another good used cover, I installed a new one. It's the MKIII type with the built-in anti-wet
sump valve. They are expensive but they stop or at least slow down wet sumping. That combined with the cNw
breather means that the new owner doesn't need to worry about it.
Except for the pressure relief valve, the timing side is done. I think I got stiffed on the valve when I bought
the bike, but I have all the parts to make on if I don't have one.
Next comes the head. It's has a valve job already but I'll still take it apart an inspect - shame to have
to do
that :-(
Once the head is on, I'll rebuild the gearbox and modify the cradle to accept the oil filter. It was mid-1972
when
they started including oil filters and this bike is not drilled for it. I made a template a while back so it's
a
simple job now. Once the engine and gearbox are in the cradle it becomes the "power unit". The power
unit
will go in the frame all at once.
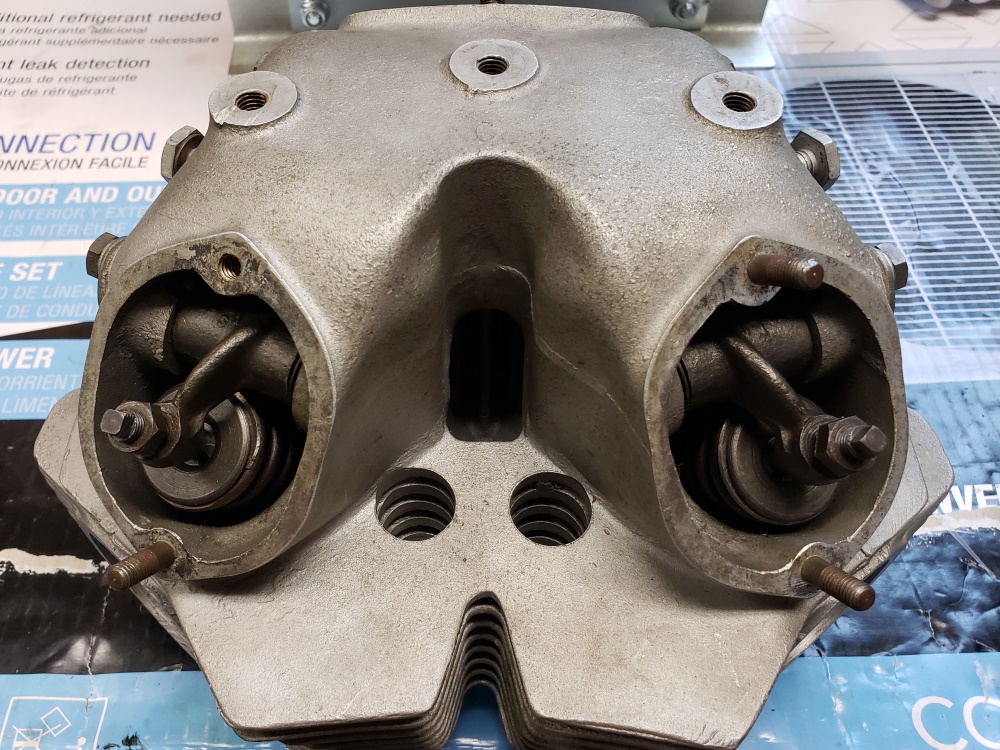
August 8, 2021 Today started with a simply plan! I was going to strip, inspect, beautify, and then install the
head. Then I was going to finish wiring the Triumph Trident I almost have done. That didn't work out too well!
The first picture shows the head as I got it. It has new valves and guides, but was not cleaned. I expected to be able
to take it apart, put it through my process, and put it back together in about four hours. Took 12!
In the second picture, you can see what look like sand on the rocker shaft. All four had that. I figure that the engine
would have eaten itself alive within a very short time! OK, issue averted, just get the valves out, make it pretty and
clean and put it back together. The first three valves whet fine. The timing-side intake valve would not come out. It
has a nick on the side. I worked for a long time dressing that nick thinking that it happened after the valve was in -
wrong! Once I got the valve out I could see the score in the guide where the valve was pushed in with the nick already
there. Fortunately, I had a matching valve and guide so I changed them.
Each of the valves still had residue of grinding compound and engineer's blue. After thoroughly cleaning all the
internal components, I went to work making the head look good. It came out nice. The head is back together but I ran out
of steam to install it. Probably do that tomorrow.
August 11, 2021. The head is on but not torqued and the two upward facing long bolts need to be restored before installing.
Since the engine is on a "lazy Susan" it spins easily to work on it, but there's no way to torque.
Everything is tight enough to turn the engine over without problem.
August 12, 2021 Re-plated the upward facing head nuts and the intake value cover stud. Also polished
the intake calve cover. It has on small spot I could not get out, but that adds to the originality - it looks good.
The studs for the exhaust covers are very rusty so I'll probably replace them rather than plate them. The
engine is ready to go into the cradle.
I checked out the cradle before starting to restore it - BAD! The spindle for the swingarm is not snug in the
tube. Fortunately, I have a collection of cradles. The one I chose was the dirtiest I had, but is in good
shape except the dirty, grease, and grime. It is from a 74 so it has the upgraded center stand mounts and the oil
filter mount. Both will save me time since now I don't have to have to modify the one that came with the bike.
I started blasting it today but ran out of steam. Hopefully I'll have it ready to paint Sunday when the weather
is
supposed to be nice again. I may not wait and do it in my powder coat cabinet like I've done before.
August 13, 2021 Start on the gearbox. When I took it apart to clean the cases, it still had the layshaft
ball bearing so I installed the new roller bearing. I should have checked the sleeve gear bearing but didn't
bother because I always have new ones in stock - I'm out of stock :-(. So, I'm stuck on the gearbox until
the
bearing arrives. Finished blasting and preparing the cradle for paint.
August 14, 2021 The weather is still bad for painting outside so I painted the cradle in my powder coat cabinet.
Once it's dry I'll inspect. Most likely, it will need more - hard to see when painting in the cabinet.
Unfortunately, the paint I'm using requires a long cure time before re-coating so if I missed any spots it will be
a while
before it is done.
August 15, 2021 As expected, I missed an area on the cradle. The sleeve gear bearing arrived and was
installed without issue. Inspected all parts. All gears and shafts are good but all had grit on them and the
mainshaft timing side ball bearing was no good. Cleaned everything and replaced the bearing. From there, it
went together without issue. I have it together enough to check/correct the end-float in the layshaft - sorry, forgot to
take
pictures.
I'm almost finished with the Trident that on the table I need for this bike. Once I get that done and the cradle
paint done, this will quickly start looking like a motorcycle!
August 16, 2021
The gearbox is done except for the outer cover. This bike didn't come with one so I went through my stash of
covers and found the nicest one. It took a long time to polish but it looks good now. They are always a
challenge because the outer surface is always porous and they get scratched a lot. Not sure why they are more porous
than the primary or timing covers, but they always are.
Fortunately I have one good set of parts for the outer cover. One of the
harder Norton jobs is to get the gear change mechanism to work right. I hope
to get that done tomorrow. Then, once I'm able to finish painting the
cradle, the gearbox and engine can go in it.
August 17, 2021 I must be living right! First the gearbox went together and was able to shift on the first try, and then
the outer cover when on without trouble the shift mechanism worked properly on the first try! So, all bearings changed,
couple of bushings changed and all seals changed.
Also, had some help so the head is now torqued, the valves adjusted, and the rocker covers polished and installed.
August 22, 2021 The cradle is ready. The holdup now is getting an empty table. I'm missing a couple of parts
for the Trident that is on one, and a couple of parts for my Norton rider that is on the other. As soon as one of
those is off it's table, this will go one. I hope in the next few days. I have three partial bikes in the
way that
I'm going to move outside once I have some help. Most of what's left on the Trident could be done on
the floor if I had any available floor space - mostly wiring.
September 5, 2021 The Trident hidden behind the cradle is done except a could of minor touches and it is sold.
The one hidden by the engine came off the table today - the only things left are easier done with it on the floor.
So, we are getting back on track with this bike. Went through everything than came with the bike today looking for
the center stand. I always use the later pivots and I'll need to open the holes on the cradle (if not already
done) and on the center stand. It didn't come with a center stand :-(. I ordered one tonight so I have to wait for
that to arrive to setup the cradle for it. I think the cradle is already done, but without the bushings I can't
be
sure and it's too hard to do when the power until is together. The cradle that came with this bike is bent so
I
checked and restored. Once I have the center stand worked out, I'll install the vernier rear isolastic.
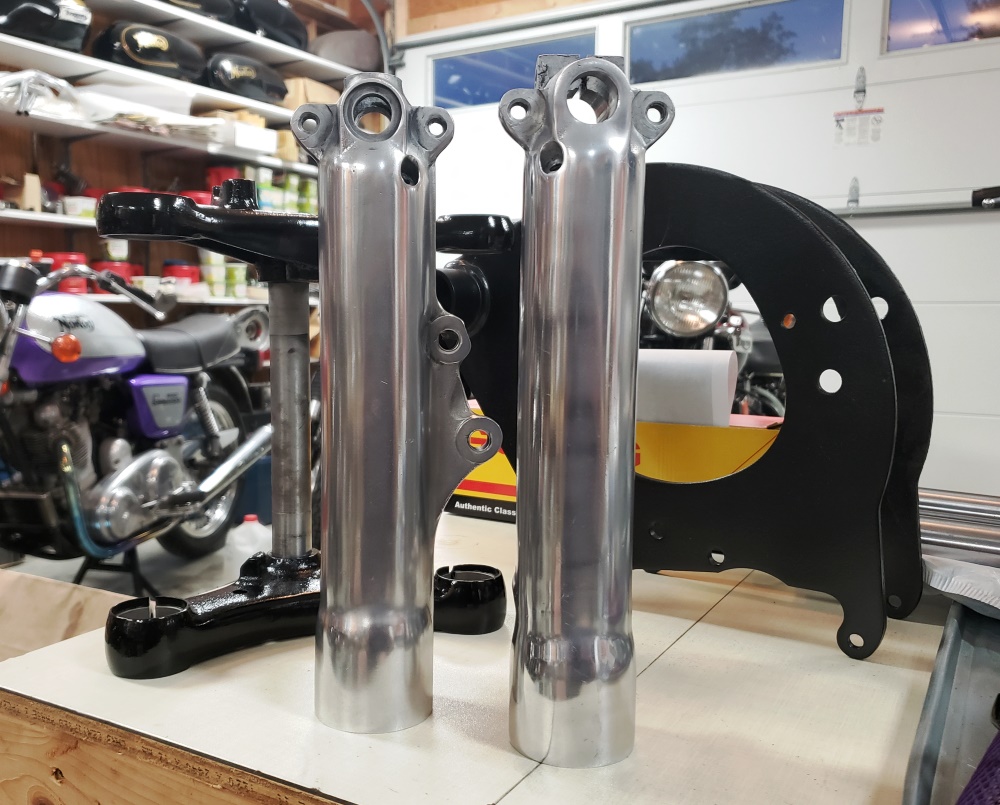
September 7, 2021 Making progress while waiting for parts. The triple tree is powder coated and ready to
install. The swingarm is ready to go on. The front isolastic mount is powder coated. The forks are apart
and inspected. The components look good and I've done the first pass of polishing the sliders. For some
reason, they are being a little difficult. I think they may have been vapor blasted - they are very smooth and
dull. They are normally easy to polish.
September 8, 2021 The fork sliders took forever to get to this stage. They need a little more. The one
on the left is even but should be a little more polished. The one on the right would be OK but there are some
bands across it where the shine is greater. The triple tree is powder coated.
September 9, 2021 The AN order arrived today. Now I can fit the center stand to the cradle and I have the steering
bearings so I can press them in. Plan to install the frame this weekend.
September 10. 2021 The center stand temporarily mated to the cradle. The holes in the swingarm are power coated so
getting the pivots through the holes is impossible without removing the powder coat. You don't want to make the
hole in the metal any bigger so it's a tedious job with a X-Acto knife. At least the cradle is one that is already
modified for the later improved bushings so I didn't have to do that. It would be nice to actually install
the center stand now, but it's too hard to get the frame on the power unit with it installed - the same is true of the
swingarm.
Be sure to check back tomorrow. Before we had TV we listened to the radio and there was a Tennessee Ernie Ford variety
show. He ended the show with something
like: "I'll see you next week if the good lord's willing and the creek don't rise", later he had a
TV show and did the same if I remember right. So, if nothing special happens, there will be real progress tomorrow!
September 11, 2021 Remember...
Well, some things did happen so the progress is less than expected. In the first picture you can see that the
vernier isolastics are installed and the gearbox is in the cradle. I re-plated all the gearbox mounting hardware this
morning and found as nice set of engine mounting studs and nuts, and got them cleaned up ready to marry the engine to the
cradle.
That's when people started unexpectedly arriving. When that was over I started to get the engine out of the stand
when I realized that the crankcase breather was not installed OR ORDERED! Stuck again!
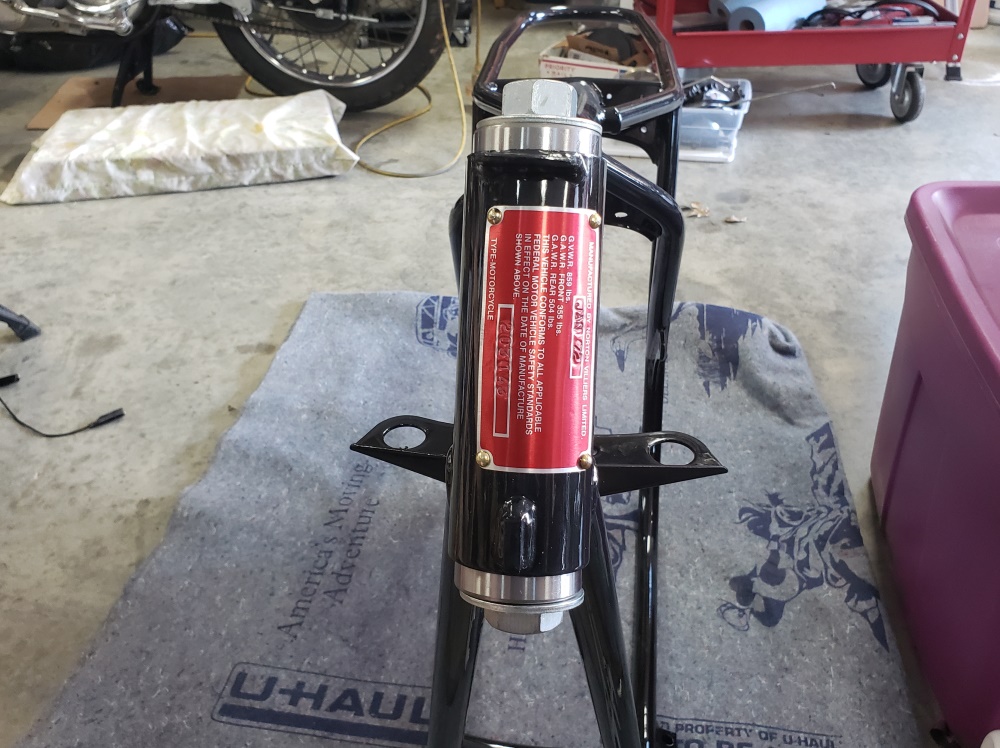
So, I went ahead and prepared the frame. My goal today was for the power unit to be in the frame today :-(.
In the second picture you can see the new certification label installed. and the bearings going into the headstock.
That's a large bolt with washers that are slightly smaller than the OD of the bearings. By tightening the nut
the
bearings are pressed into place with no possibility of damage - works perfectly every time.
September 12, 2021
Weird issue day! Continued polishing the fork sliders. Generally, I can see myself in them with no more than
as hour's effort. These have probably four hour - look good - but not super shiny. The super shiny doesn't
last long anyway but I have no idea why this set is so hard to polish.
The next weird thing is that when we put
the non-disc side together, the tube would get stuck in the bottom. it was completely free and smooth all the way
to the bottom and then would't pull out. The tubes and bushings are new. After a lot of study, decided
to change parts one as a time starting with the bottom bushing retaining
circlip. It was clearly not new, but looked fine. That fixed it! I've done lots of these forks and
never had a problem before. Both sides are excellent now.
September 13, 2021 Went through my cache of instrument holders and found two good ones - they polished up nicely.
I need to send the instrument themselves off to be restored. Then went through parts and found a MKIII head
steady. Took that apart and blasted the body so I can powder coat it. Also cleaned and blasted the battery
box.
September 21, 2021 No, I haven't forgotten this bike! The breather arrived yesterday, but I had a problem with
the
gaskets and had to order more. Also, I didn't realize that I was out of 3/8" oil hose so that's coming
tomorrow.
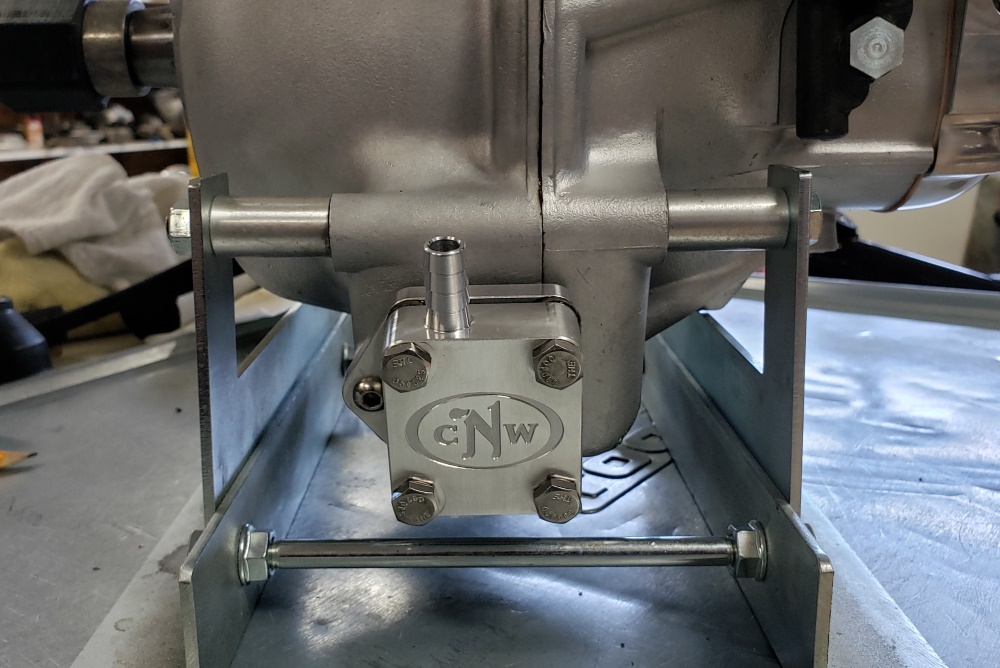
September 30, 2021 Finally! TheUSPS took from 9/21/21 to today to bring me a simple envelope with replacement
gaskets for the breather in the first picture. It's and expensive upgrade but well worth it. Nortons are
bad
about "wet sumping". This is where the oil from the tank seeps past the oil pump and fills the crankcase.
Besides making it harder to start, that oil sometimes forces the crankshaft seal to the primary to push out resulting in
an oily mess. Since I installed a MKIII timing cover, this bike is less likely to have the problem; but British
bikes tend to leak. A reed valve breather eliminates the crankcase pressure and makes leaks less likely.
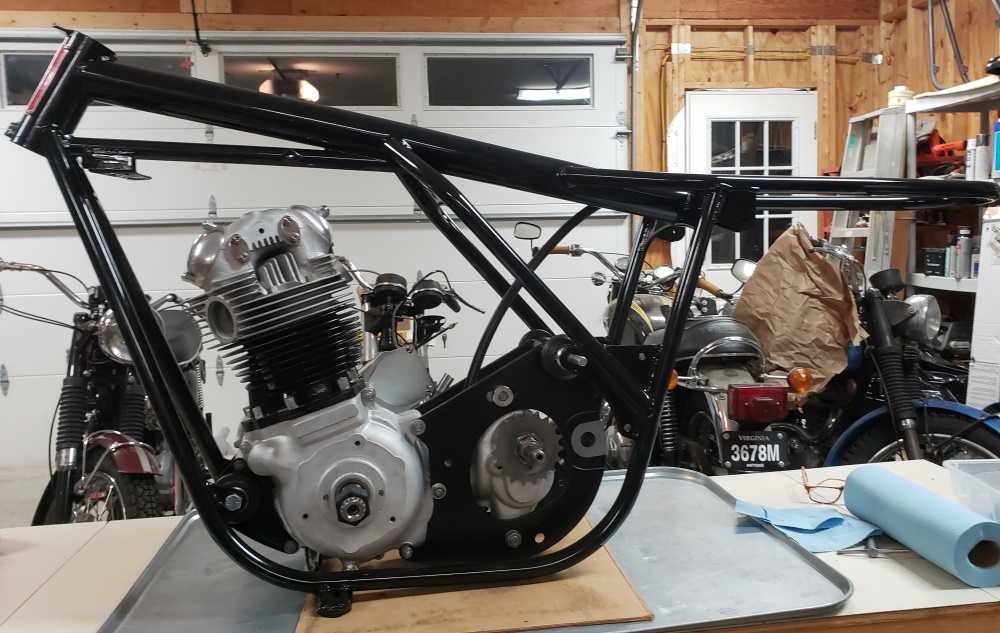
In the second picture, I have joined the cradle to the engine and laid it on is side on a thick piece of foam.
In the third picture, I have lowered the frame over the power until and installed the rear isolastic stud and the front
isolastic; and then, set the bike upright. Now we should start seeing steady progress.

October 1, 2021 Installing Norton forks is not hard if you do it in the right order. If you don't you'll
have
loads of trouble and probably handling problems. Rather than a bunch of pictures, I'm going to describe the
process. With forks ready to be installed and the headstock bearings in place, this is the procedure.
- Slide the head lug dust cover (06.7651) onto the top half of the triple tree (yoke). Make sure the right side
is up.
- Slide the washer (06.7685) onto the top half of the triple tree.
- Slide the top half of the triple tree into the headstock and make sure it goes all the way down.
- Slide the bottom half of the triple tree onto the top half shaft but only enough to have a few threads stick out on
the bottom.
- Slide the tab washer (06.1912) onto the shaft followed by the nut (06.7781). Do not tighten the nut, just put in
on 2-3 turns.
- Now for the tricky part!. Put two o-rings (06.1900) in each side of the bottom triple tree one on top of the
other with some grease to
hold them in place.
- Put one o-ring (06.1900) in each side of the underside the top triple tree - use enough grease to ensure that
it stays in place.
- Then one side at a time hold the correct side fork ear (06.2028/9) in place and slide the fork in form the bottom
being sure that the o-rings are not displaced. When all the way in, put a top bolt (06.0345) through a
washer (06.0345) and then through a instrument holder and into the fork. Finger tighten.
- Once both sides are in, you must install the headlight shell! If you don't you won't be able to after the
next
step!
- Tighten the bottom nut until it is just snug.
- Put the bottom axle in to keep the sliders from turning.
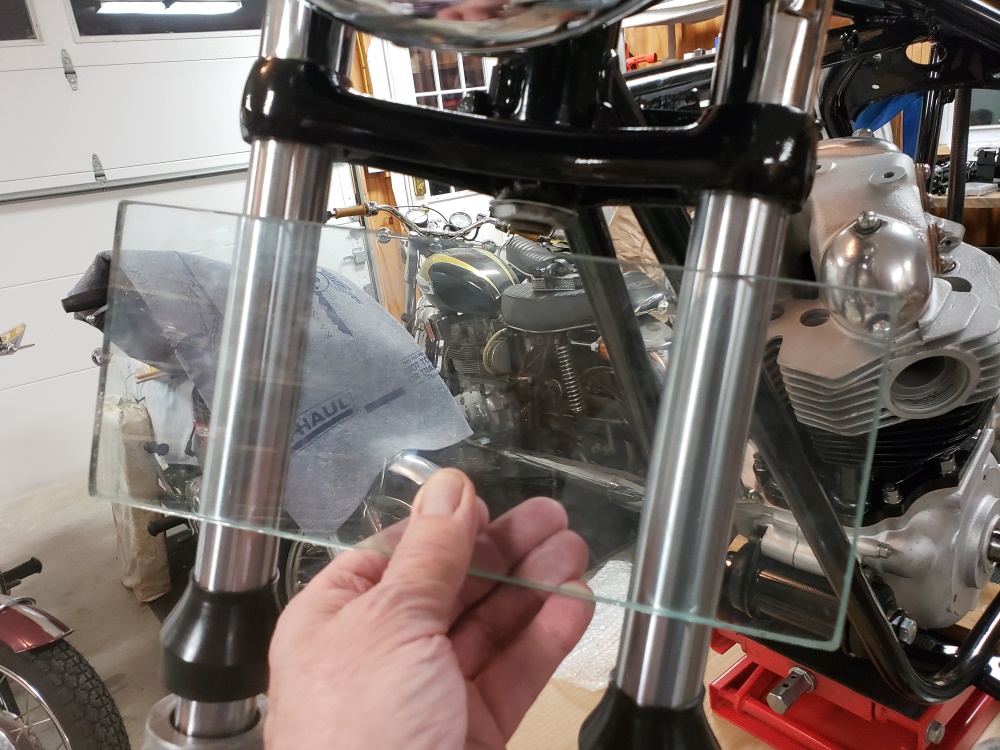
Now is time to true the forks. The first picture shows how I check that today. You can also slight across
them. With the glass held against the forks if one of the corners has a gap, it must the corrected. As each
thing is tightened, recheck/correct. First tighten the top bolts to about 20ft lbs. Then the bottom nut to
about 20 ft lbs. At this point, the forks will be all the way up and so will the bottom of the triple tree.
Tighten the bottom triple tree cap screws to about 10 ft lbs. Tighten the top for bolts to 30-40 ft lbs.
Remember - keep checking! Tighten the bottom nut to 25-30 ft lbs. Tighten the cap screw pinch bolts to 30 ft
lbs.
Later when you put the front wheel on, do one final check.
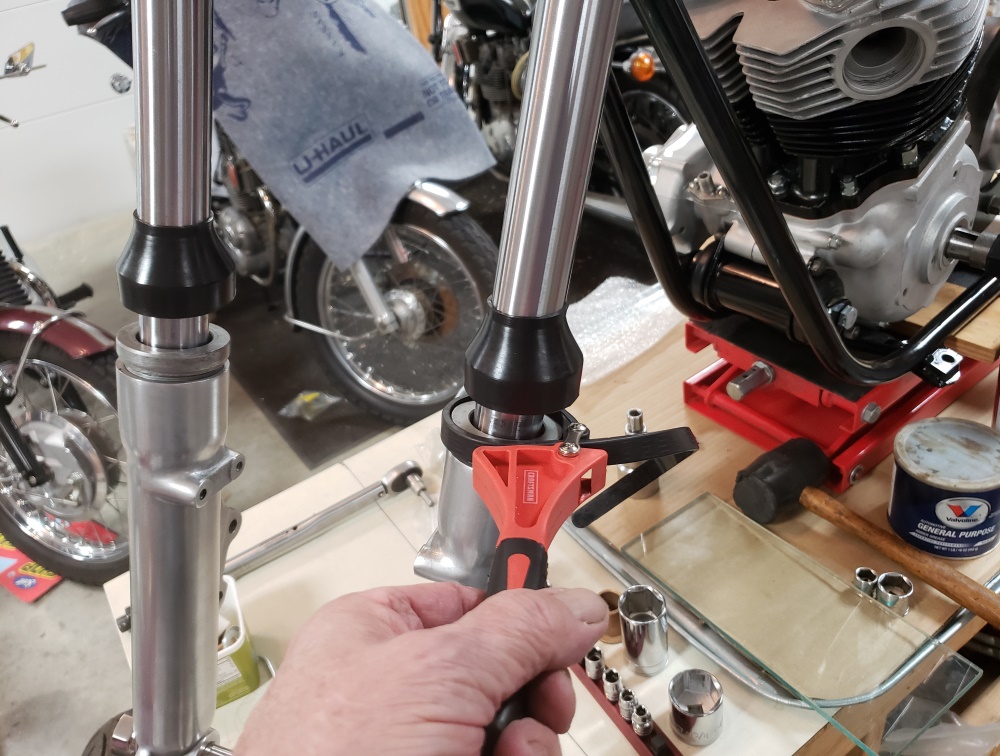
The second picture shows me tightening the slider collars. I just make the hand tight when working on the forks
off the bike - too hard to hold onto. Once on the bike, the bike holds them and makes it easy. The same is
true of the damper bolts from the bottom. I'll tighten them to 10 ft lbs before installing the wheel. Also,
the forks have no oil right now. I'll remove the top nuts (they are not connected to the dampers. That makes
it a lot easies to get the oil in. I'll just pour it in, wait for the oil to drain down into the sliders and push
up on the forks and screw the damper rods to the top bolts.
Swingarm tomorrow.
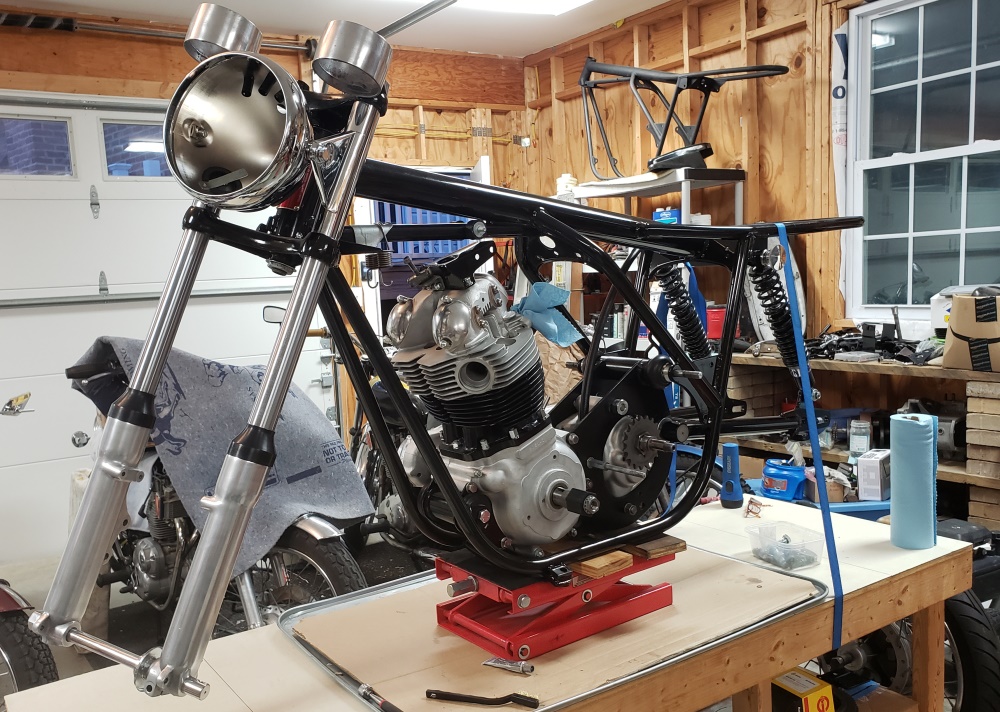
October 2, 2021 Although the picture below doesn't show a lot of progress, plenty was made. The swingarm
with all new parts i installed as are the shocks. The shock came with the bike and are Hagon. I'm concerned
that the bottom portion is too short and will interfere with the chain guard. I'll have to check that before
finalizing the shocks installation. This is a common problem. If they do interfere I have a new set of
Girling shocks meant for Commandos that I'll install.
I already powder coated the head steady. Today I cleaned up the other parts, plated some, and painted some.
That can be installed tomorrow. I started looking at the wheels today. They came with new Avon tires, but the
previous owner put them on without cleaning the wheels there are a few rust spots on the rims - real shame as the are
original rims and spokes.
A couple of people invited themselves to visit me tomorrow. One job I'm not strong enough to do alone on a Norton
is install the center stand. They don't know it yet but visitors much work!
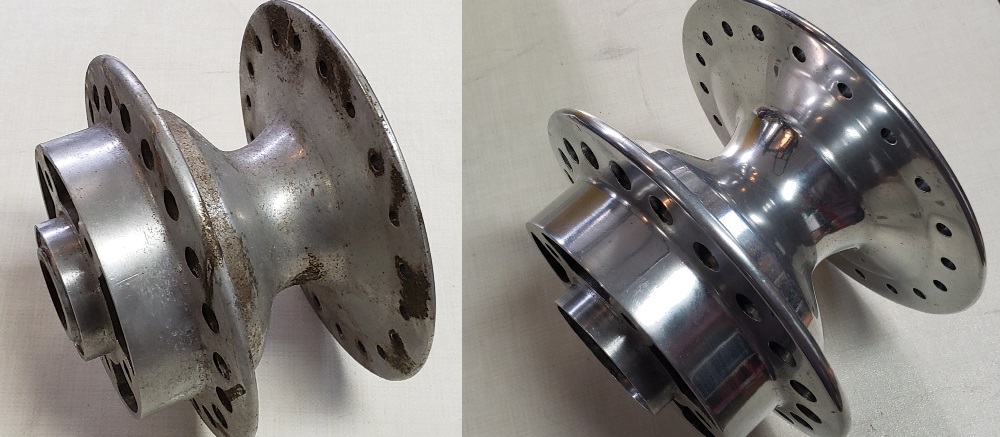
October 3, 2021 The visitors stopped by and helped me install the center stand. I checked the chain guard
clearance against the rear shocks - there's no problem. Decided to rebuild the front wheel. Taking the tire
off, the spokes off, and polishing the hub took five hours! You can see the before and after hub below.
Being a perfectionist is not good for the next part of the job. There's no such tings as a perfect truing job.
The lacing is not particularly hard but the truing is tedious, especially for a perfectionist!
October 4, 2021 Annoying! Annoying! Annoying! Got all setup to build the front wheel and laid the spokes out
(four different lengths/bends) and got out the nipples. That's when I realized that I had no nipples for the
disc-side spokes. The two Commando spokes sets and nipples came in the same padded mailer but the contents were
wrong! Call England right away but they were closed for the day so I've emailed them - hopefully they will ship
quickly.
I did get the front fender stays blasted and painted and I finished (I hope) blasting the battery tray. It was basically
done but oil leached out from the joints so I blasted again. Tomorrow I'll heat it in the oven and see if more comes
out. Then I ' to install the head steady and realized that I didn't have the through studs so they
are ordered now too. That's one of the problems buying a partly built bike - the owner always thinks they are more complete
than they are!
Today would have been my wife's 78th birthday. Happy birthday Madeline - wish you were here.
October 5, 2021 The battery tray did leach more oil so I send and blasted it again. Disassembled the rear
wheel to get the hub ready to build a new wheel.
October 6, 2021 The battery tray is now powder coated and in place. It won't be fully installed until the
z-plates are on, but it is required for installing the rear fender. Removed the bearings from the rear hub and
put it through the process to make it look new and then installed new bearings and felt seals. I have everything to
build it so I'll do that next. Along
the way, I'll improve this page: Rear Wheel Lacing
October 11, 2021 Forgot to update on the 8th. The rear wheel is built. The proper nipples are on their
way from the UK for the front wheel and an AN order arrived Saturday so I have the parts I know I need for this bike.
Haven't done much in the past few days as I had two bikes come in the be fixed.
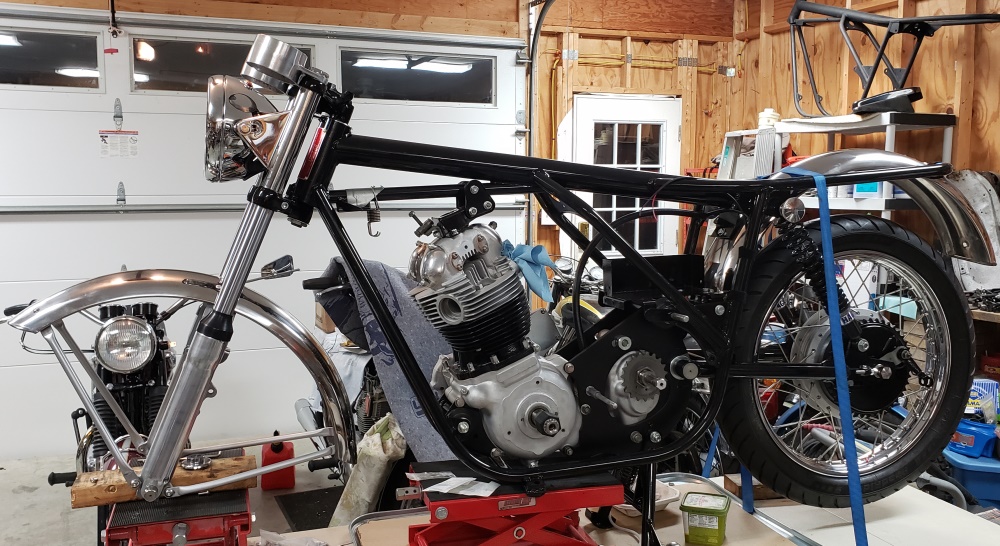
October 19. 2021 One thing after another has gotten in the way. Finally made some progress worth showing.
The horn is installed in the normal location but it's not a stock horn - this one is much smaller and many times louder.
The rear fender and rear wheel are installed. The hub is new and takes a 520 chain as does the front sprocket.
This eliminates the chain interference problems and since it will be a x-ring chain, all but eliminates the chain
maintenance. Unfortunately, I needed a 98 link change but have a 100 link. I'll either order a 98 or cut
the
one I have. Once the chain and chain guard are on I'll install the primary. Could do that now, but the chain
and chain guard are much easier to deal with the primary off. The rear axle is new, stainless, and one piece.
Both fenders are new polished stainless. The nipples for the front wheel are arriving tomorrow so I can get back on that
soon.
October 21, 2021 Shortened the chain and installed it and the chain guard. Forgot to take pictures. Nipples
still not here.
October 24, 2021 Front wheel misery! First, the nipples didn't arrive until the 22nd.
The nipples arrived and started building the front wheel two days ago. When all the
spokes were in, it was obvious that something was wrong. The non-disc inner spokes were too short on the short bent end.
Since they came with the rim, it took quite a while to convince myself that it was the spokes that were wrong - not me.
I had another set of the same spokes and tried to use a different spoke to replace them - no joy.
Then I had a set of
spokes that came with a rim from a different manufacturer but I sold the rim and still had the spokes. These were all
10ga so half of the nipples wouldn't fit.
I looked around and found another set. Before trying them I removed enough
spokes from another OEM front wheel to test each of those. The all were the right length including the bent end, but the
bends were wrong for all outer spokes. So the disc side spokes needed to be bent a little more and the non-disc a little
less. I rigged up some channel locks and rubber so I could bend them correctly without damage, bent, tried again, bent,
tried again and so on until I had them all right. Took forever!
Then I built the wheel and started truing. Generally on
a Norton front wheel you leave the non-disc side loose, get rid of the hop and make them true with a zero offset using
only the disc side. Then bring the offset to a half inch using the non-disc side. For some reason, this was not working
so I did the sides in stages. Surprisingly, this wheel came out the best I've ever done on a Norton front! It measures
.005' of maximum hop and .008' of out of true - the rims are not perfect enough to do better than that and that's way
better than is usually done.
Mounted the tire and was then out of steam for the day. If nothing gets is the way tomorrow, the jack will come
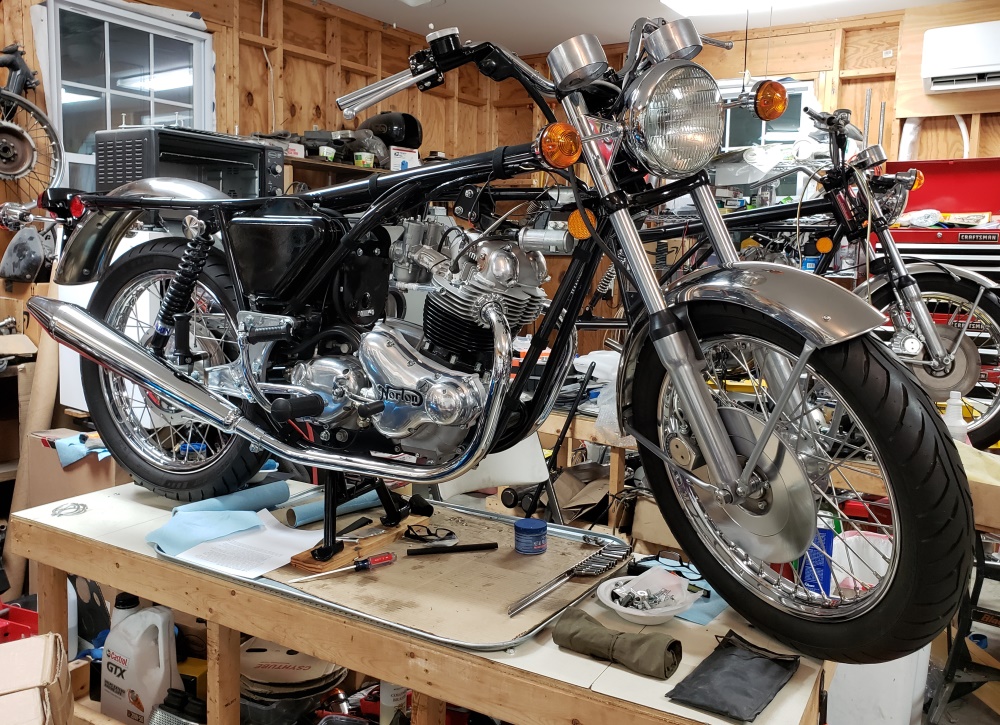
out from under the bike and it will be a "roller".
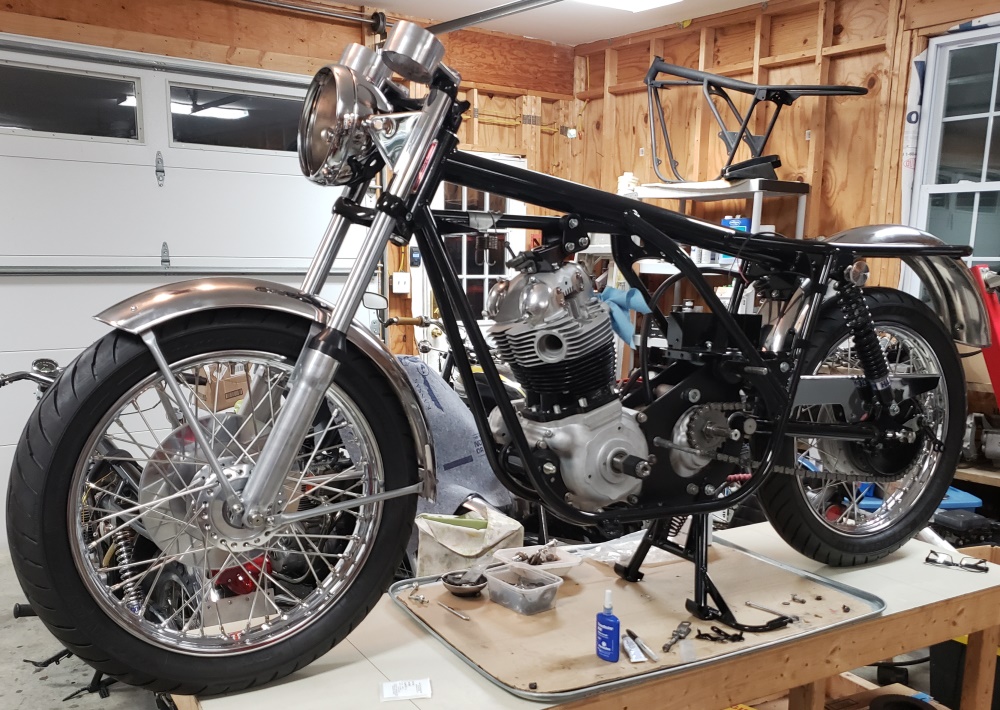
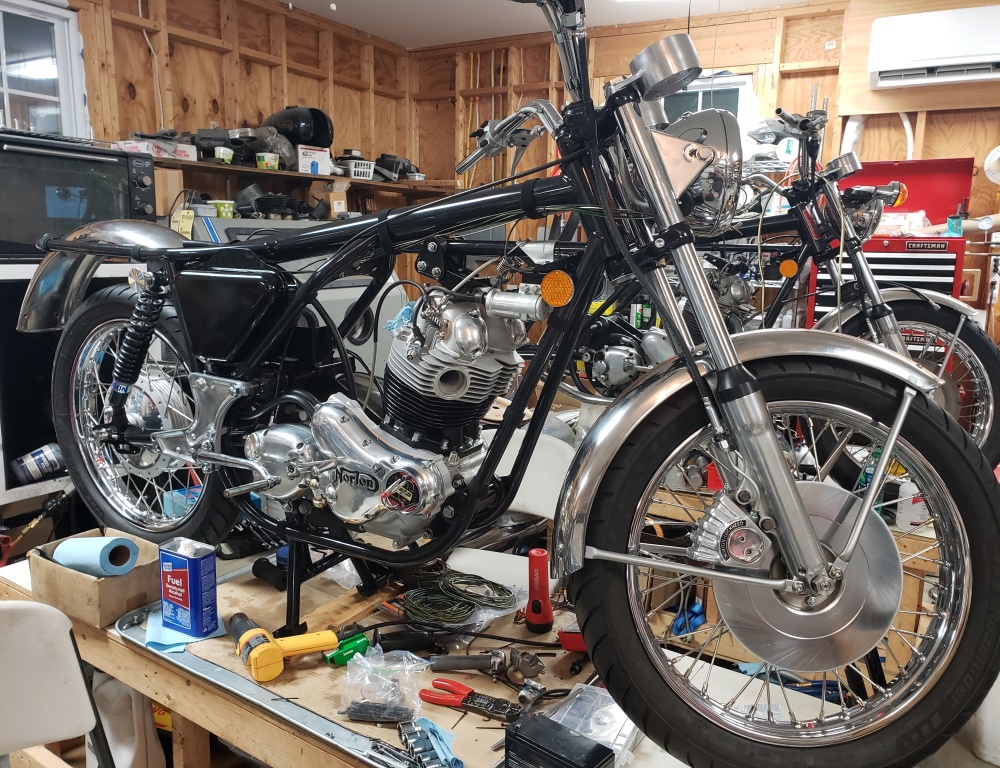
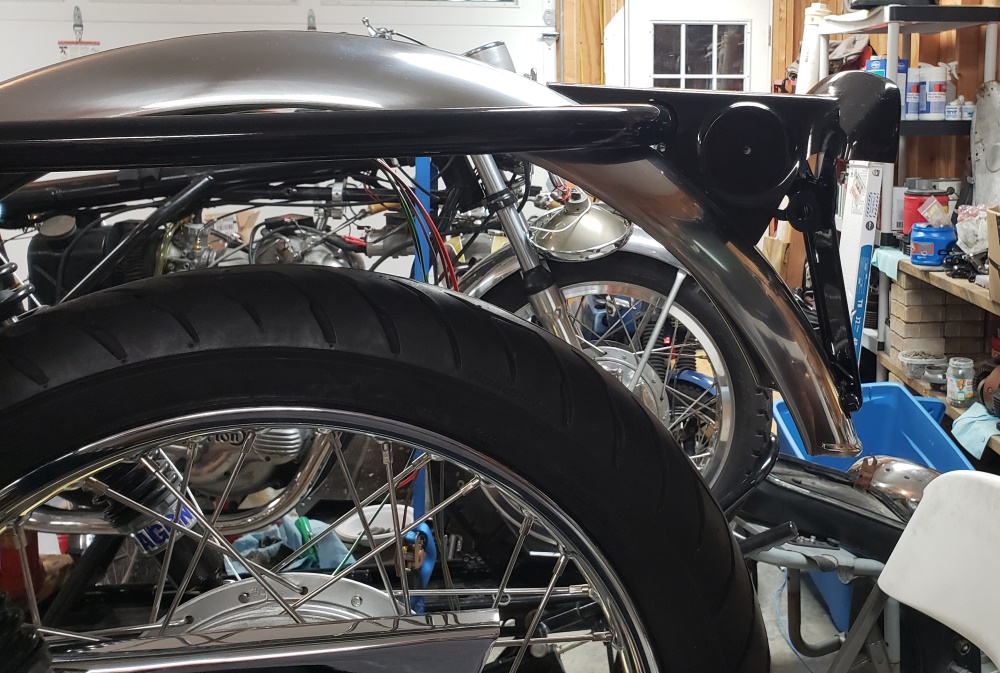
October 26, 2021 This is always a big event. The bike is standing on its own and could be rolled around. The front
fender is new and was a little fiddly to get mounted but it's aligned really well. My heart sunk when I realized that
he rear fender is drilled for the later tail light :-) Not sure if the missing holes can be drilled or if I need to
order a new fender - I didn't double check myself - I thought it was an earlier fender. Now that the bikes is on its
wheels I noticed that both tires touch while on the center stand. The shocks that came with it are 13.5" center of
eye
to center of eye - they are supposed to be 13". I'm not sure if that would make a big difference, but I will check
it
out. Norton rear wheels are usually barely off the ground.
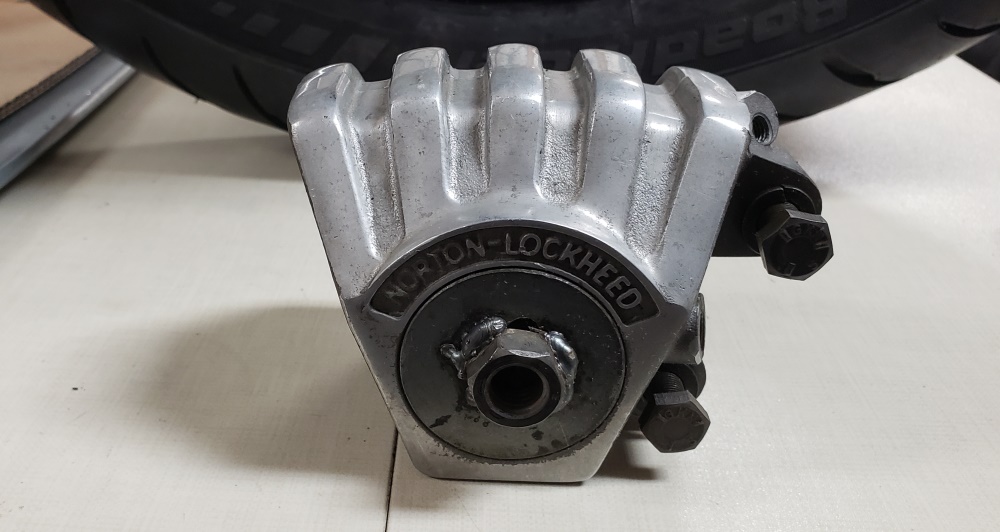
The second picture shows the caliper body as it arrived with the bike - it needs all internals and a new outer plug.
You'll be surprised the next time I show it.
October 27, 2021 Looked at the taillight parts that came with the bike - not good! The fiberglass housing looks OK
from a distance but up close it has lots of hairline cracks and the threads are in poor condition. I have another
one that is in very good shape structurally but dull. I'll look into polishing or painting it. The metal
part where the license plate goes is mangled. I straightened it enough to see if the fender will be alright after
drilling two holes - seems fine. I'll have to order the metal part. The taillight assembly itself seems
OK.
October 28, 2021 The caliper is now pretty, but I found a problem with it.
Norton calipers are notoriously hard to get the inside chamber to bleed due to the way fluid gets to it and air gets
out - the same 7/64" hole! When they drilled this one they stopped sort - the bit barely went into the chamber
and
it left a piece of metal stuck to the edge of the hole. When I ran a safety wire through the hole the piece
of metal popped off - amazing that it held on for about 50 years! The safety wire would barely go through to the
chamber - the opening was about 1/32". I'm not sure it ever was properly bled. I tried to take
pictures but could't get the problem to show.
It's easy to fix but I had to
order a long 7/64" drill bit as the only long one I had was 1/8" - the hole starts in the bleed screw hole and
I don't
want to damage that seat. The bit should be here Saturday. It only takes a few minutes to rebuild one once
it is pretty and this problem is solved.
October 29, 2021 It turns out that the bike only came with one z-plate and that was in terrible condition.
So, I went through my stash and found two usable but pretty ugly. I have server that were poorly chromed that I
keep forgetting to put in the recycle bin. So, I started sanding and then buffing the worst of the two I found.
Took a couple of hours to get it looking good. I'll work on the other tomorrow. Spoke with the customer and
decided on which handlebars. I'll need them soon because after the caliper, I'll restore the master cylinder
and
finish the front brake.
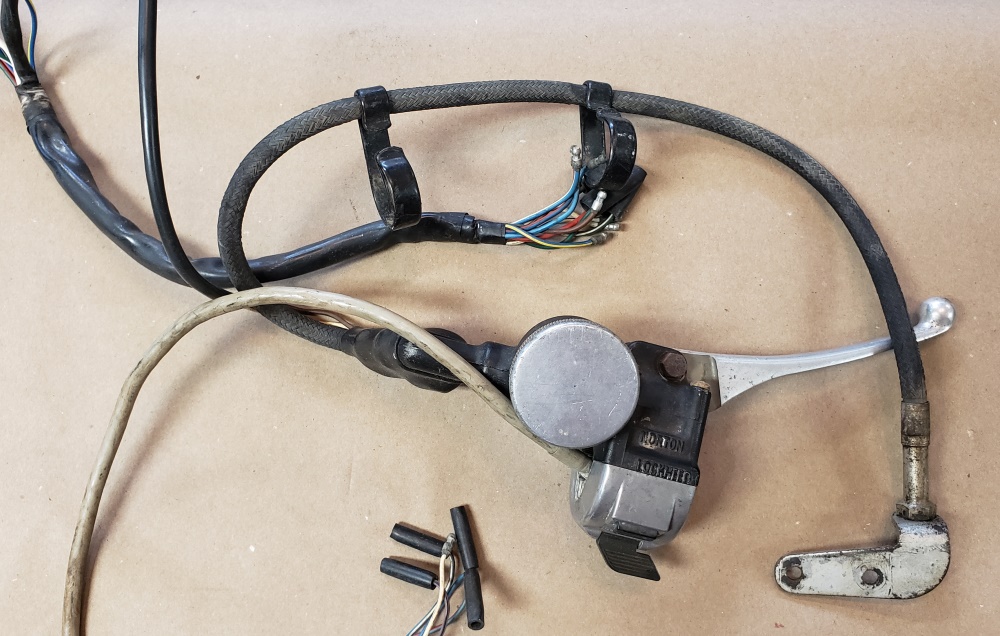
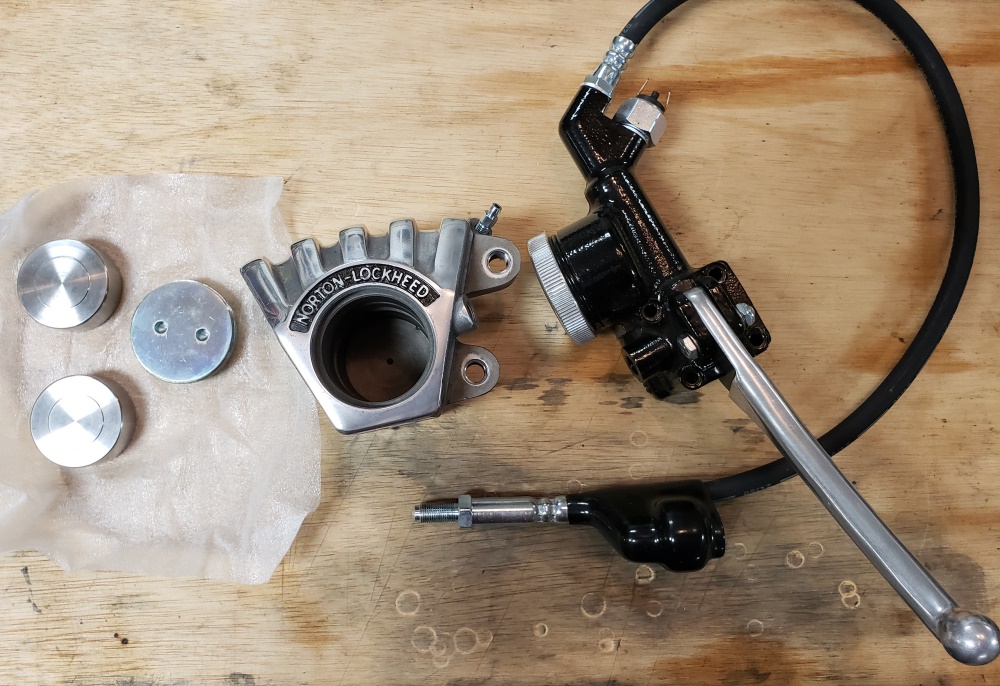
November 1, 2021 The first picture shows the master cylinder I started with. It doesn't show in the picture, but
it
was full of mud. The second picture shows the master cylinder restored and the caliper ready to assemble. I
did finish the caliper and pre-bled the caliper. The Norton caliper is very difficult to bleed so here's how
I do it when I have one apart:
- Soak the seals in brake fluid.
- Install the bleed screw.
- Put an 3/8" x 24 bolt in the feed hole to block it (this is temporary until the caliper, master cylinder, and hose
are
installed.
- Install the inner seal.
- Put the caliper on it's back (like in the picture).
- Put about 3/8" of fluid in the inner cavity.
- Push the inner piston into place. Brake fluid will squirt all over the place so push slowly.
- Install the outer seal.
- Push the outer piston into place.
- Loosen the 3/8" x 24 bolt a little and fill the outer cavity with brake fluid to about 1/4" from the top.
- Put the seal on the plug and screw it in. Fluid will squirt out around the 3/8" x 24 bolt.
- Snug the bolt. The caliper is now full of fluid and had no air - final bleeding is easy once installed on the
bike!
November 4, 2021 Every day there's something to sort out on this bike! The bike came with a new Sparx rotor and stator.
The rotor's center hole is deformed and although the old nut could be screwed in, a new one could not and the rotor had
about .005" of wobble. So, I installed a new Lucas rotor. The Sparx stator is fine.
The bike came with two sets of clutch plates and two pressure plates - one early (thick) and one later (thin). The
earlier set had new fiber plates but one used bronze plate. The later has all used bronze plates in good shape. The
stack height is not ideal with either set. So, more investigation is needed - I'll check all for flatness and decide
what to do. Early or late is OK as long as the clutch works properly and doesn't require superman to pull.
I did use the 850-style tab washer on the clutch center nut. In 72 they used a lock washer and nut but I like the
assurance of a tab washer. I also used a new nut and "shake-proof" washer on the rotor.
November 5, 2021 It took forever but the bike now has a great clutch. I can just pull it with my index finger and
with index and middle, it's easy.
Threw out several of the plain plates that came with the bike - warped. Went through all the friction plates that came
with it and all the new and good ones I had. I found a bronze matched set of plain plates, and pressure plate that came
out with the perfect stack height. I had a cNw clutch pushrod seal so I installed that - not sure they are needed
with a standard clutch, but could't hurt.
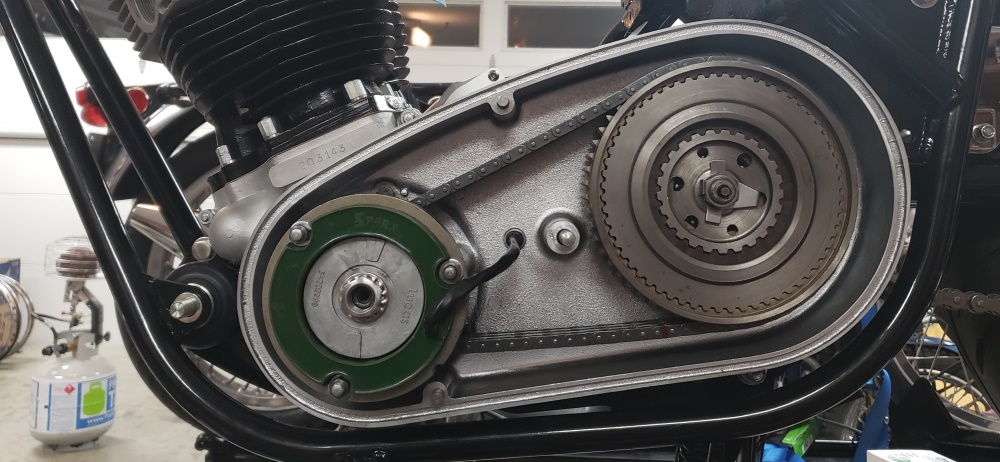
Still have to polish the cover and check the timing marks before I can close up the primary.
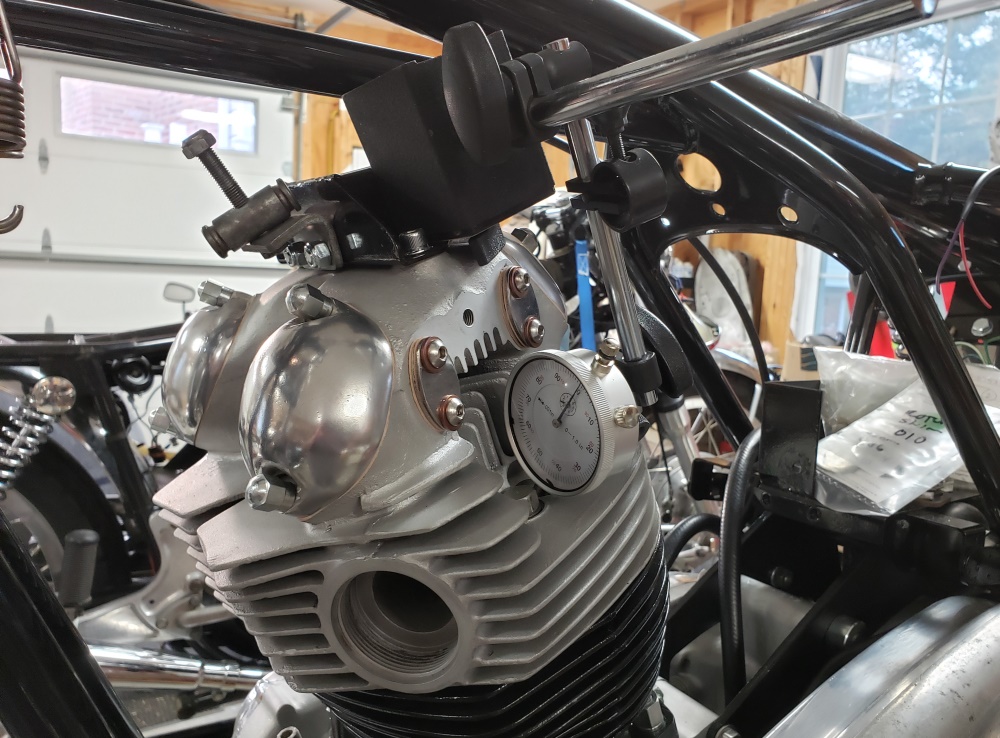
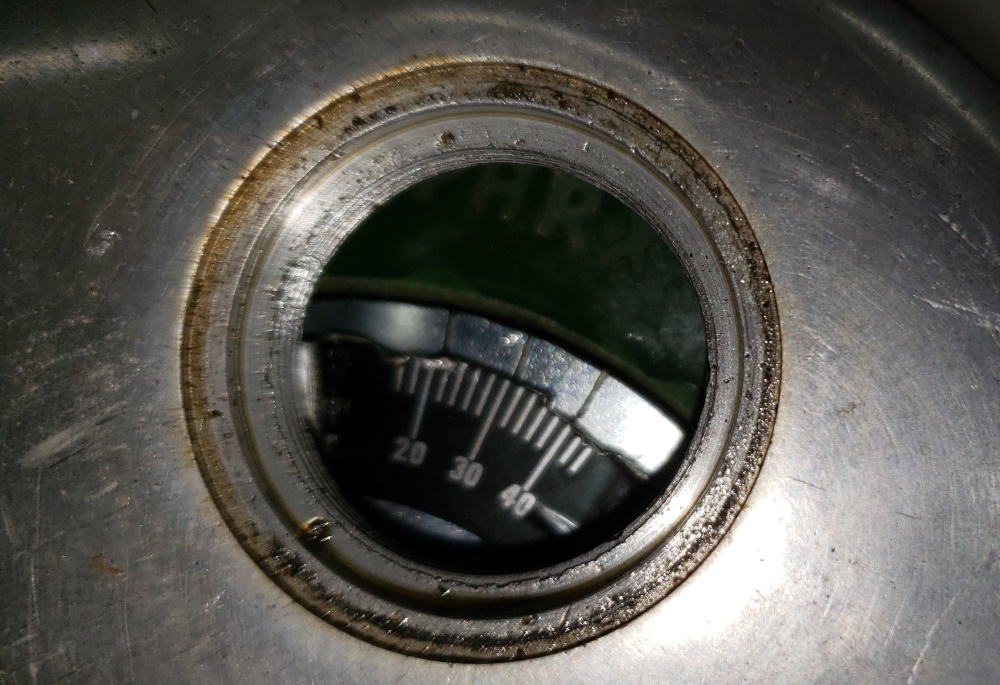
November 6, 2021 Time to check the timing marks. To do that on a Norton, you first have to put the engine at to dead center
(TDC). The first picture shows how I setup a dial indicator to do that. Once at TDC, you align the Andover Norton tool
long slots with the two timing marks on the rotor. Then put the primary cover on and look at the marks. The second picture
shows them off ever so slightly - nothing to worry about. But notice how torn up the little degree plate is - it's even
worse on the back side but I didn't think I had one so I was going to go with it for now and order one.
This primary cover didn't come with the bike. The one that did looked really good but probably was dropped since it had
a small chunk out of the sealing surface on the bottom. This one came from a bike
that the rotor came loose on - that's why the degree plate is messed up. Otherwise it's decent shape and doesn't have the
normal foot peg dent. It does have lots of tiny dents some of which came out during sanding and buffing.
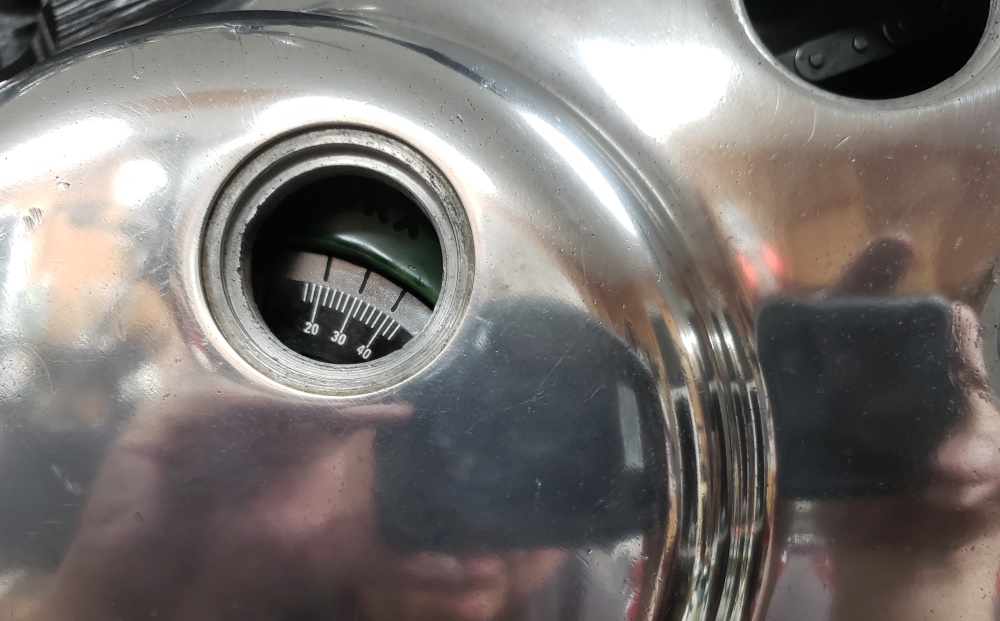
I went in the house
for a break and added the degree plate to my next order when I was told that I already had two! So, I changed it. The
third picture shows that I was able to get the replacement to exactly line up when I rechecked the marks and it shows the
partly buffed cover.
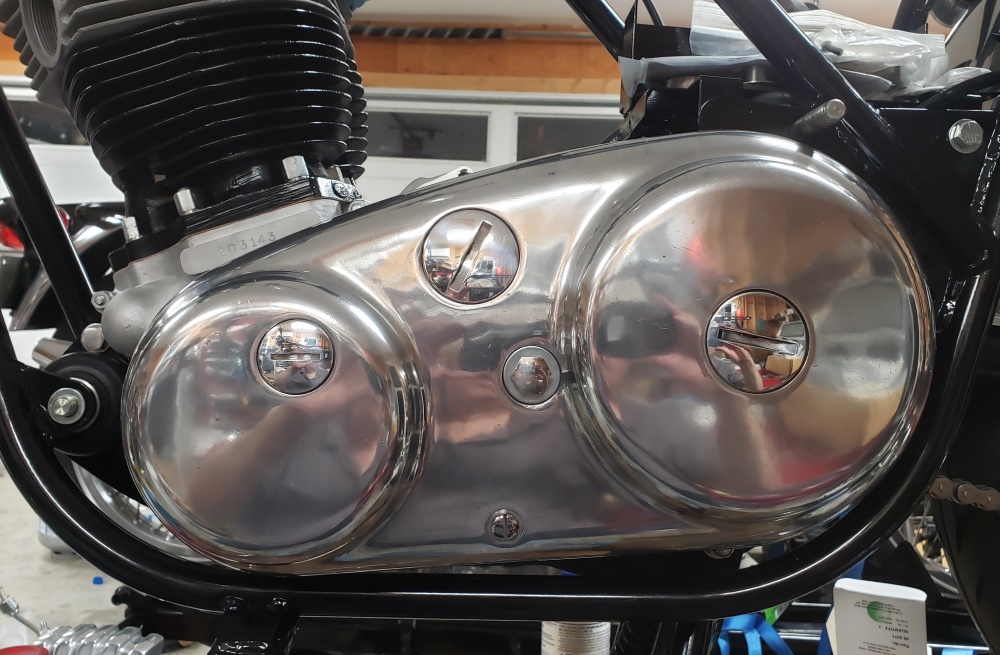
The fourth picture shows the primary all done. The buff is not a high polish job but it does show four hours of effort
and you can see lots of copies of me taking the picture.
According to UPS tracking the oil tank will be back from cNw on Tuesday. With that I can finish the plumbing on
this bike and put my rider back together as well. Tomorrow I'll tackle the second z-plate polish and try to get
them installed.
November 7, 2021 Had a bunch of non-motorcycle work to get done today, but did get some time on it. Spent a
long time finding the special spacers I had made for the drive side z-plate. These set the plate out a little from
normal and give the rear brake cable the room it needs to keep from chafing. I hate it when I put things were they
won't be lost and then forget where that is! Installed the timing side z-plate without problem. Then I
forgot that I needed longer bolts for the drive side :-(. I've ordered some. I found a usable timing side
foot peg mount but it had the foot peg broken off in it. Took a lot of drilling and fussing to finally get it out.
Then I realized that the bike didn't come with the studs to mount the foot peg mounts. Those can be replaced with
5/16"-18 bolts 1-1/8" long, but of course, I'm out of those. Oh well, there are plenty of other things to
do while I wait for parts.
November 8, 2021 The bike didn;t come with coils or the coil mount so I went through my stock and found a matched
set of Lucas 17M6 is good condition and tested them - they are good. Found a coil mount, blasted and powder coated
it. The coils are installed. Then I realized that I have three bikes to wire right now, so I inventoried my
wire and connectors and placed an order for what I need. The long pole is the fuse holder - they are no longer
available unwired and they don't come with the right color wire. I'll have to figure out what to do about
that!
November 10, 2021 I forgot to update yesterday but I did get some things done then and today. The oil tanks arrived from
cNw so I was able to installed the one for this bike and finish the main plumbing. Still have to run the rocker feed and
I have to see if I have all the parts to make an oil pressure relief valve - the bike came without one.
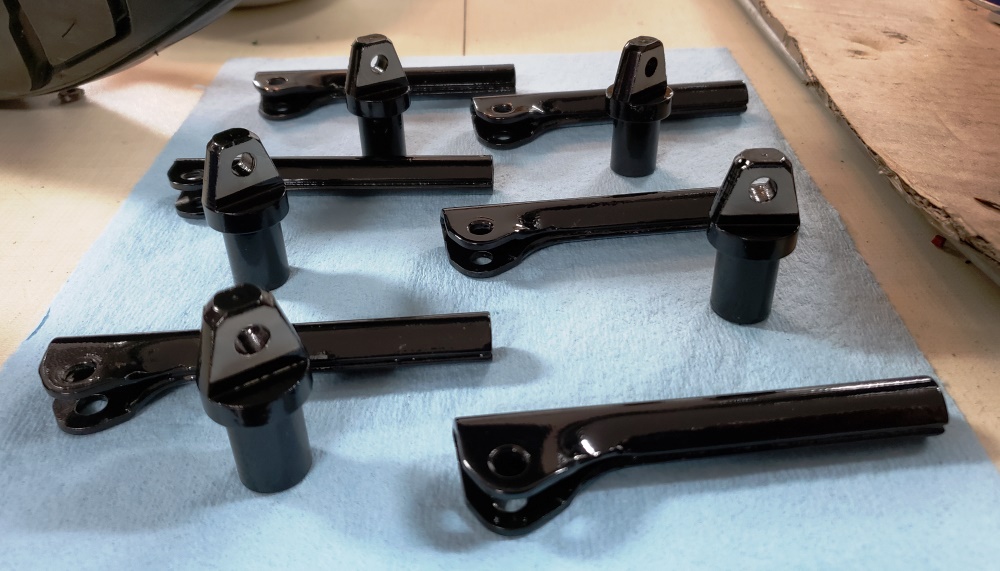
The bolt came in so the z-plates are now fully installed and the timing side foot peg is temporarily installed - still
waiting for the proper studs for the foot pegs. I needed to install it because the threads were catching when I tried to
screw in the actual peg so I needed to chase the threads - much easier with it mounted. The chrome is no perfect on it,
but there is no rust. The drive side is another matter. It came with two foot peg mounts and two rear brake pedals - all
rusty.
I restored the clutch side switch console and it and the clutch lever are installed. Still need to restore the throttle
side so I can mount the master cylinder and caliper.
The coil mount is powder coated, the coils are installed along with the jumper between them, and the MK3-type head
steady is installed. The head steady will need to be adjusted once it comes off the table - can't do it while on the
center stand.
November 11, 2021 The plumbing is done. You'll probably notice a little wiring is happening as well. I restored
the master cylinder switch console housing, internal, and cable, but I'm missing the correct flip lever to put it
together - I probably have one, just need to go through boxes (what's new). Venhill made the crossover rocker
pipe
a little long this time, So I'll come up with a rubber sleeve for it so it won't rub on the frame - it won't
be seen.
I plan to install the Tri-Spark ignition tomorrow if I can find some proper black/white wire. I have an order on
the way of everything I need to wire all three bikes except the black/white wire and the fuse holders - British Wiring
is out of stock on both and I haven't found another source so far.
November 12, 2021 I made some progress today. The switch consoles are done and the wires run to the headlight
shell. Therefore the master cylinder is installed as is the caliper and it's all bled. I said before that the
bike came with two terrible drive side foot peg/rear brake pedal. On closer inspection one foot peg is not bad and
the other brake pedal is not bad. Neither is perfect but at the cost of new - I'm sure they will be fine.
They are certainly better tan the ones on my rider! Spent a while cleaning and polishing them and will install once
the studs I ordered arrive..
November 15, 2021 Some parts arrived so the foot pegs and rear brake as all installed.
November 19, 2021 I've been on some tangents the last few days. I finally found some black/white wire so the Tri-Spark
ignition is installed, tested, and statically timed and I've started the rest of the wiring.
November 20, 2021
Simple jobs - not always simple! This not so simple job is quite the scenario that built on several factors.
- The bike came with a giant carb that left no room for the "hamcan" air filter, so it came with no filter parts.
There was also no room for the battery box due to the Harley oil tank it came with but it did come with a loose battery box.
- The battery box support arms were bent and it was a rusty mess. I already straightened, powder coat, and installed it.
- I mount the Tri-Spark MOSFET rectifier/regulator (regulator) on the back of the rear air filer housing.
Since I'm wiring, it was time to mount the regulator so I could route the wires. That's when the long slog started! it's
often the case that mounting the air filter rear housing is fiddly but this time it would not fit at all. Turns out that
the battery box was way too high in the front and the housing top mount was bent way out of shape. Since the battery box
is a part of the rear fender mount it's no little matter to getting it right. Once that was corrected I started working
on getting the top mount correct. That wasn't hard. Then I needed to be sure, considering what I just went through, that
the actual air filer fits and that the ignition switch mount was correct. No way! The tabs for the through bolts were
way off and the ignition switch arm was very screwed up.
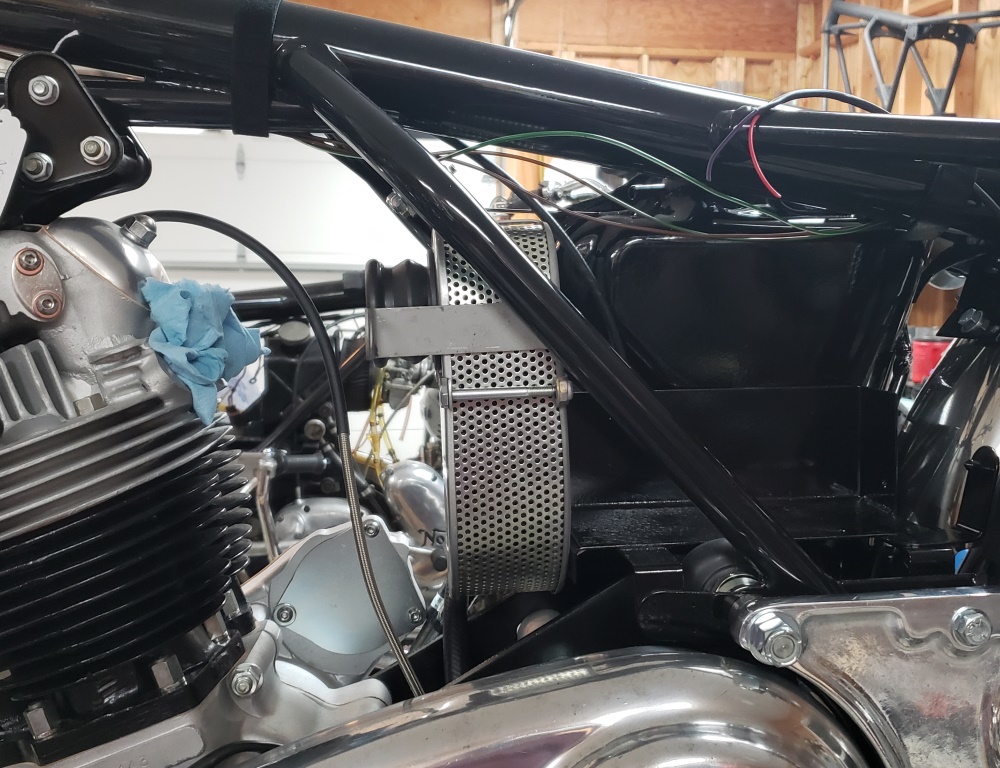
The picture shows it all fixed and together. Now I can powder coat the housing back and finally install it. it's not noticeable,
but this is my narrow air cleaner. Looks exactly like the OEM filter but is about 1" narrower so changing is it simple.
November 23, 2021 Lots of things going on but I'v only done a little on this bike. Most of the wires are run but not terminated. The Regulator is installed so I can figure out where those wires end.
December 4, 2021 I found a new way to (actually re-found) keep from getting things done! Went for Thanksgiving with family last Wednesday and that night we went to a packed bar to watch my Grandson perform. Thanksgiving Day was great and I felt good. Friday morning I woke up with a dry cough - didn't seem like a big deal and I felt fine otherwise. I was driving home mid-day and the cough kept getting worse. On the way I stopped at the grocery store and my office to get the AN and Wassell parts that had arrived that day. By the time I got home I was having real trouble breathing so I got ready in case I needed to go to the ER. About 6pm, it was clear and I headed there. While waiting in line to check in, I was struggling and a security guard saw that and grabbed a wheelchair - as he came up behind me I took my last breath. I came to in a little while with an O2 mask and two IVs. I got home from the hospital around 6pm Tuesday. I'm still a long way from perfect, but I'm doing OK.
It was not COVID, FLU, or pneumonia. I never had a fever.<
I needed the tail light on to work on that wiring and when I tried to mock I up, I realized that I had installed the later rear fender. The easy thing would have been to drill the missing holes, but that would have left extra hole and I don't do things like that. So, I ordered a fender along with the missing taillight parts. Put that fender one and could't get the taillight fairing on. After a lot of fiddling, got it all together and properly lines up. The fairing cutout was too tight and the two small holes for the fairing in the fender were not in exactly the right places. Everything must be worked out a little at a time and it is all good now. Also restored the rusty parts of an original taillight I had so once the wiring is done it can all go together.<
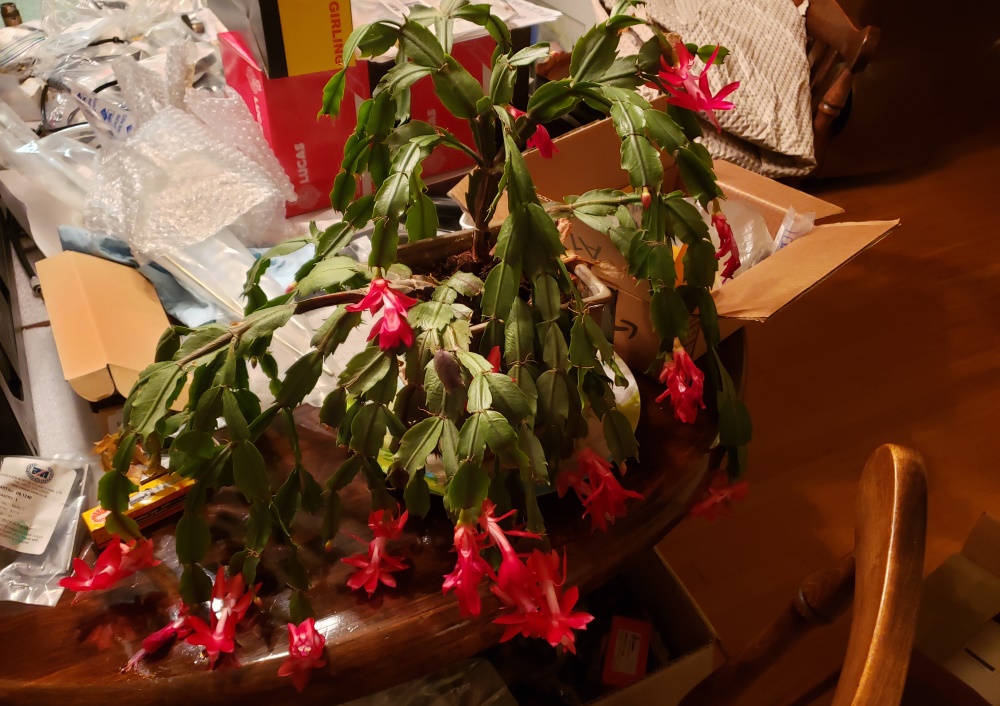
The second picture is of a "Christmas Cactus" that has been sitting on my dining room table (or should I say parts table) for many years. People always assume that I don't take care of it but I have for probably 18 years. This is the first time it has bloomed anywhere near Christmas but it usually blooms once or twice a year. I don't do anything to make it bloom. When it looks really dehydrated, I give it a drink, sometimes with a little plant food - that's why people think I don't take care of it. If you over water them they die because the roots rot.
December 10, 2021 I've probably mentioned before that I've gone crazy! I have three more bikes on the way along with a pile of parts in boxes about 8 feet long, 4 feet high, and 3 feet wide. There was no way that would all fit. So, I've spent a lot of time rearranging, throwing away, and organizing. Then, last night my stepson helped me move the bikes around to put them order of how I will work them. Also, the 69S that I was working for a customer is now mine and on a back burner so it's off the stand. When the bikes and parts get here, I will go through all the boxes, put clean things in clean bins, label and put them in the house.
Now if I could just get someone interested in the most desirable Triumph, the beautiful 70 Bonneville I built - I might have enough room to move! Another of the bikes coming is built as a Fastback LR - and is also very nice. It shouldn't need much. The other is yet another Combat Roadster - it will be on a back burner unless someone commits to buy it.
I hope to finish the wiring on this bike this weekend. After that, its carbs and exhaust to get it off the bench - those I have in stock. I still need a tank and side panels to send off to be painted.
December 12, 2021 I took my last steroid yesterday so I'm no longer in superman mode, I'm back to old man. I didn't quite finish, but the wiring harness is made, circuits tested and installed. The taillight is fully installed now and tested. I have quite a few wires to terminate and connect but that's the easy part. I spent a LOT of time working out what to do about a fuse holder since they are no longer available. I finally found one at an auto parts that looks about the same but is heavier duty. Unfortunately, it already has wires. It took forever, but I was able to un-crimp the wires so I can use the proper colors (Brown/Blue).
December 13, 2021 Stuck again! Wiring going fine until I started on the master switch - the new one I have is not marked (which terminal is which). No biggie, just check with an ohmmeter - nope - the switch is no good! No problem, I have more in stock and they are genuine Lucas. Next problem - they come without the keys and lock and I'm out of those. So, I placed an order.
I'm glad this happened - I forgot that the ones I bought were junk and the genuine Lucas are quite good.
Also found out today the EMGO Roadster tanks are due in January and the UK made side panels in February. I have the tank and side panels on backorder and they will be drop shipped to the painter. With a little luck, the red set for this bike will be here in February. Along the way, I'm buying extra sets so I have them when I need them
December 16, 2021 I've sorted through most of the parts that arrived with the big shipment and I got the lock and keys today and finished wiring the master switch. Everything in the battery area is done and power is getting to everything it should. Just need to finish the headlight wiring.
December 17, 2021 Had a IT business mess today so never got started. Hopefully I'll have a productive weekend.
December 19, 2021 Finished sorting and putting things away. Filled my recycle tote, my neighbors recycle tote, and four giant lawn and leaf bags with all the packing!
Then I got back to wiring. I still have the front brake switch and speedo/tacho harnesses to make but otherwise the wiring is finished and everything works.
Remembered today that I have to send the speedo and tach for this bike and for a Trident that's almost done being rebuilt. My guy is quick so it shouldn't slow things down.
The mounting brackets for the exhaust arrived Wednesday so I can install that now and I have a new set of premier carbs set aside for this bike so I'm getting there.
December 20, 2021 The wiring is done and I've started on the exhaust. I don't know if it really helps, but I've always painted the inside of new exhaust pipes with high temp white or silver paint. An old guy told me to do it in about 1970 and I've been doing it ever since.
I did these with Rustoleum Ultra High Temp silver paint. I force rags through them soaked in acetone to make sure there is no oil. Then I spray in both ends and turn every which way and repeat four times. You can see them under the bike propped up so that any runs inside go where more paint is useful.
December 21, 2021 Installed the exhaust today. The pipes and mufflers are both from EMGO and are very high quality. You certainly can't say that about all their products but you sure can about these!
December 22, 2021 If I weren't so old and could actually do it I would kick myself in the ass! Got out the set of carbs I've been saving for this bike - new Amal Premier PACK 140 which is correct for a 72 Combat.
Problem 1: Amal was supplying all carbs for 750s with #17 pilot jets and #19 for 850s. The Combat really wants #19. I sold my last set of #19. They are hard to find on the web, easy from Amal and they are expensive from Amal but ridiculously expensive from others. Today, Amal supplies #19 for all Nortons and for Triumph 650/750 so I didn't worry about ordering more. I can get around it because I have several sets of carbs in stock that I will use later on so I can get a set from of those sets. Of course I spent a long time looking for them before I realized that.
Problem 2: This bike came with two intake manifolds, but they were mismatched (fortunately I caught it). Norton made at least three versions: 30mm x 30mm, 32mm x 30mm, and 32mm x 32mm. I have quite a few manifolds, some as they came from the factory and some opened up with a Dremel. The Combat is supposed to have 32mm x 32mm and after sorting through all my parts I found a pair, an ugly pair so I've started cleaning them up. The thing that makes this hard is that none of the factory manifolds were actually the sizes listed and they seemed to change over time. For instance the 30mm x 30m are actually supposed to be 1-3/16' x 1-1/8' (28.6mm x 30.2 mm), and the 30mm x 32mm are no longer sold.
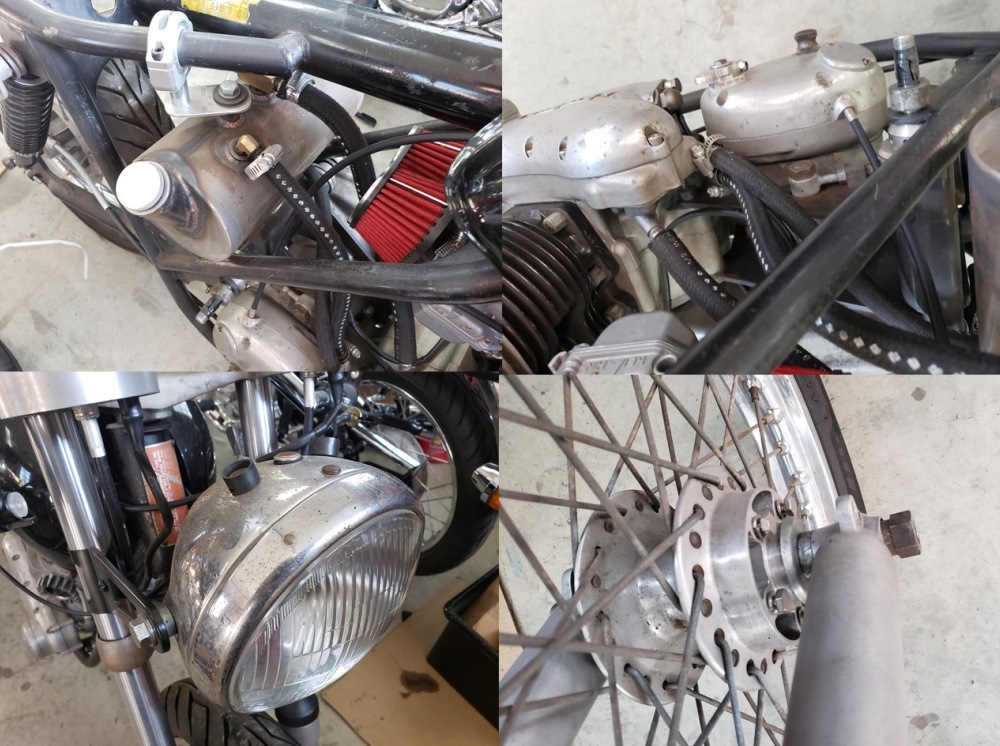
December 24, 2021 I was about to say something that would't make a lot of sense because I never showed what I started with on this bike. It had a pair of gigantic racing carbs and a goofy chopper oil tank along with the rest of what you see in the next picture and the following compilation of pictures. After those two, the narration continues...
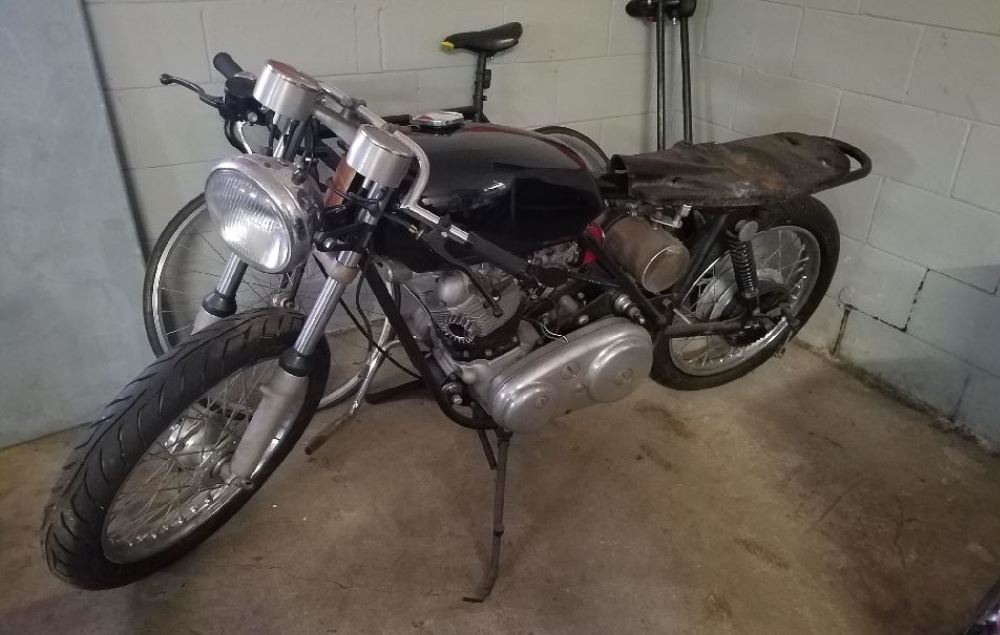
So, the bike had no carbs, oil tank; and, a lot of other things it had were junk.
The intake manifolds are restored and the new Premier carbs have been thoroughly checked, pre-set, and installed. Also finished the breather line routing today.
This is kind of a big day for this bike for two reasons:
- With some throttle cables and fuel lines - it could run!
- For those wondering what it costs to do this - I now have over $8000 in cost in this bike. The only big costs left are paint which will be around $1000 if I don't have to ship a tank. I'm hoping the EMGO tanks will be available at JRC early next month and they can drop some to my painter. Shipping a tank to CA now costs about $100. The side covers are already there.
I was stuck again today on customer IT problems. I plan to make the throttle cables tomorrow, install the fuel lines, make the battery hold down, and restore the passenger pegs. Other than double checking things, and the tank and side covers, that should be it for this bike until I can test it and tune it.
Good thing because I've over promised for late spring. This is what I can remember of the top of my head (have a spreadsheet with it all).
- Finish this one.
- Build a 73 850 from a customer's basket case
- Fix an 850 with a smoking left cylinder
- Install a cNw e-start
- Finish the T150V I was working on when this all started
It would be nice to finish putting my 74 850 rider back together so I could go for a ride sometimes! I was spot painting and doing things like replacing the isolastics when I got to busy to work on it.
December 25, 2021 Merry Christmas, especially to those alone with nothing better to do than work on bikes!
Well, I got part of what I planned done. The fuel lines are installed. When I got the passenger pegs out to restore them I realized that they were too far gone. The mounts were damaged and very rusty and the pegs were almost rusted through. So, I went through boxes and bins and found three pairs - all needed to be restored. Last time, I simply powder coated them and that was a mistake since they would not go together correctly. So, here's the process I used this time.
- Cut the rubber off, took them apart, and sandblasted. Six pegs came out good. One mount had bad threads and I couldn't get them to clean up, so I only had five good mounts.
- Tin/Zinc plated them. Since they pivot on bare metal, the plating will help stop rust.
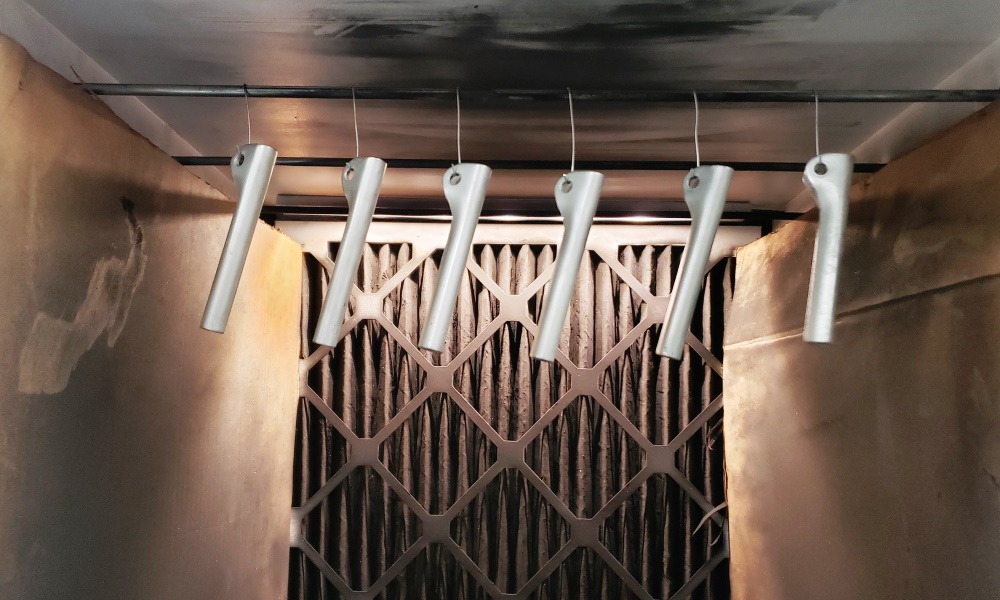
- Powder coated the pegs - the first picture shows them hanging in my cabinet waiting to have the powder applied.
- Masked the mounts and powder coated them.
- Since the powder doesn't get inside the tube part of the peg or in the swivel surface, I used pipe cleaners to paint the insides. This will keep them from rusting inside and rust dripping out on the mounts.
- The second picture shows the pegs and mounts almost done. I put a thin coat of black paint on the bar metal of the mounts. It won't hurt anything and will wear off where the actual swiveling happen. Of course I'll use a little grease when I assemble them.
Sometimes the littlest things take most of the time! At least I have one extra complete set ready for the next bike and 3/4 of another ready.
Dec 26, 2021 Pretty, even if I do say so myself! While gathering everything to make the throttle cable I realized that I'm out of single-pull twist grips - there has always got to be something to slow me down! I did a bunch of little things today. The passenger pegs, gearshift and kick start levers, and the rest of the rubbers are installed. The points cover is polished and installed.
December 27 2021 I realized this morning that I could temporarily use a dual-pull Amal-type twist grip to make the cables and switch it later, so I did. The carbs are sync'ed now. I may not update this for a while now. I need the speedo/tach back and the tank and side covers to finish but otherwise everything that needs to be done on the table is done. I'll probably try to make headway on the basket case I need to build.

January 21, 2022 I expected the tanks to be available by now but still no. Now it will be the first week of Feb. I have five ordered so I won't get into waiting game again - at least for the current builds. The side covers for this bike are already at the painter's.
January 25, 2022 Click here for a general update on the parts I've been waiting for.
January 29, 2020 The speedometer and tachometer are back from Vintage British Cables and as usual they are beautiful. He tank and side covers are being painted so we're getting close to starting this bike. Sill need to go over everything to be sure all is tight and once off the table recheck the chain adjustment.
February 5, 2022 I've gone over everything. It's time to get it off the table and once it warms up put a temporary tank on it and get it tested. Right now I'm so packed in I can't take it down and put something else up. I'm working on a plan to fix that. I also got my rider back together enough that I can take it down. I wish I had time to finish i, but I don't so it needs to come down so I can build the other customer's basket case.
February 12, 2022 I got two 4' wide, 6' tall, 18" deep rolling wire shelves. I've put one together and I put a lot of the pile of parts that were on the floor on the shelves. Being able to roll them around is helpful since I don't need an aisle way around them and they take up less space vertically. I'll put the other one together and it should have more than enough room for the rest. I will still have way to much stuff in the space but at least there will be room to roll the motorcycle tables around where I can swap bikes.
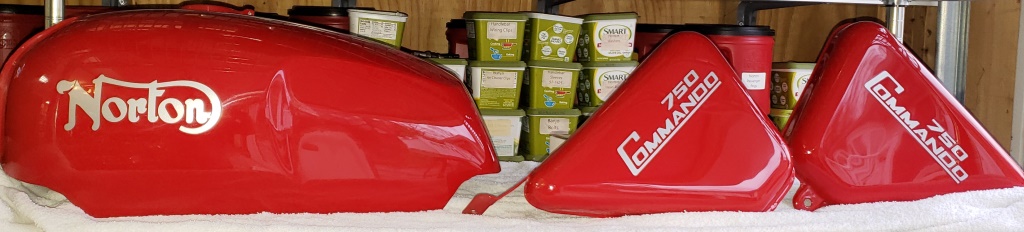
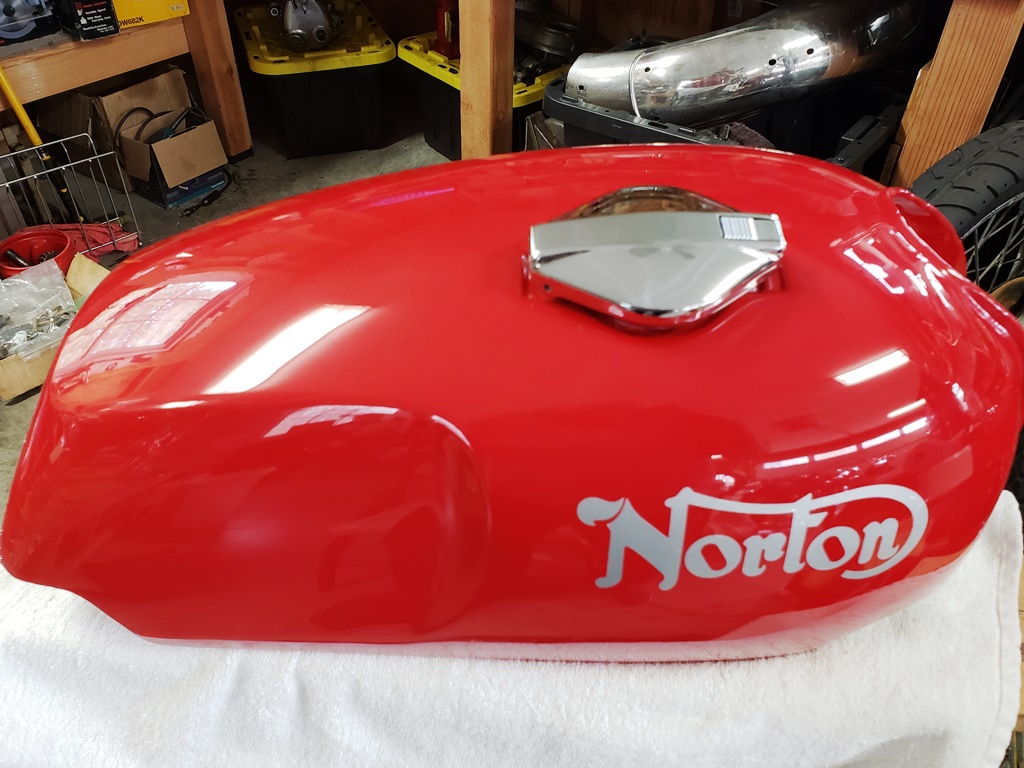
February 16, 2022 It was "The Ten Commandments Time" today - as Ramses II said in the movie: "So let it be written, so let is be done". The bike will be Signal Red, the lettering will be silver, and there will be no stripes.
February 22, 2022 Got a little done today. I started to install the custom battery hold down I make and thought of (I think) a better way. The battery is sitting on foam, is surrounded on three sides by metal backed foam, and is held down and in place by a Velcro strap. This has the advantage over my other way of not needing two 7/16" wrenches to get the battery out.'
Finished statically synchronizing the carbs and in the process remembered that I didn't have a proper twist grip and used a dual-pull. I need to resolved that - one because it's unprofessional, and two because the cable is 3/8" too long for that one.
Went over everything again checking for tightness. The only outstanding thing is the tab washer for the nut on the bottom of the triple-tree but I need to do that with the bike on the ground.
I've just about got enough room now to take this one down and put something else on the table.
March 7, 2022 Got a call today. The tank and side covers for the Combat have been cleared. They need a couple of days and then will cut and buffed. They should be here sometime next week.
March 18, 2022 The tank and side covers arrived - beautiful work as usual. The lighting in the garage is not great for pictures, the tank and side covers silver is like the side panels not the tank.
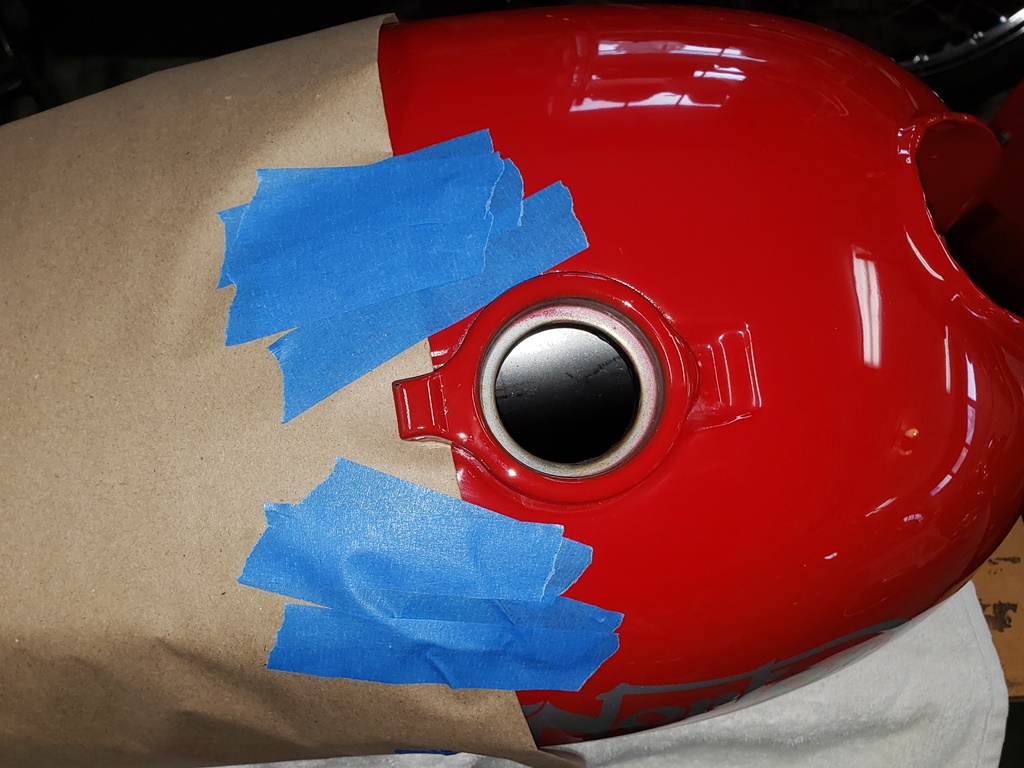
Now I have the hard/scary job of installing the gas cap - yikes! I wish Norton used the caps Triumph/BSA used!
It's supposed to start raining overnight and all day tomorrow. I would love to finish it this weekend but the weather will probably stop that - shame - we're supposed to make it to 80 tomorrow.
The other long pole in the tent is finding a seat - I haven't found new ones for about 6 months for any sort of reasonable price. I have a couple in bad shape - might have to restore and recover one but the only covers I have are gold rear lettering and with silver on the tank and side covers that's not good.
March 20, 2022 Well, the scariest job on a Norton is done without incident! Putting a new gas cap on a new tank with an expensive new paint job - now that's scary. Besides getting it on, you have to get it to close. I love these EMGO tanks, but the hinge hole is slightly low so once you get the roll pin in, the cap won't close. It takes careful prying to get the rear portion raised enough. I leave it just able to close and open as over time, things will loosen. Later installed the petcocks and studs. The tank is ready to go one th bike.
April 12, 2022 Finally, a nice day. Sunday I was planning to ride my Bonneville to the Norton Club meeting, but it was 46 degrees and rainy. Yesterday was not much better. This afternoon it was sunny and hit 80 in some areas.
I would have taken this one out for tuning and testing, but I ran into another problem. The twist grip I had on it no play and the new one I bought for it had way too much. The new one is pretty junky so I'll fix the cable to work with the old one.
I gave it a good once over and besides one big problem there are a couple of minor things to do. When I was wiring I didn't have sockets for the speedo and tach so I didn't make that little harness - I have them now so I can do that. I'm out of the grommets for the battery cover - it's on for the picture without hem but I can't leave it that way. Neither of those stop me from tuning and testing tomorrow (if the weather people aren't lying).
The big issue is the seat. This bike came with a piece of crap. No one (other than India) has new ones right now - I've had them on back order for about six months. I do have one quality cover, I may have to restore a seat. I hate that because although new ones are expensive, the cover, foam, and time cost more.
April 13, 2002 I should never say when I plan to do anything - it embarrasses when I don't make it! Simple 10 minute job:
- Remove the throttle end ferrule from the throttle end of the cable.
- Shorten the outer 1/2"
- Solder on a new ferrule.
That's something I've been able to do for 50 years! Well, not today! I tried to solder that ferrule on for a LONG time and never got it to flow. Tried on a new piece of cable - no issue. That cable is some different material. Finally broke down and switched it out. I HATE 2-way junctions! Why not the Triumph way - dual pull and do the carb sync with in-line adjusters! I hate the junctions because you can't get them apart without removing the slides and you can't do that on Norton without removing the tank. Anyway, that's back together and the carbs are re-synced. Then I realized that I didn't powder coat and install the license plate brackets I make so had to do that - don't dare test ride without plates.
It's hard to believe that I messed with it for five hours and
only effectively put on the license plate!
I did find Roadster seats today at The Bonneville Shop and they say they are UK made. Strange because Wassell, Andover Norton, and RGM can't get them. I suspect that they are made in India and sold by a UK company - found that with side covers a couple of weeks ago. They want $385 delivered which is about $225 more than I paid Wassell for a UK-made seat before.
April 14, 2022 Disappointed! I always brag that my rebuilds start and idle on the first kick and if not, definitely on the second. Maybe it's because I'm 72, have a bad hip, this is a Combat, and it was lightly wet sump'ed. The first kick was not nearly robust enough and no fire. The second kick fired but died. Turned up the throttle stops ½ turn, and one the third kick it was not only running but idling at 1000 rpm. Grabbed the camera and took way to short a video - it's always best to have help for this.
So, I walked to the drive side planning to strobe the timing as soon as I saw oil turning to the tank - what a mess! Oil all over the front and side of the engine. Quickly shut it off and investigated. See the red oval in the picture. Those are polished stainless rocker shaft covers. It turns out that the tabs on the inner cover are too wide and it wasn't sealing. Since Norton supplies full crankshaft oil p0ressure to the rocker about eight ounces was squirted out in 30 seconds. I
used an OEM inner cover and the stainless outer one to fix it. Then started back up to be sure it was fixed - it was but not the pressure was causing the drive side intake cover to leak. Fixed it the same way. The timing side is not leaking but I will fix them too. I don't want to run the bike any more until I can take it outside and wash all the oil off - don't need burned on oil on a just-finished bike!

April 15, 2022 Adjusted a few minor things that you really have to have the bike out about ready to go and someone sitting on it. For instance, the handle bars, control angles, drive chain tension, etc. then it was time for a very short test ride to get it hot enough to re-tighten the exhaust and do an overall inspection - all good.
Then a little longer, faster test ride and the idle would't come down below 3000rpm! I knew exactly what that was so off with the tank and readjusted the carb to adjusters to take up the slack in the short cables to the 2-way junction - I've probably mentioned before that I hate the Norton way - this is the last bike I'll do with dual carbs and a single-pull throttle. The Triumph dual cables and twin pull throttle can't have the problem and syncing the carbs is much easier.
Now it was time for a movie. That's my stepson riding. The bike pulls strong! He didn't go far because I was waiting to make the movie. The plan was to send him to fill it with gas and then go for longer shake-down ride. Notice the puff of blue smoke from the left exhaust as he let off in the court. That ended the riding. I'm sure the left intake valve oil seal has come loose. Assuming I can find the tool I need, I'll fix that without removing the head. Norton is goofy in that full crankshaft oil pressure is sent to the rockers and the intake side drains into the timing chest through a small channel through the barrels which is to the right of the timing side intake valve. So, the intake valves need seals and the left side especially needs one since the drain is on the right. The trouble is that if the seal comes loose from the guide and rides up and down with the valve it actually pumps oil into the valve guide!
BTW, the seat we stuck on it is UGLY but they are too hard to ride without one.
May 2, 2022 So, the valve seal was fine. Therefore I had to remove the head - something I hate in the frame and something I find very hard to do by myself at my age and with arthritis. It quickly became clear that the copper head gasket was defective - I should have checked but it's the first one in 55 years. I didn't have another copper one so I used a fire-ring composite. Once all back together it started right up but had a noise that sounded like it was coming from the head. This time my stepson was here so getting the head off was much easier. As he walked away with the head he thought he heard something fall out of it - he was sure so new gasket and back on it went. Now the noise was louder! I thought I must have the valve timing wrong or maybe it was in the primary or who knows. So, timing cover off - no problem found. Primary apart - no problem found. Today, I took the head off again. I can see where the drive-side exhaust valve has been just touching the piston! So, I compared
the head with another Combat head I have and it is clear that this one has been decked .020"-.030"! Such a shame - the head has new guides, valves and springs and is very clean. I'm hoping the other one I have has good guides and seats - it has no valves or rockers so I have to move them over. I may have to change the guides if they are worn. Of course, I have to get it clean and looking good first.
May 10, 2022 So, the Combat head I compared against not only wasn't Combat but wasn't even Commando! It has a cast-in "C" on top, not a stamped "C" - fooled me!
No harm, no foul; I have a partly build Combat with a bad title so I took the head from that. Beautiful with new guides, valves, exhaust thread inserts all done by Jim Comstock. While installing it, the left front stud pulled! I started comparing those heads and found that they were decked about the same. I had measured there to be 0.005" difference in the two sides of the first head, but I did that with a caliper as I didn't have a proper depth micrometer. I got a depth micrometer and realized that there was only 0.0025" difference so I lapped it in. Then I started wondering about the pistons. For a moment I thought I had them in backwards. They are not marked left and right and the exhaust side it not marked. I looked at the bike I took the head from and it appeared the opposite of what I had, but those pistons are marked left and right but no exhaust marking. I wrote Jim Comstock some emails mostly as a sanity check and I finally confirmed that I had them right and the other bike
is backwards!
A couple of weeks ago I bought a much better endoscope than the one I had. It can look down and to the side at the same time (two cameras and lights). I put the original head on with just the four easy bolts and the exhaust pushrod. I could clearly see that the valve was not hitting. The donor bike had the high-dollar steel pushrods so I used them to make it easier to install the head and put it on.
I finished putting it back together today and it started and settled in idling at about 800 rpm on the first kick, but somewhat missing on the right cylinder. A quick adjustment on the right side air screw and both cylinders were running smoothly. Once it got warm, the idle was about 1000 rpm. NO NOISE! YAY! Tomorrow I'll check strobe time it, check everything over, and go for a test ride.
May 11, 2022 Low energy day. I've checked the bike over pretty well but didn;t have the energy to get it out for a ride. Tomorrow morning I'll get a steroid shot in my foot and I'll have help in the afternoon so I should ride then. Spent a lot of time putting things away and moving bikes around.
May 12, 2022 Gas fill-up and shakedown ride. Clutch and gearshift not properly smooth at first but that all cleaned up on it's own. Have a minor leak at the oil pressure switch (Don Pender) - easily fixed - I reused the washers when I re-installed after checking the valve timing without annealing. Another interesting thing is that he bike came with a new set of Hagon rear shocks that are a little long. The ride is nice but the rear wheel just touches the ground on the center stand (brand new). Need to think that one over.
Forgot to put the left-side panel on I'm and going to strobe the timing when I have a helper so the "points" cover is off. Yes, I'll install a mirror and the seat really lets the bike down but new ones are really hard to find now, especially with silver lettering.
The movie proves that a newly built Combat with premier carbs and Tri-Spark ignition can idle nicely!
July 6, 2022 Found a seat - it's on its
way.
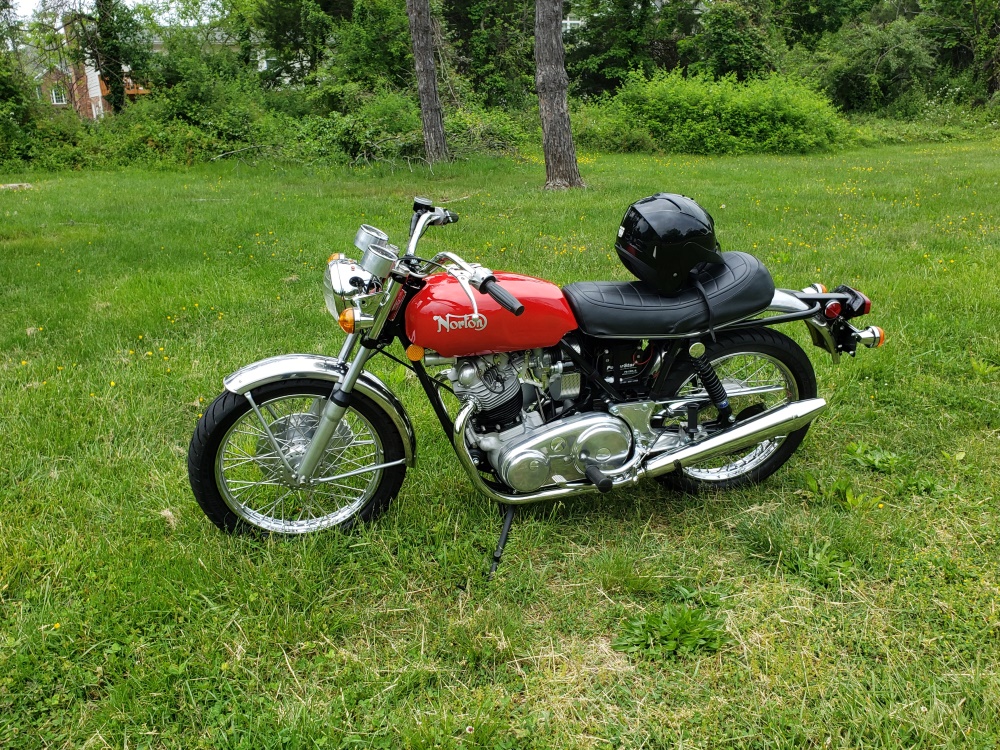
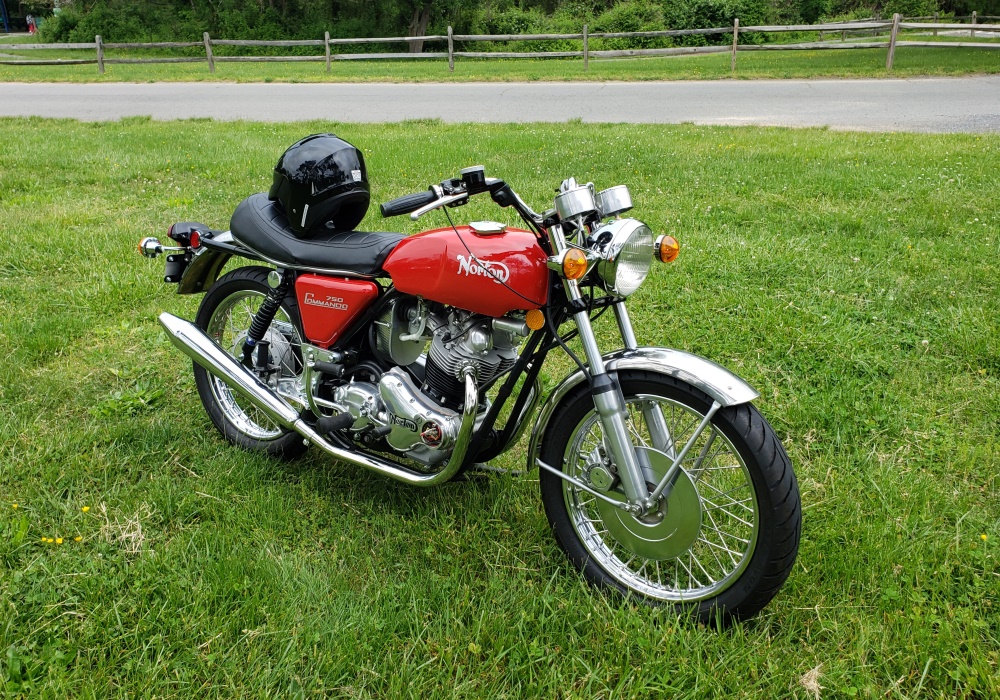
July 9,2022 Finally fixed the oil pressure switch leak. The new seat arrived today. It was a little bit fiddly to install but looks good. Planned to do final timing and testing today but lots of rain go in the way of the. The say tomorrow will be nice - hope so!
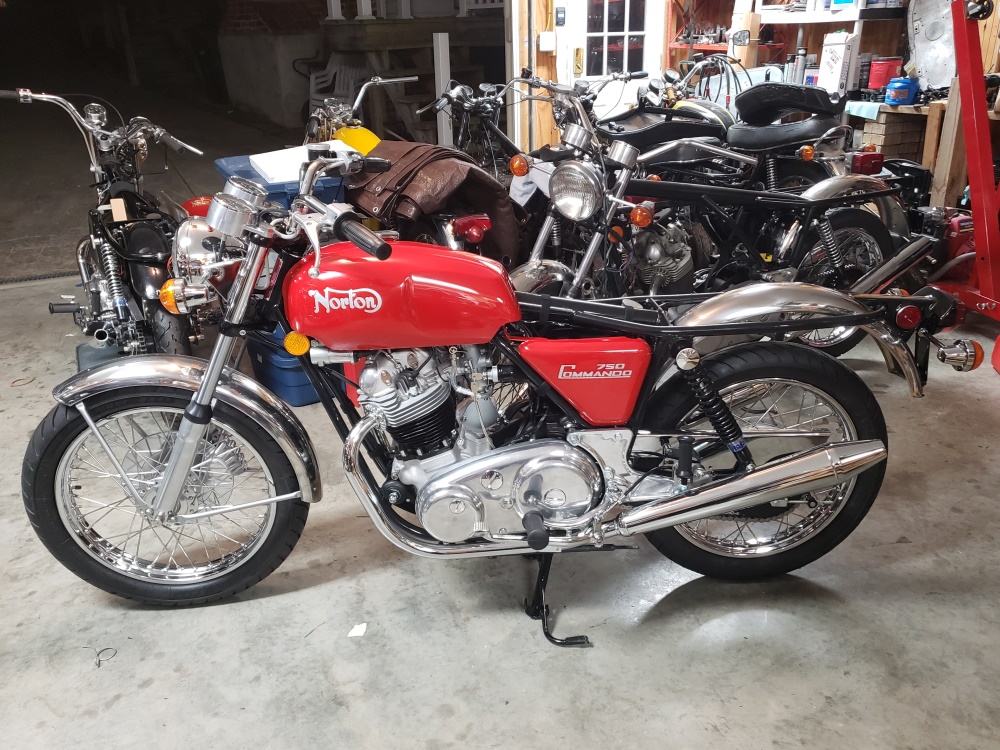
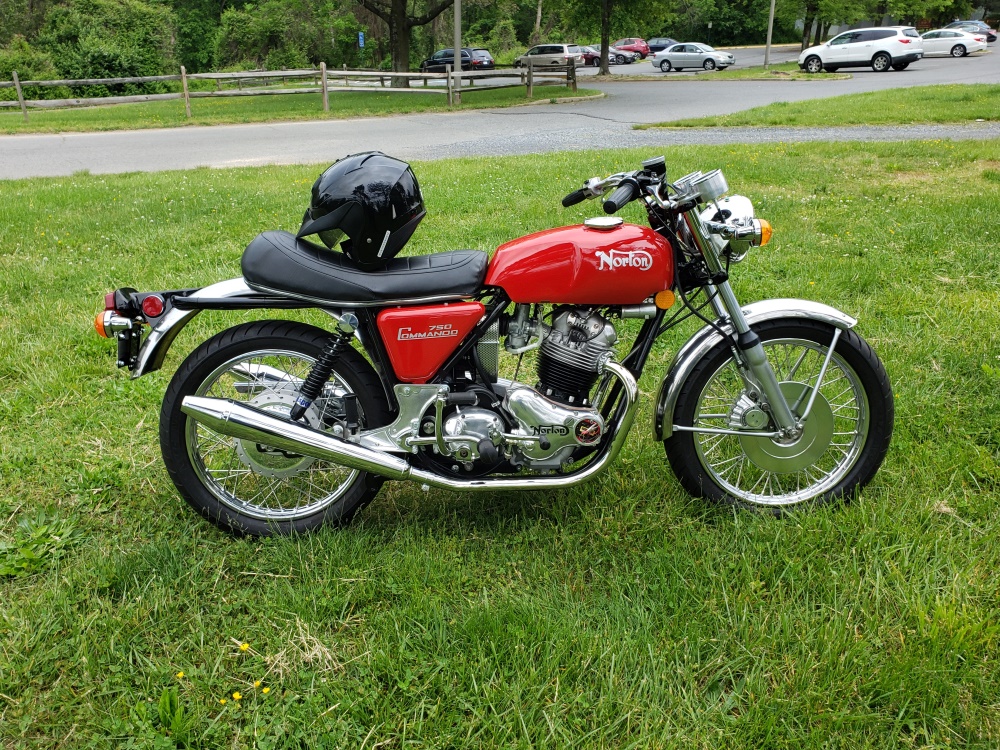
July 10, 2022 This bike is done except mirror and the second tank/side covers set the new owner wants.
Note: The large gap here was 69S entries that have been removed.
November 28, 2022 Put the Combat back on the stand. It is a slight leak at the timing cover that I need to fix.
December 4, 2022 Replaced the timing cover gasket today. Didn't find anything wrong with the surfaces. It may be that the leak was from the oil pressure switch. It's all back together and ready to be re-timed with a strobe. Hopefully the leak is gone.
December 6, 2022 Everything is back together waiting for decent weather to test it again. Right now, Thursday is looking the best. The weekend is supposed to be clear, but in the 40s.
December 10-11, 2022 Re-timed and went for a test ride. It was leaking from the left-side banjo and the float bowl drains and the left side was flooding. Not sure how that was happening, I verified the fuel height before installed the carbs and it didn't happen before.
December 16, 2022 Haven't had much time but have been working the fuel leaks and flooding. Both are fixed now. The was a little piece of gasket stuck in the float needle seat - I have no idea how I missed that or how it happened - earlier test rides had no problems.
The banjo surfaces on the AN fuel lines were not smooth. Even though it probably wasn't needed, I changed the plastic filters and the fiber banjo washers to be sure they weren't damaged by the banjo surfaces.
The bike needs another shakedown ride to get it to temperature and recheck everything. I don't like to call them done unless I come back with nothing to do. Unfortunate, we have a cold spell coming and it could be March before it's warm enough.
March 16, 2023 Well, it's been three months to the day. Today's were test ride was perfect - nothing to fix.
It has taken so long partly do the weather, partly due to my general health, partly due to the fact that my hip is stopping me from getting on a bike, and recently partly due to me not being able to start one due to my hip. My hip replacement is scheduled for April 6th. The big problem is my test rider (stepson and Norton 850 Interstate owner) has a new job and hasn't been able to test for me. He came by today and took this and the 1970 Bonneville out for test rides. So, they are officially done.
The new owner has had a nightmare of problems with surgeries gone wrong on his shoulder so he's in no great hurry. We still have worked out the orange color he wants for the second tank and side covers for the Combat, but that's not an issue for the builds.
August 31, 2023 I've been trying since March to talk to the new owner but have not been able to connect with him. I need these bikes gone. I want $14,000 for the Combat.
October 19, 2023 I found a new buyer for this one. He wants some changes.
- Change to Black and Gold
- Change seat to gold "Norton" on the back.
- Add cNw e-start and Barnett Clutch pack.
- Change to cNw Mikuni single carb kit.
- Upgrade to a Lucas 3-phase stator.
- Upgrade to a Shorai Lithium-Iron Battery LFX18A1-BS12.
October 20, 2023
All parts but the seat are ordered. It is a stock item at AN so I will order it on my next order. Very expensive (my normal supplier is out of that business) but still less than the one with silver lettering from The Bonneville Shop so I'll keep that one to eventually use with the red tank and side covers.
Several other projects will need to be completed before I make much progress here. The cNw parts should all arrive on varying schedule and all before the end of November.
October 26, 2023 We're still discussing changes and parts are being ordered and are arriving. The change list is now:
- Change to Black and Gold (painter working on it)
- Change seat to an AN Hump Back seat with gold "Norton" on the back, 13-1829.
- Add cNw e-start and Barnett Clutch pack. (Ordered, expected in later November)
- Change to cNw Mikuni single carb kit. (Arrived)
- Upgrade to a Lucas 3-phase stator. (In-stock)
- Upgrade to a Shorai Lithium-Iron Battery LFX18A1-BS12. (Arrived)
- Upgrade to a Don Pender front disk (Working out details with Don - ordering more items at the same time)
October 27, 2023 Don Pender front brake ordered, should be here in two weeks. The only thing not yet ordered is the seat and that is on the list of things for my next large AN order.
November 15, 2023 The Seat will arrive this week, the disk brake has arrived. Still waiting on the tank and side covers and the e-start.
November 20, 2023 Spoke with the painter yesterday. He will probably ship the tank and side covers this coming Saturday. Expecting the e-start any day now. Took a really bad fall yesterday - knees gave out. Doing OK today but walking like a 90-year old to protect my knees. I'm seeing my orthopedic surgeon tomorrow - but I bet there's nothing he can do. I can't really explain what happened but my right knee gave way and today it seems stable. My left knee was not great and got further damaged in the fall and it hurts, but it too seems as stable as it was before.
December 3, 2023 Well, mid- to late-November has come and gone and no e-start kit yet. Everything else is here. Knees are working fine now - just had to be careful for a few days. The doctor said it's fairly common for people with a lot of arthritis in their knees. You have a quick pain that you don't even notice because your muscles "quit" and you fall. He says it's always described like I did - don't know what happened.
On the other hand, my heart is not doing well right now. I think I'm the only person with heart failure that comes and goes! Not a big deal it but does cause breathing problems when it's not working well. At least I've never had a heart attack and all heart blood vessels are fine.
I have a guy talking about wanting a Red Combat or 850 so I guess that will be my next build after all the current projects are done.
December 8, 2023 Got a message from cNw, they are working on it but have no new time line. He promised a update "soon".
December 11, 2023 It wasn't my heart. It got real bad so I went to the doctor - shingles!
December 14, 2023 Arrived today, beautiful!
February 17, 2024 Got an email today saying that the e-start kit has been shipped!
Need to finish the engine/gearbox going to AU as they are on the bench I need for this upgrade. Shouldn't be long.
March 12, 2024 Happy Birthday to me! Hard to believe I'm 74 :-(
March 17, 2024 The crating of the engine and parts going to AU is done and the table became available today. After moving things around for a few hours, I finally got this bike in place to remove the parts that I can while sitting on the floor. Baring something unforeseen, it will be on the table tomorrow.
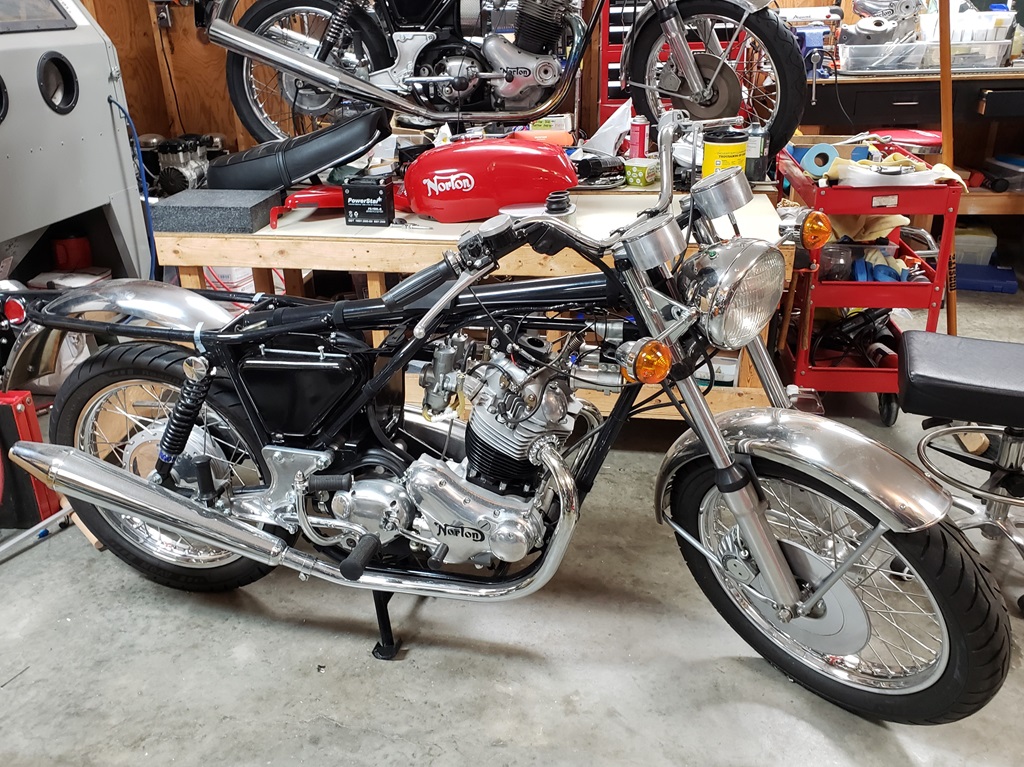
March 18, 2024 In my shop, motorcycles fly! This one's front wheel has just touched down. After getting straight and landing the bike, got a good start on the e-start upgrade.
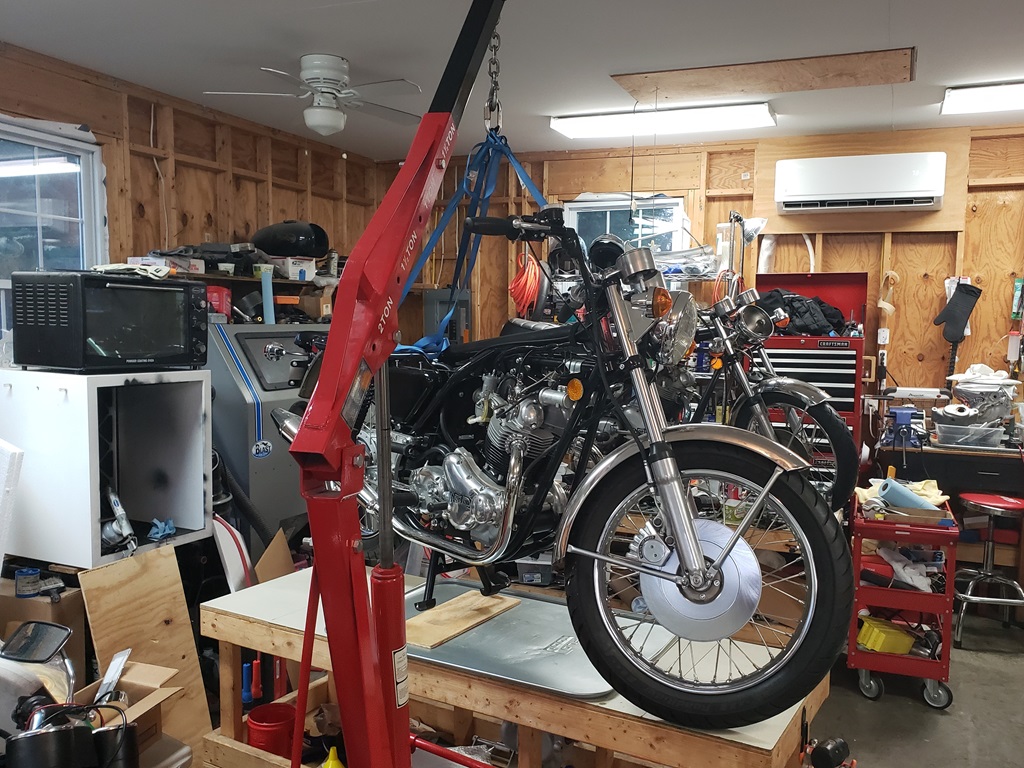
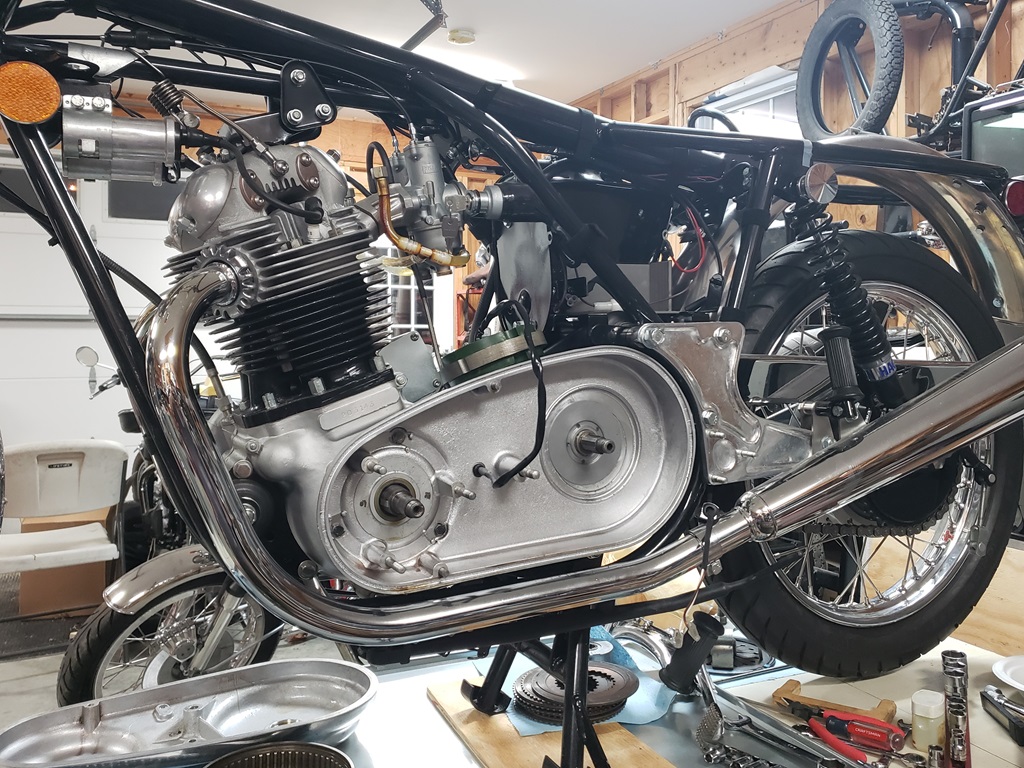
March 21, 2024 I guess I'm going to have to turn my phone off for a while. I've made some progress but the last three days people have started calling for motorcycle help and it hasn't let up. I expected to finish the e-start today, but never got within 10 feet of the bike! The new inner primary is on and fully aligned so it's straightforward from here if the phone will leave me alone!
March 23, 2024 The e-start is installed except replacing the degree scale in the outer primary and the final adjustments that have to be done with the bike running. Did find TDC and 30 degrees BTDC accurately and mark the stator so I can be sure the new degree scale is accurate. I wish it was possible to make the battery area wiring look neater but the e-start adds four wires and they are longer than needed. Of course, the new battery is wider than the one I had in the bike so I had to move the bracket that keeps the battery from moving towards the front of the bike.
The cNw chrome fender arrived today so next on the agenda are the front-end modifications.
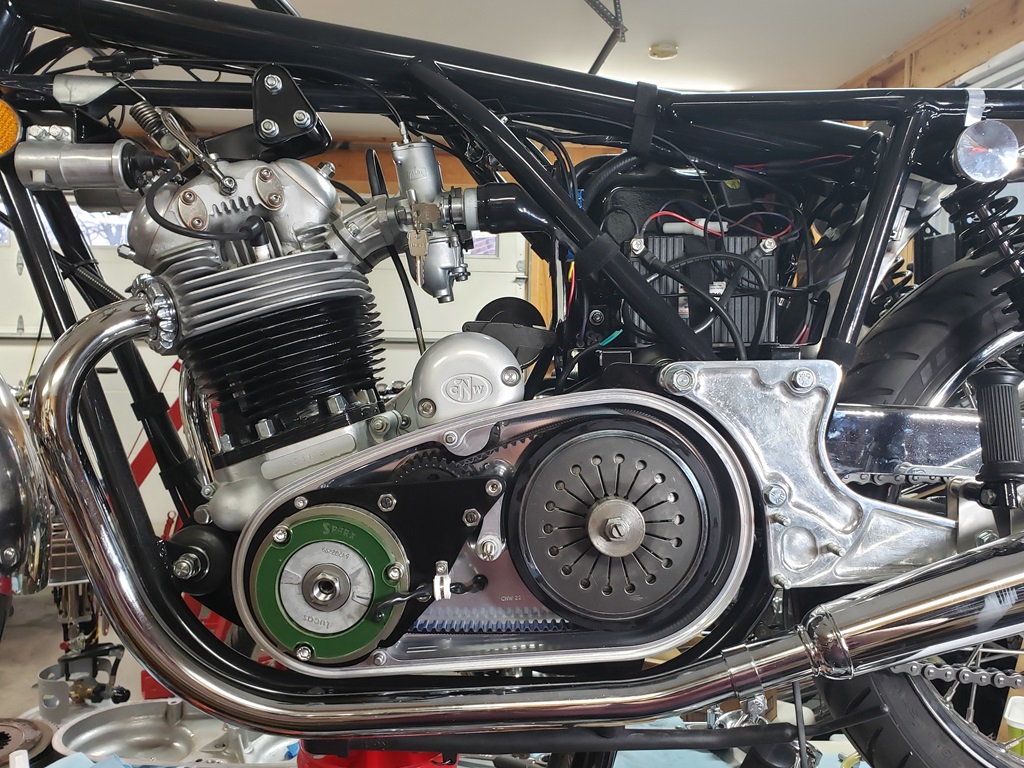
March 24, 2024 Unfortunately, this isn't horseshoes! Turns out that the cNw front fender and the Don Pender brake aren't compatible as delivered! There is a bracket that supports the connection of the hose from the caliper and hose from the master cylinder. The cNw fender bracket is much wider than the stock fender's bracket so those two brackets interfere. Right now, I can think of two fixes. 1) Get a longer hose and just use one. I'm not fond of this idea as the entire hose would be in the breeze. The other is to cut a slot in the brake bracket to go around the fender bracket. This should work, but it's just a piece of zinc-plated steel. It will rust like crazy. It's actually kind of ugly anyway against chrome fender bracket so I'm thinking about cutting the slot and then powder coating it black. That should help it disappear, prevent rust and if noticed, will look good next to chrome.

March 25 2024 Had company today so I didn't get a lot done. The chrome rear fender is in place but the tail light still needs to go back on. Still thinking about the front brake hose bracket
March 26, 2024 There are some job on a Norton that are hard, some that are fiddley, and some scary. One is hard and fiddley! The rear end of a Norton is not in line with the rest of the bike so getting the fender centered over the wheel means that it is off-center with the read of the bike. Then since there's no central bridge like on a Triumph, getting the tail light level is nearly impossible. The early tail light has lots of screws that never really align with the fender until tightened down. After 3.5 hours are trying, I had a really bright idea. The front bolt that goes through the fender, through the loop and into the tail light housing is a bear to get in. I found a stud that I could screw into the tail light housing and then put through the loop and fender. With that still loose, I could start the other four screw and then put a nut on the stud. Then fiddle until everything was in place but not fully tight. Then I could fiddle with the fender until it was more-or-less
centered and the tail light was very close to level and tighten each in turn making sure it stayed good. Long story short, this is a best I've seen or done!
I don't remember where I got the chrome rear fender, but it's heavier duty than the currently available stainless steel one.
I mentioned a scary job - that's coming soon. Installing a gas cap on a brand new pain job is a job that gives nightmares! Although I've done it many times, I still find it very hard and very scary.
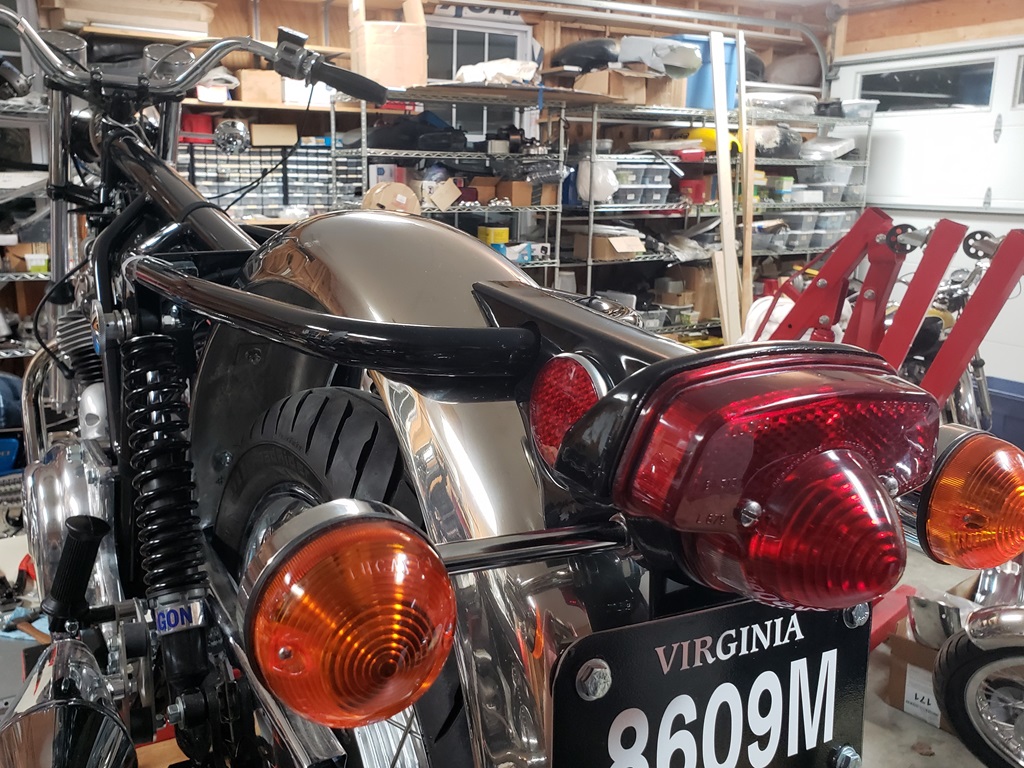
April 1, 2024 I've spent the last couple of days trying to workout the plumbing on the front brake. I hacked away at the bracket that came with the new brake and it will work, but is ugly. I have a guy I work with to make brake lines and have sent him pictures. Ideally, we can make a hard line to go to the standard chrome bracket. If so, it will look good and I'll need a longer line to the master cylinder, but he makes those no problem.
April 5, 2024 Hopefully brake hell is finally coming to a close. Spend a couple of hours on the phone with my hose guy talking and texting pictures back and forth. He is sending me a hard line to test. the 45 degree bulkhead fitting I bought is another problem - the long end is not long enough to take a lockwasher, nut, and the hose line. Just finally found one at another place and they measured it for me - should work. Once those two are here and installed, assuming no more troubles, I can measure for the hose to the master cylinder, get that, and be back to where I was a week ago!
April 6, 2024 I was sitting here fat, dumb, and happy since the brake issue should be solved when parts arrive and I was thinking about what to do on another bike while I waited. But, I felt like I was missing something. Well, I went into one of my parts rooms (dining room) looking for something and spotted a Mikuni carbs sitting there! Wow! Forgot all about that!
OK, getting it installed should be no big deal. Took the dual Amals off - no issues and it took very little time. OK, put the 2-in-1 manifold on and about done. Nope! Get three screws in, barely and could't even start the forth. OK, back off what turned out to be about 20 times. Check the holes - all were poorly drilled and had burrs. Used a countersink very lightly in the four holes on the engine side and the two on the carb side. Put a small chamfer on the two middle ones on the inside with a deburring tool as you can't get straight at those holes.
OK, now the screws went in the holes nicely. Put the manifold back on with each screw just started. The inner and outer timing side holes were rubbing on the screw bodies. OK, got out my drill index. I assume the holes were drilled with metric because I had one bit that would slide right through and the one 1/64" bigger would not go through. Using only my fingers, I reamed the four holes with the larger bit. Now I could put the manifold on with all four screws loose and slide it to and from the head so I knew that the holes were all good.
Then I tried to snug them all. The inner timing side would not go because the Allen end of the cap screw was binding on the recess in the area with the red arrow in the first picture. After several on and offs and working with a Dremel, I had that resolved. OK. Should work right now? Nope, see the second picture. That recess is way off.
While working that, my Dremel battery died and I was well frustrated so I decided to finish tomorrow.
Yes, I could have forced it at any time. First, I don;t do that and second, the two inside screws must never come loose so they must installed with Loctite. To do that, I want all four screws to go in with fingers and then be snugged with a ball-end Allen. Then take the inside screws out one at a time, apply Loctite and put back in. Then tighten them, Finally, tighten the two outside.
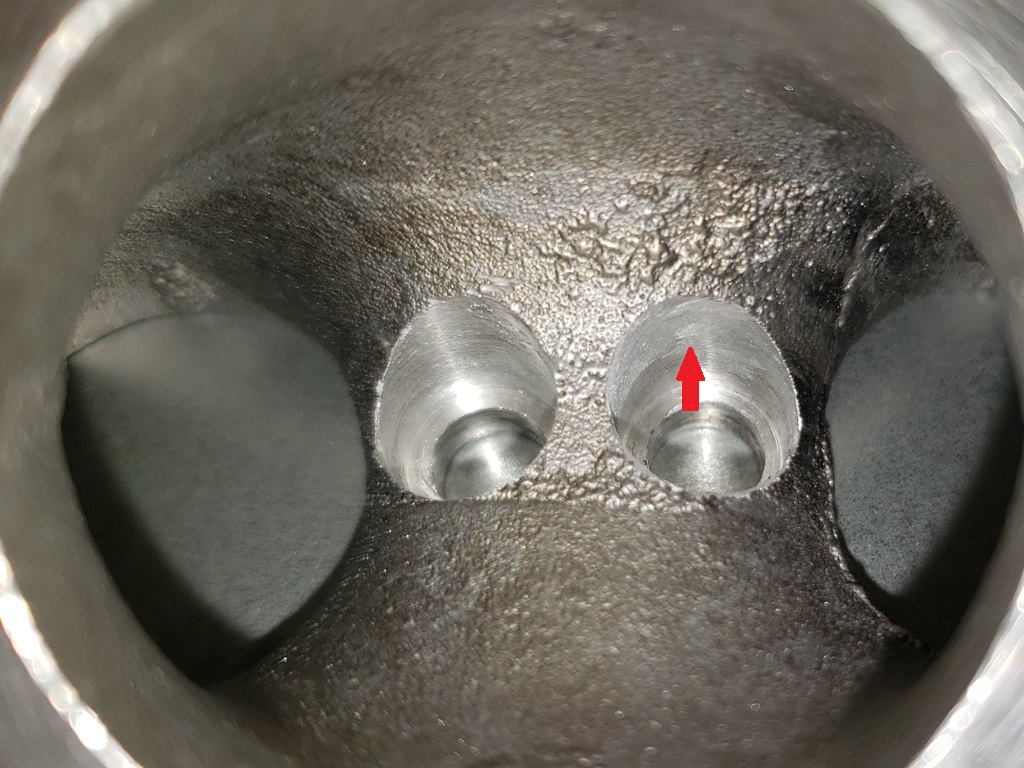
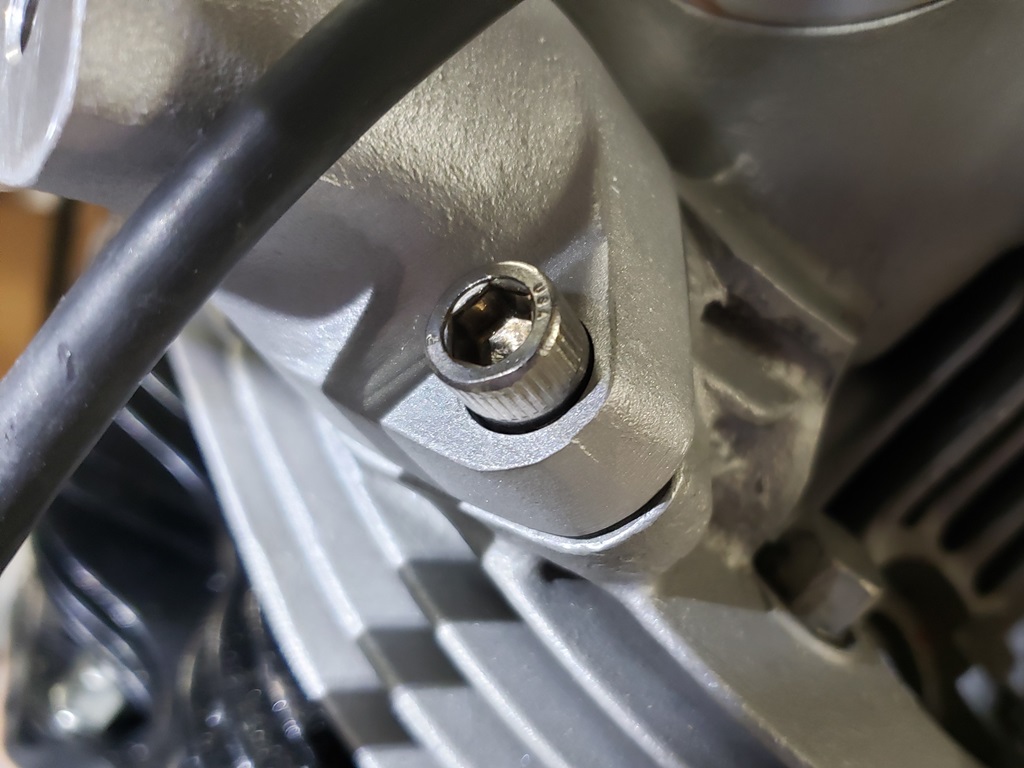
April 7, 2024 After a bunch more tries, I finally got the manifold on properly. The carb when on easily, but that air cleaner was a royal PITA. I probably tried for 30 minutes before I figured out how to turn it and that I had to light the carb to get it behind the carb, and the 30 more minutes getting it slid on the carb! I hope I don't have to take it off again, but I bet I do. The cable adjuster is under the tank - stupid! the cable has no free play and the adjuster is all the way short so I bet I have to fix the cable!
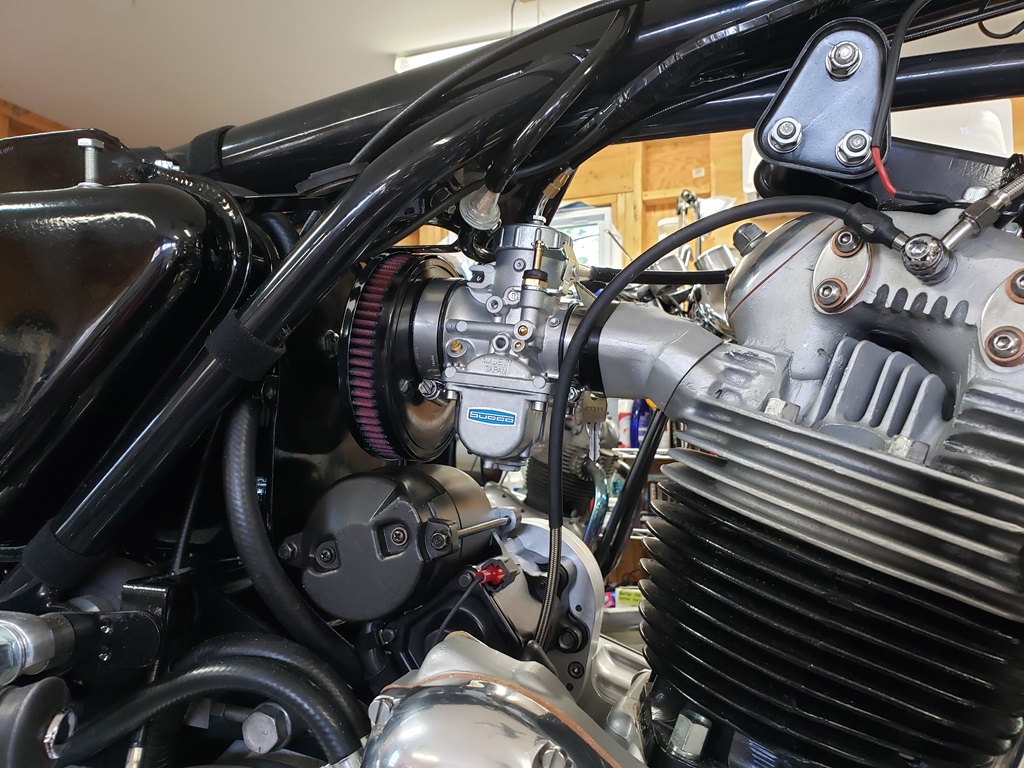
April 8, 2024 Most of the parts for the brake arrived today. The hard line my guy made it too long but proved that the solution is good and I was able to use it to provide the exact length needed so we're still not quite there but should be soon..
April 16, 2024 The hard line and hose arrived today and it will went together fine. I was working on other things today so I didn't get the brake bled but that's about the last thing before the new tank, gas cap, side covers and a new shakedown rides.
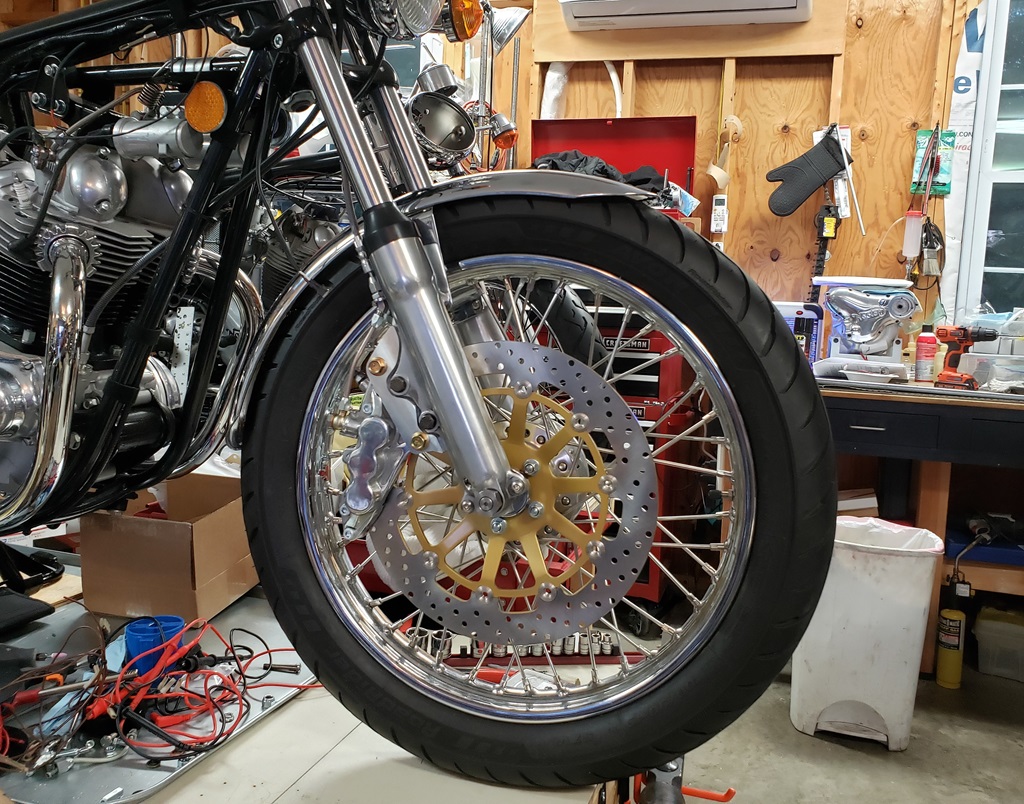
April 20, 2024 Time to fly again. The bike is now on the ground. Finished the front brake today. Took a long time but was much easier than a stock Norton brake to bleed. The caliper holds a lot of fluid and the master cylinder has a tiny reservoir Also finished some small things. The second picture shows the brake fluid used. The front brake switch harness had to be re-made since the switch uses small spade terminals rather than standard ones, and the harness was too short. Also finished wiring the starter button wire. So, almost done, to do:
- Install side covers
- Install gas cap on tank
- Install tank.
- Get it running on the Mikuni well enough to do the final starter adjustment.
- Finish the starter install. Simple job, but the primary cover must be off and the engine running.
- Re-install the primary cover, and foot peg/foot brake.
- Make sure the carb jetting and idle are right. Supposedly it's properly jetted and only needs the idle adjusted - that would be nice!
- Test ride and take pictures.
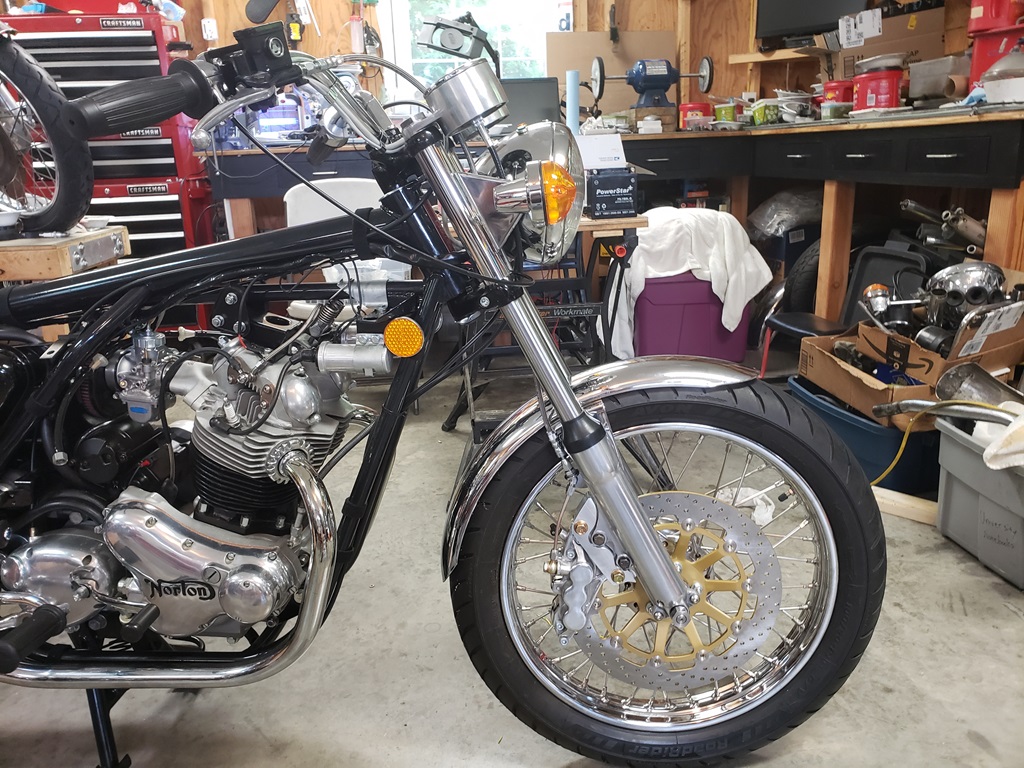
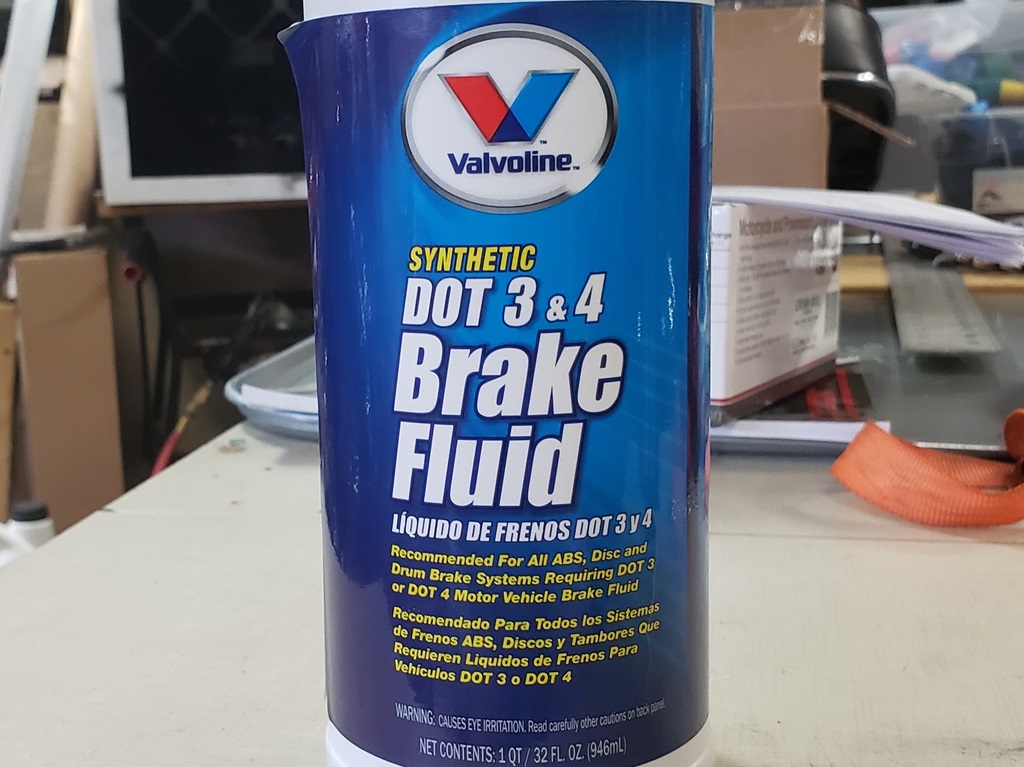
April 21, 2024 Had company today so I didn't get a lot done, but I did manage to get my most hated Norton job done! So nerve racking - make one mistake and ruin a $900 paint job. Fortunately, I've never ruined one but I'm always afraid that the next cap I put on will be the one. I REALLY like the EMGO tanks, but they have one issue that is equally as nerve racking as putting on the gas cap. The pivot point for the gas cap is a little low on every tank. Once the cap is on, it won't close. To fix, you must pry up the rear of the cap a bit. It is strong metal so it takes a goo bit of force. I bring them up just high enough so the cap will latch with effort. Over time, things loosen over time so I don't overdo it. The particular tank also had the roll-pin hole slightly undersized. Fortunately I checked before trying to put the cap on. That was easily fix with few strokes of a small round diamond file.
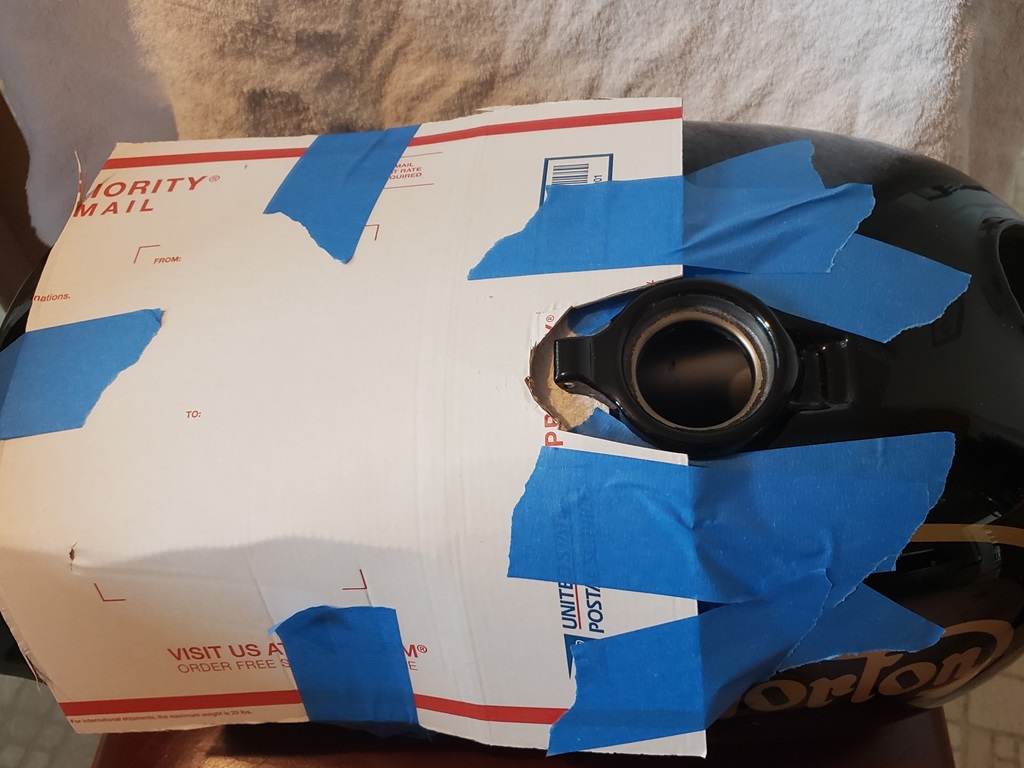
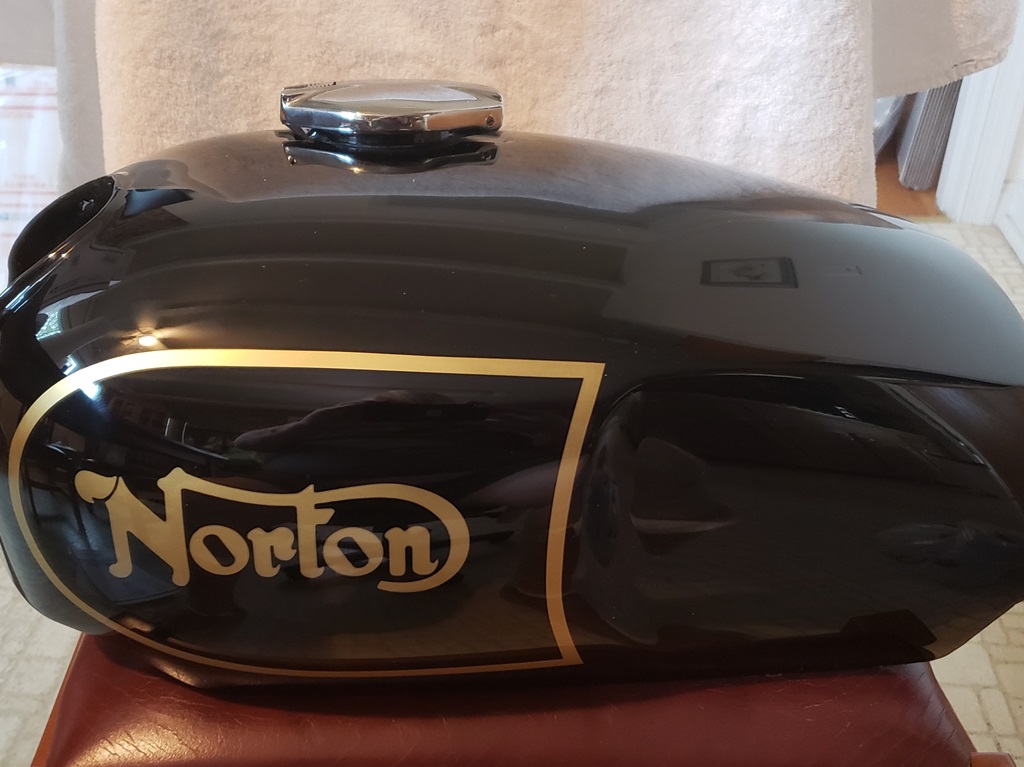
April 22, 2024 It was a figment of your imagination if you thought there was a Red Norton in my shop! This black (the only sensible color) Combat is about done! It may be a little while before I can take it outside, finish it, and test it. My legs are all wrapped up right now trying to get them healed so I can get more foot surgery and my test rider (stepson) is off on vacation. The new owner is out of the country right now so there's no real hurry.
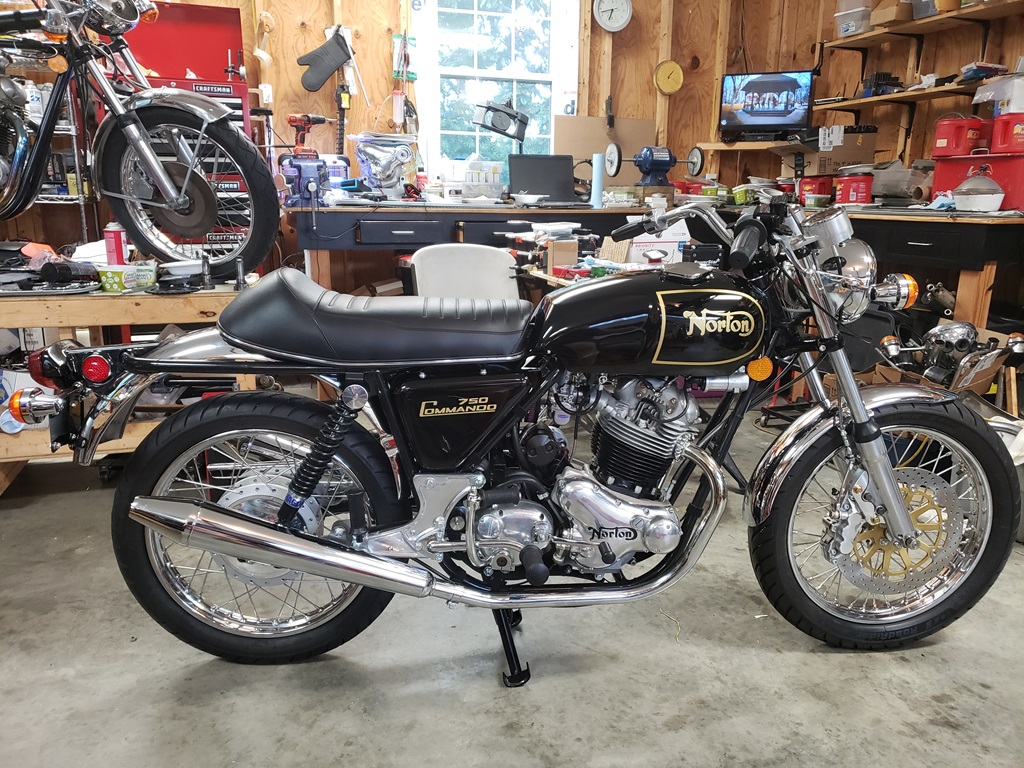
May 5, 2024 What we have here is a instant start, finished Norton Commando Combat! The very first push of the button it started and idled. It was idling a bit high - turned that down and it runs great. It's nasty weather out so no riding today and the picture is crap. When it's again nice, I'll take it where I take pictures and replace this one. Yes, I'll put a mirror on - running thing between my stepson and me. I don't care about mirrors on bike and he won;t ride without them, so I always call the finished when there's only the mirror to go. Actually, it needs another shakedown but I expect no issue because that was all done while it was still red.
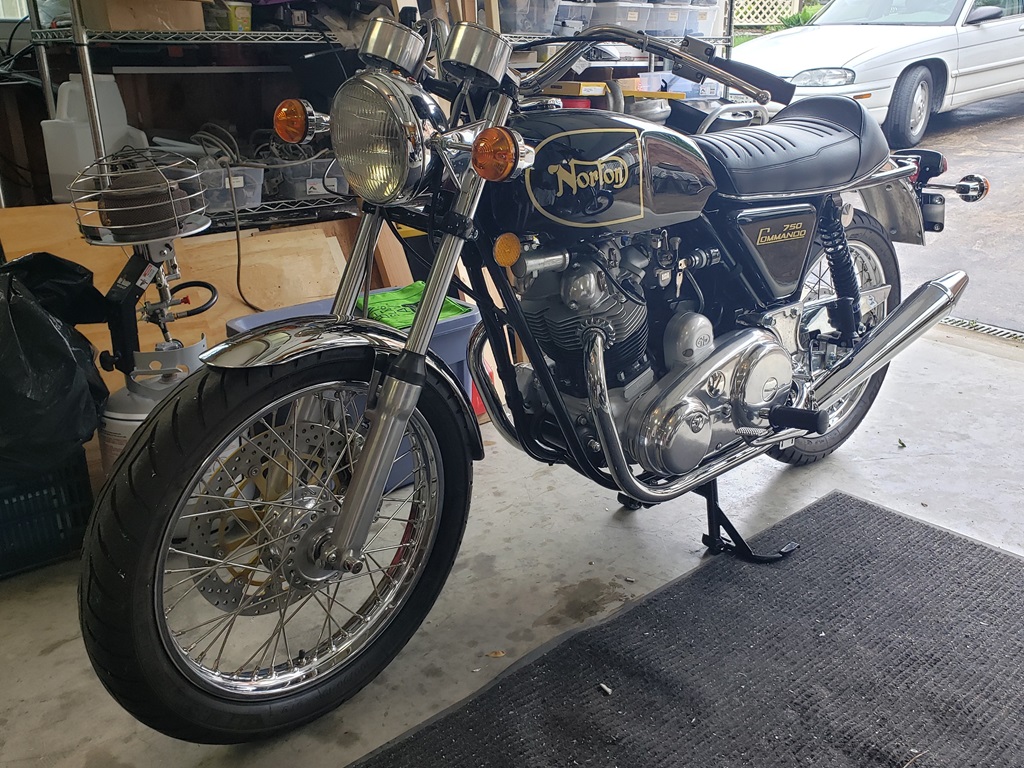
May 9, 2024 The weather was finally decent this afternoon so I got ready for a ride. Glitch! Opened the door and was hit with the strong smell of gas! Turns out that the right-side petcock is leaking at the tank. Tried tightening and waiting a while - still leaking so the sealing washer must be bad. So, tomorrow's task is to drain the tank, take it back off and change that. Annoying!
May 10, 2024
Changed the sealing washer and that seems to have fix it, I'm leaving it on the bench overnight to be sure
May 11, 2024 The tank is not leaking now. It was a nice but cold day today so I worked on other things.
May 25, 2024 Finally the weather conditions and time availability coincided! The shakedown cruise is done and the pictures are taken! Time for pickup.
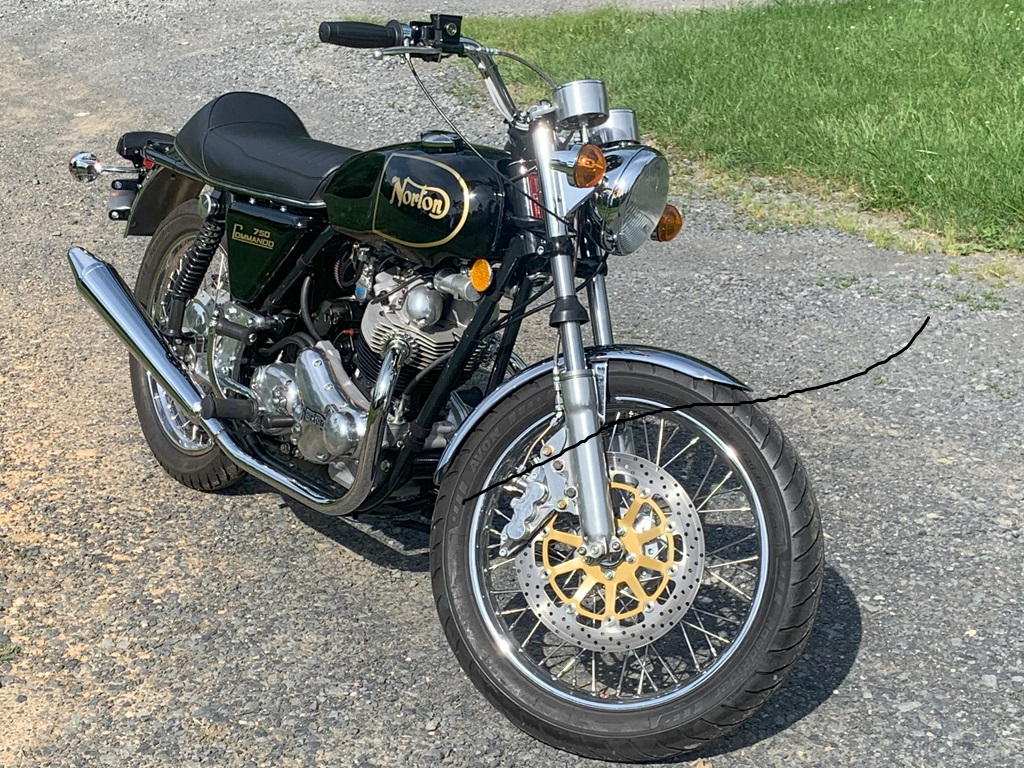
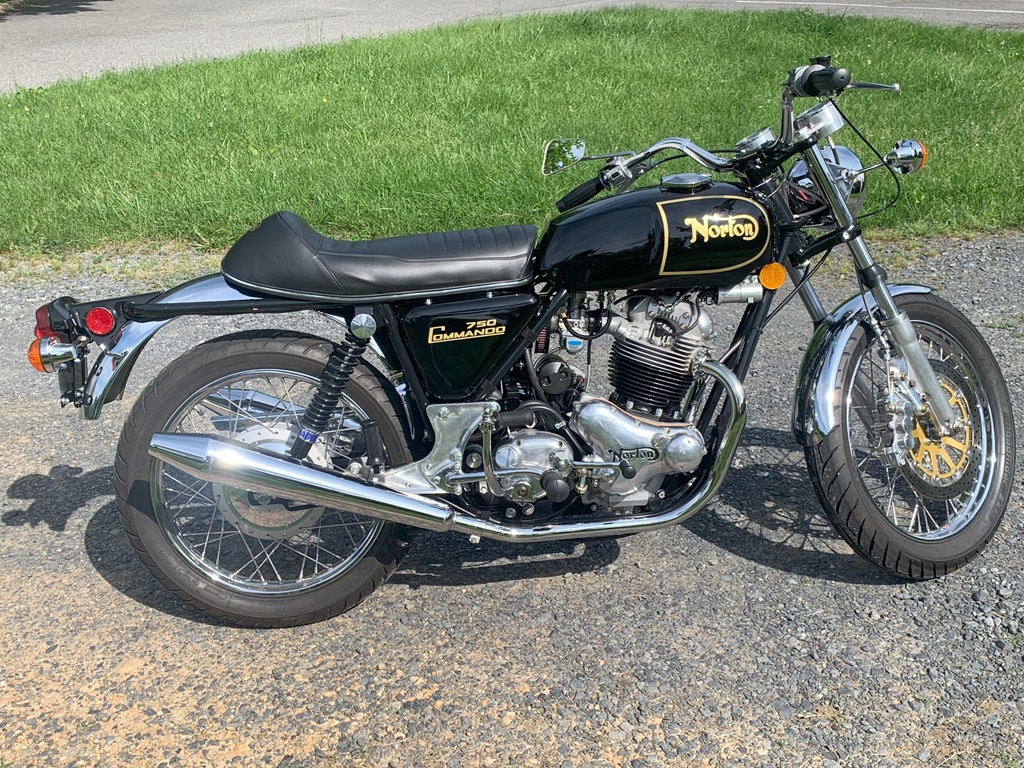
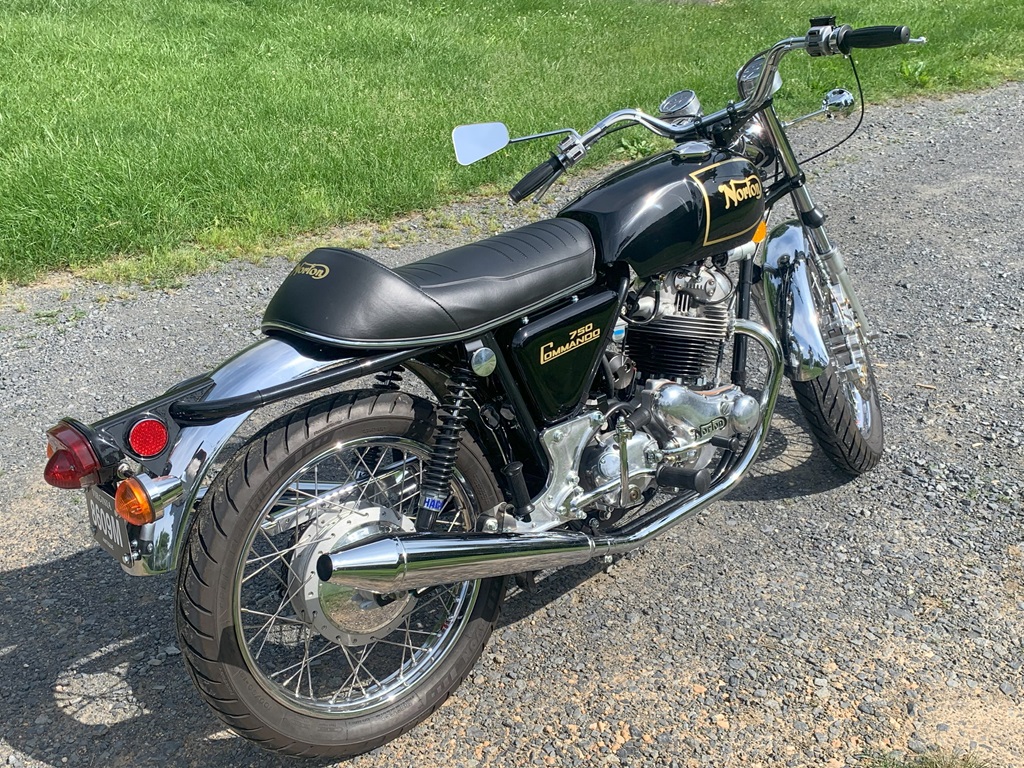
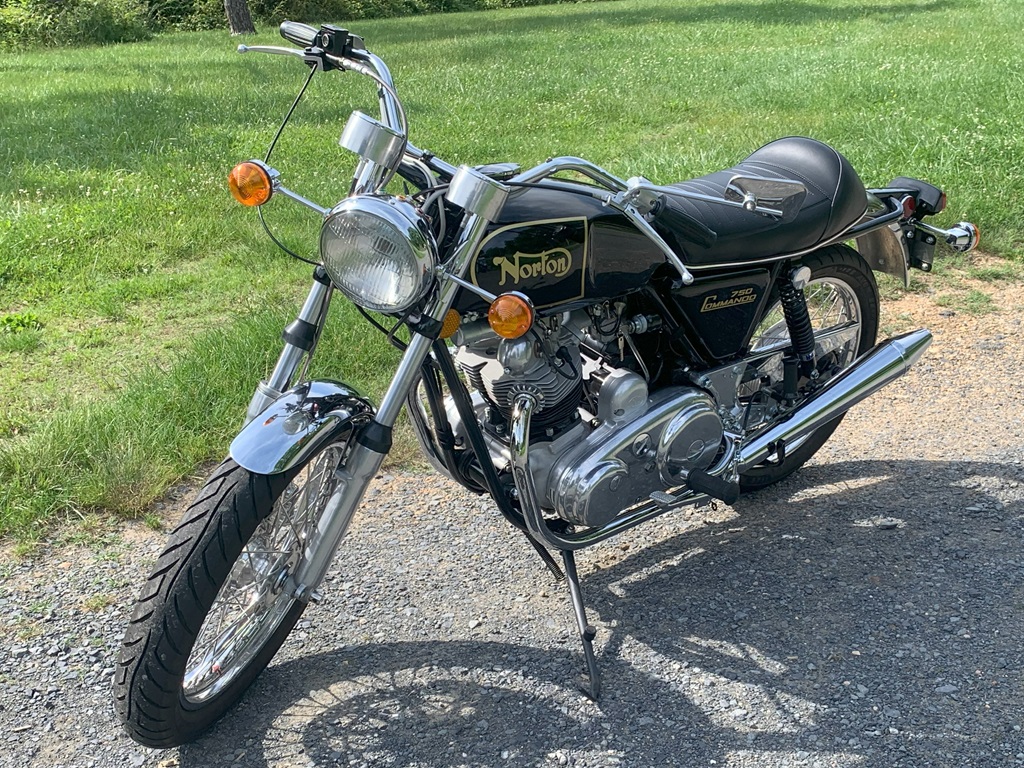
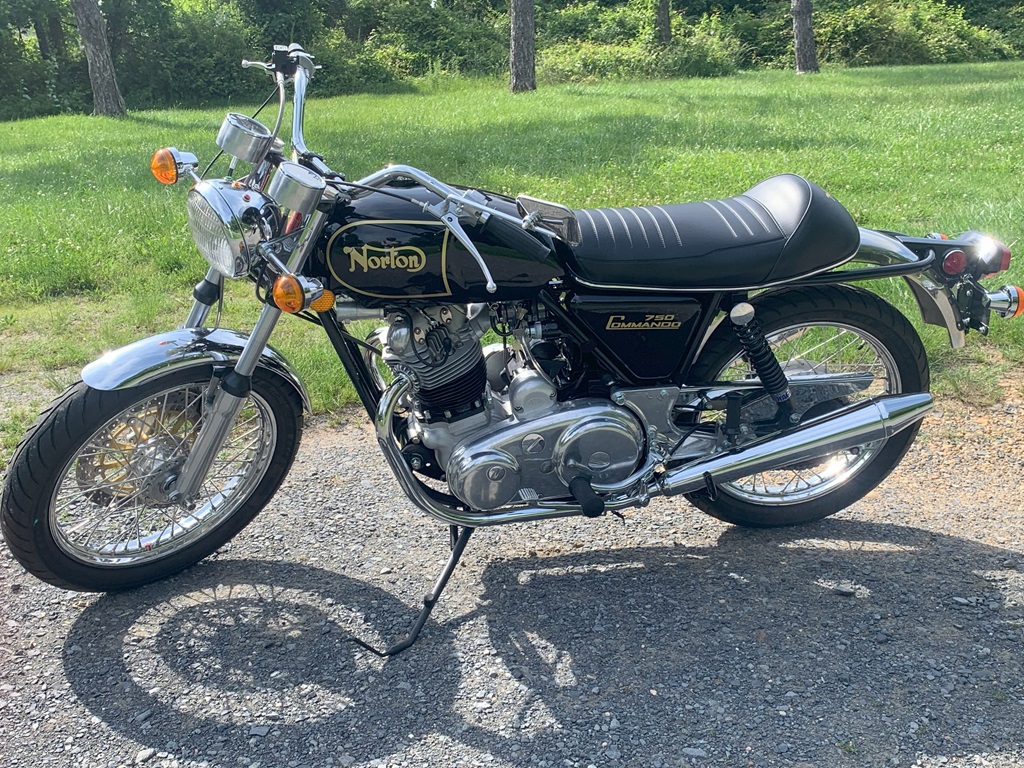
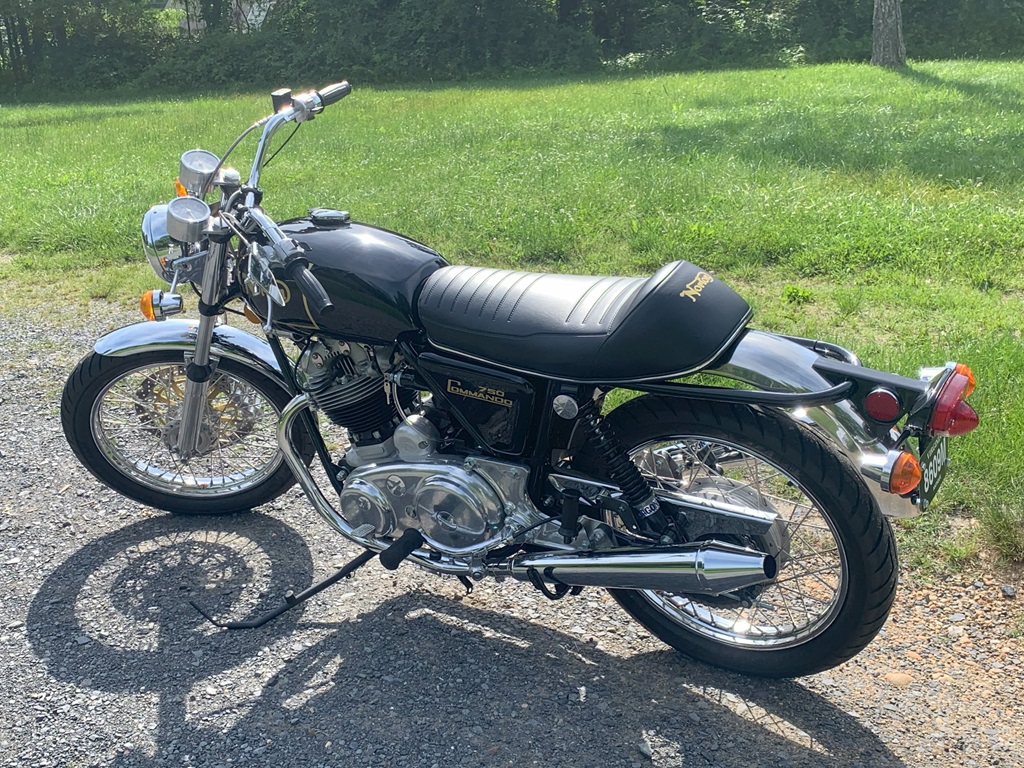
May 30, 2024 The various documents, keys, tools, title, and Bill of Sale left today to the new owner. So, this one is about gone. Next I have to get the Trident ready - the guy would wants it has been waiting a long time. Supposedly there are a couple of bikes coming in June to "get on the road". Then, maybe, I can spend the day needed to get my 850 Commando back on the road! I liked pushing the button to start this one so much that I made but the cNw e-start in my rider!
June 3, 2024 The new owner has the bike titled and insured and is arranging shipping.
|